Note: This is an older post and I have subsequently upgraded to 400 AH of Discover Lithium and a Xantrex 3000 XC Pro Inverter. A few people have asked me why I didn’t simply purchase more Battleborns. Answer is: No Bluetooth. This new technology lets you monitor the health of individual batteries – very important the more more you have. Battleborn has releases some mumbo-jumbo that they intend to stay in the stone age. So I switched to Renogy.
At first I really intended to keep the crummy flooded lead acid batteries that came with my coach.
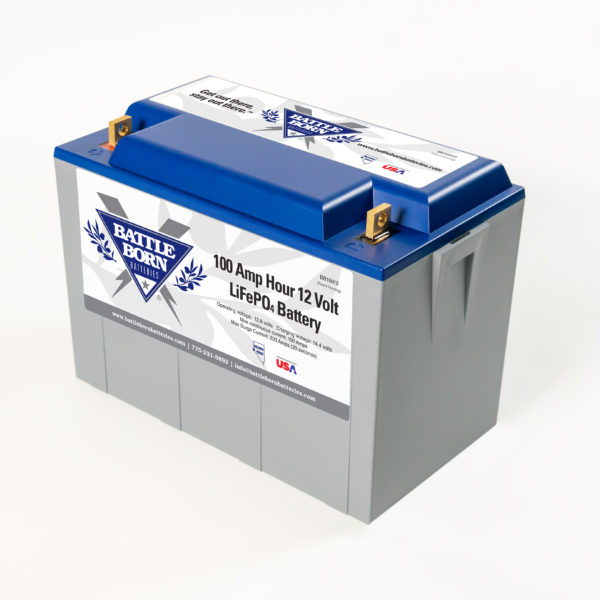
They need to have water added every month, only have about 110 Amp-Hours (for 2, because you can only discharge them 50% if that before damaging).
They weigh 60-70 pounds each.
In spite of all that, they work fine and should last a few years. Even when we are dry camping (so called boondocking) we only use about half that each day. And every day we go somewhere so the alternator charges them, and even if we didn’t the sun quickly recharges them also.
However, we really really really want a compressor refrigerator, that will use about 50 amp hours a day all by itself, so that wouldn’t leave much to dry camp with.
This upgrade solves that. We will have almost double the usable amp-hours, albeit at an exorbitant price.
So the first, step is, I had to tweak the stock Magnum inverter charger with a better remote that allows you to tweak for Lithium. See Magnum Remote ME-RC50.
It also helps to have battery monitoring. No sense in having fancy Lithium batteries and have no clue what the state of charge is. So I had already installed the Victron BMV-712.
After that, this is a pretty easy task. You just rip out the old batteries and drop in the new. A few caveats: the new batteries are wired in parallel instead of series so you need 2 new cables.
I went for the giant 2/0 cables which are a bit overkill but with copper too big is always good. The other advantage is these are very flexible, so easy to use. Sadly Amazon doesn’t have the right size in the ones I prefer but you can order them here: 21″ X 5/16″ 2/0 battery cables. You need one red and one black, and be sure to specify 21″ and 5/16″ end on both sides.
Some safety notes. I switched off the battery and unplugged the coach. I still treated every wire as hot. The safe way to remove battery cables, which I often see mechanics get wrong is, remove the negative first. That way, if you accidentally contact metal somewhere, no shower of sparks. Likewise, as you wire these back up, always start with positive.
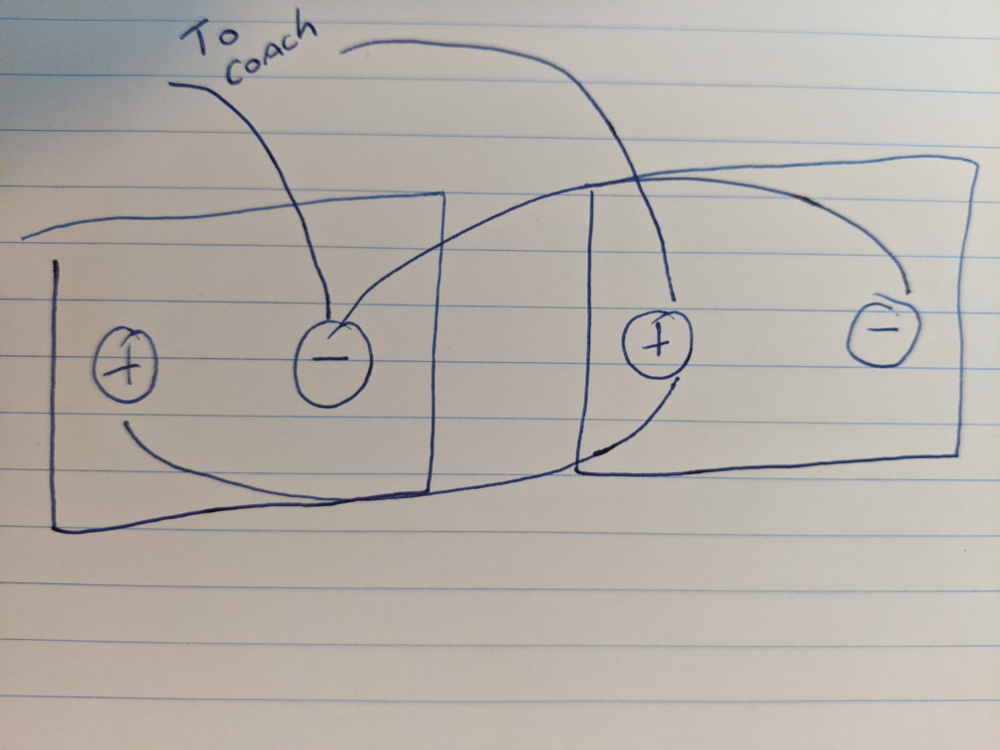
Note that there is a right way and a wrong way to wire batteries in parallel. You can just wire both batteries directly to a distribution bus bar, which I didn’t do.
Or you can wire the coach negative to one battery and the coach positive to the other battery, which I did, and then join the negatives and positives on both.
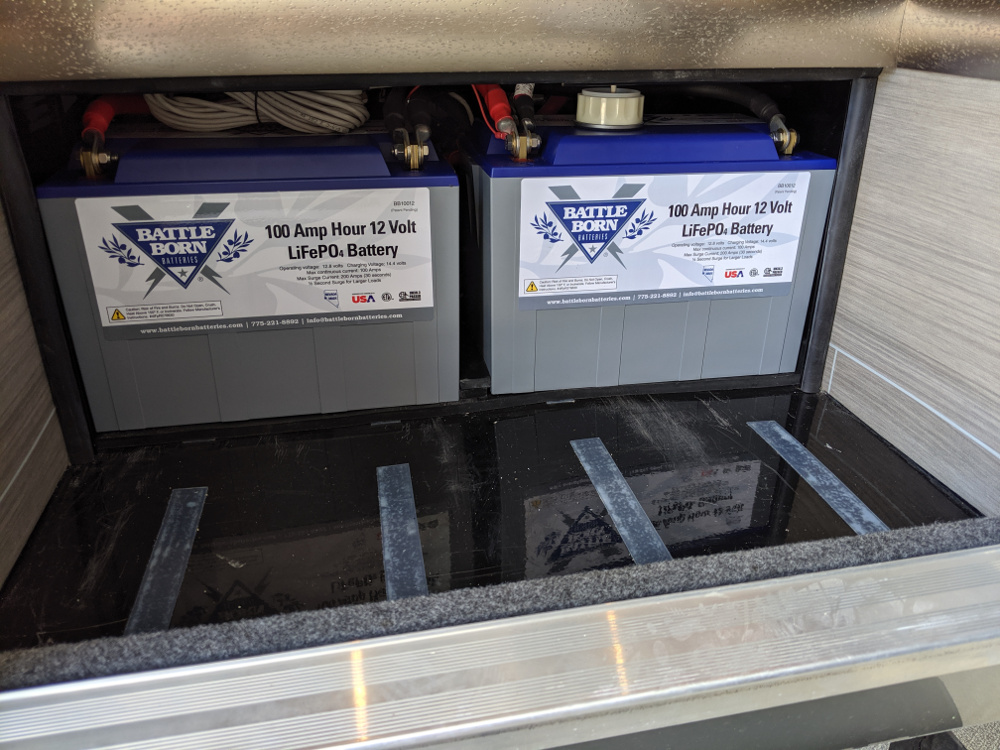
What you should not do is wire the coach negative and positive to one battery and then parallel wire the second battery. This will sorta work, but the second battery will have a slightly higher cable run and a tiny voltage drop to it, so the pair won’t work as well together. So if you look carefully at the final installation photo each battery has one post with only one connection, which are the new 21″ cables.
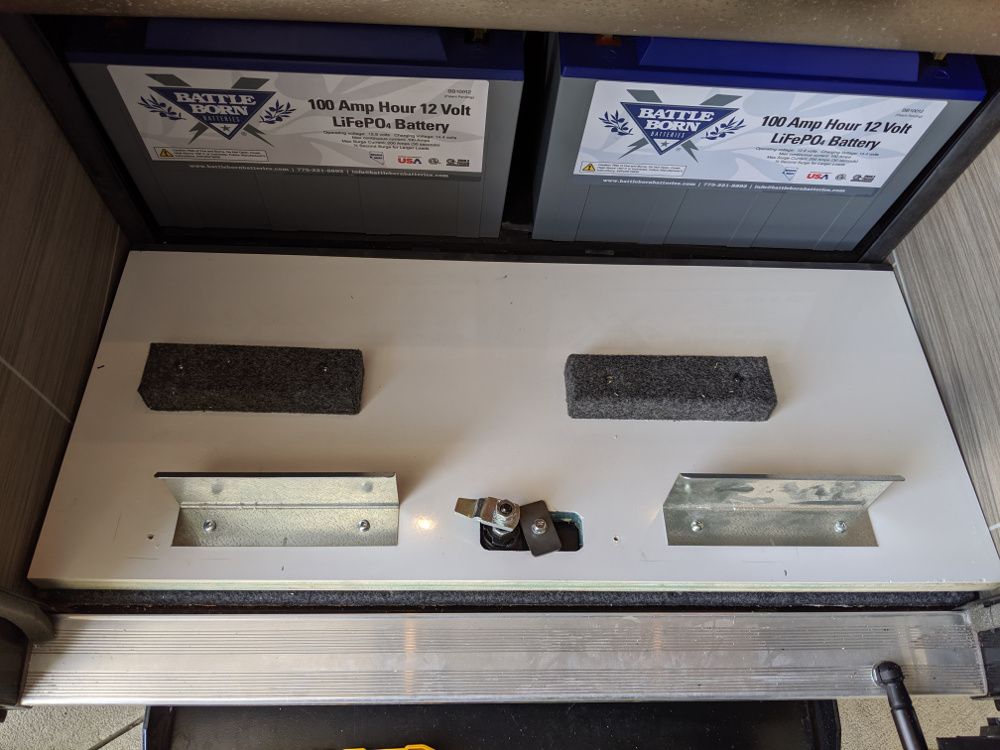
Next there are a couple bolt heads sticking up on the floor on the sides of the battery compartment. At first I was going to cut a 3/8″ piece of plywood, but I ended up using 2 rolls of a 3/8″ rubber material I have used before. The rubber cuts (fairly) easily with a knife and gives these babies a soft ride.
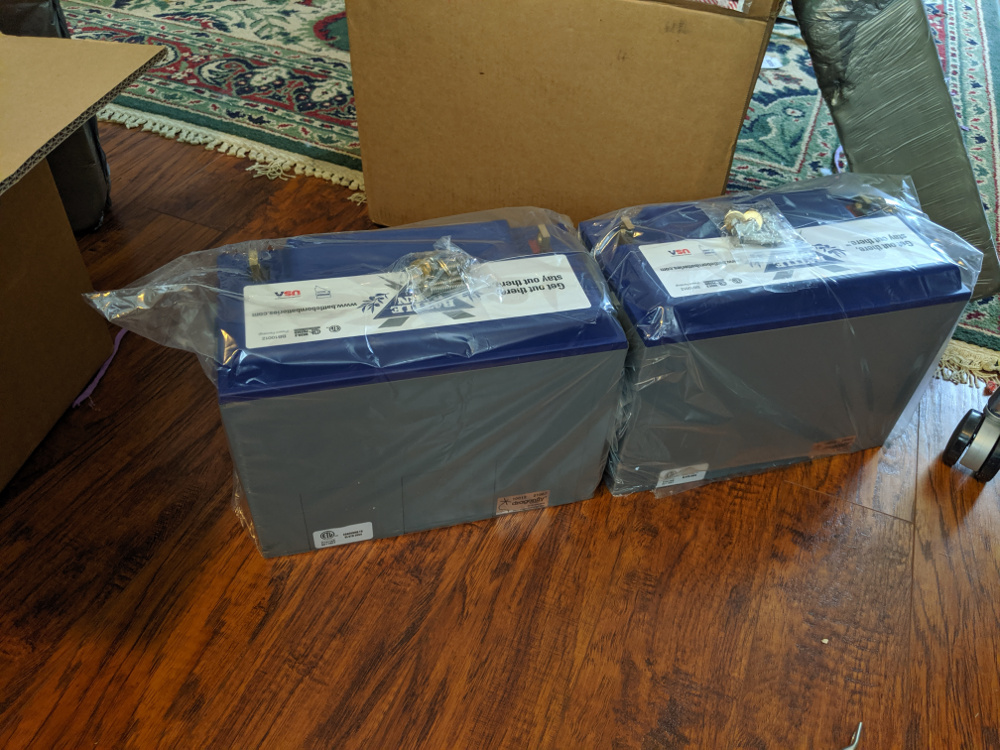
Finally the batteries showed up! They came superbly shipped in separate boxes with deep layers of styrofoam protection.
The final result is below. A couple additional notes:
Note that in my excitement to fire these up, I forgot to take a picture of the wiring, but here is a crude diagram:
Be sure to torque the bolts down to 10 foot pounds or so. Loose battery terminals can cause very bad things.
I had to remove all of the battery stops screwed into the floor of the compartment except for the rear one. The new batteries are much wider. In fact they barely fit lengthwise.
I used some left over rubber to put some small strips on the left and and right and in between the batteries so they don’t bounce around.
The battery door also has some metal hold down bars that if left on would touch the battery terminals. A lot of people just remove these. I ran out of daylight today, but I plan to reinstall them moved slightly over to clear the terminals. While I doubt I will drive off a 3 foot curb and bounce the batteries, battery hold downs are installed for a reason presumably.
So how did they work?
Well, for starters, I reset the charger profile in my new Magnum remote to CC/CV which is available on later revisions using these settings:
- Max Amps – 100 – default
- Charge Volts – 14.4
- End Charge – 60 minutes – default
- Recharge – 13.3 Volt (which is 90% of a fully charged battery)
- Max charge – 12 hours (default)
These were gleaned from a couple contradictory articles written by Battleborn. I plan to call them and see if any tweaks are appropriate, together with my actual experience after using them. If you have an older controller that does not support CC/CV, you may be able to still use them with settings recommended by Battleborn, but I didn’t have to do that.
The solar controller has no such settings, so I just changed to AGM as recommended.
As soon as I powered up everything and put in these settings, the magnum charger quickly started pumping 50-60 amps in, even though the batteries were shipped 90% charged, and topped them off in short order.
Batteries seem to work great as expected. I’ll be doing a few tests, namely, seeing how they stay charged on shore power, as well as testing how they charge with solar and alternator.
So I’ll update with results soon!
First Update 09.11.2019 The RV is in storage; I’m too busy to travel for a bit.
I stopped by to clean up the install, including lowering the battery hold downs slightly and centering them over the new batteries.
That completes the installation. While I was there I checked and the batteries were still about 98% charged on shore power, which is good.
I have some significant “vampire” loads. Among these are the propane solenoid (I plan to address that), the battery monitor, and my Internet router. So if the charging wasn’t working by now I would see some depletion, so all is well so far.
I still need to test the alternator and solar charging, but I’m pretty confident that will be fine. Some have reported the alternator will fail to charge the Lithium batteries past 80% or so because of the way the relay works. Even if that were true I doubt I would bother to address that as the 400 watts of roof solar would fill in the rest quite quickly.
Update 10/5/2019 I’ve had some chances to drive and use the RV. My initial observation is that while it works fine, the alternator and solar charging is not optimal. Neither seems to charge the battery fully and I’m often driving around at a 90% SOC.
That extra 10% doesn’t sound like much, but with my ongoing compressor RV refrigerator install I need every amp hour I can get.
After reading up on it a bit, I see the solar controller I have really is low priced junk. It’s not just that there is no Lithium charge profile, so its not optimal, but the technology is simplistic. What I want apparently is an MPPT controller that is more efficient at coaxing the maximum out of cells, particularly in shade. As a bonus it will have a proper Lithium charging profile.
Likewise, the factory relay under the seat that performs alternator charging is not optimal for Lithium. It appears that I want a DC-DC charger to optimize my Battleborn charging,
So the bottom line is, both of these are relatively small and inexpensive projects, and worth doing. Even for now though, the Battleborn upgrade was a great investment as is.
Because even at a 90% charge rate that’s still almost twice the useful amp hours of the factory setup.
Update: 10/17/2019
I moved my RV to storage closer to home. The new storage is more expensive and has no electricity. This gives me a different angle on things as the RV has been sitting a lot lately while I am busy with other things.
I have been periodically running the generator to maintain the battery (no solar as its under a roof). That’s how I noticed the Magnum charger is really flaky. It continuously cycles up to almost 60 amps of charge, then after about 30 seconds goes to 0 and the charge led flashes. A few seconds later the cycle repeats. So much of the time its doing nothing.
I emailed Battleborn, and got this back:
We don’t recommend the Magnum MMS-1012 Inverter/charger with our batteries. It does not charge them properly, there is a setting it does not allow you to change that needs to be changed to properly charge our batteries. It’s called the final charge state setting.
On the 2000 watt Magnum inverter/chargers and higher you are able to change those settings and they work well with our batteries.
Well, I kinda already knew it wasn’t ideal and doesn’t charge the battery the last 10%.
So I emailed Magnum and got back this:
If voltage from generator goes too low below vac dropout charge led will blink amperage to 0. Go into setup menu and reduce VAC dropout, if currently at 80 go to 60 and if higher than 80 lower to 80 and test again
Well, that sounds stupid. I have a 3.6KW generator. 60 Amps X 12 Volts is 720 watts, so I’m pretty confident my generator is not even breaking a sweat at this rate and is putting out 120 Volts.
But I decided to try it anyway, not matter how stupid it sounded, and actually that fixed it perfectly by lowering the VAC dropout to 60.
So I am assuming that setting doesn’t mean what it says, or Magnum uses some way of measuring it that is only valid on mars or something. I’ll have to measure the voltage of my generator and confirm its always 120 but anyway that makes the Magnum OK for now.
Update: 12/9/2019
Well I went ahead and upgraded solar to the Victron SmartSolar MPPT 100/50. This should eke out a bit more solar and play better with Lithium.
Update: 05/08/2020
The Magnum charger eventually drove me nuts and I put in a real Lithium charger in addition: Progressive Dynamics pd9180alv-80-amp-lithium-charger .
That worked outstanding! The issue was the Magnum would just bounce around at 50 amps on shore power. On the generator it was even worse – it kept hopping from 50 down to zero and back, taking a long time to build up enough charge.
Update 04/08/2021
Well as we approach the 2 year mark these batteries have been great! There are some new options on the market including Lithionics that tempt me but for now I am satisfied. Its worth noting that since then I have installed 600 watts of solar.
Also, if you have a small alternator be aware that the Lithium ability to absorb a (high!) charge could fry your alternator or turn off the charging. Even though I have a Mercedes 220 amp alternator, their upfitter guide recommends no more that 40 amps for house battery charging.
I often see a charge rate of 100 amps. Thats why many people put in a DC-DC charger that will limit charging to a more reasonable value, say, 50 amps.
As a compromise for now I installed a dash alternator switch. This simple hack lets me turn off the alternator charging of the Battleborns. The idea is, if the batteries are not fully charged, I keep the charger off until I am blasting down the highway.
At cruising speed the alternator is more easily able to keep up with the huge 100 amp demand from the Battleborns due to a higher rpm and better cooling.
Eventually the DC-DC charger is probably the safer way to go but for now its working our fine!
(Paid Links)

Leave a Reply to Stephen T Cancel reply