
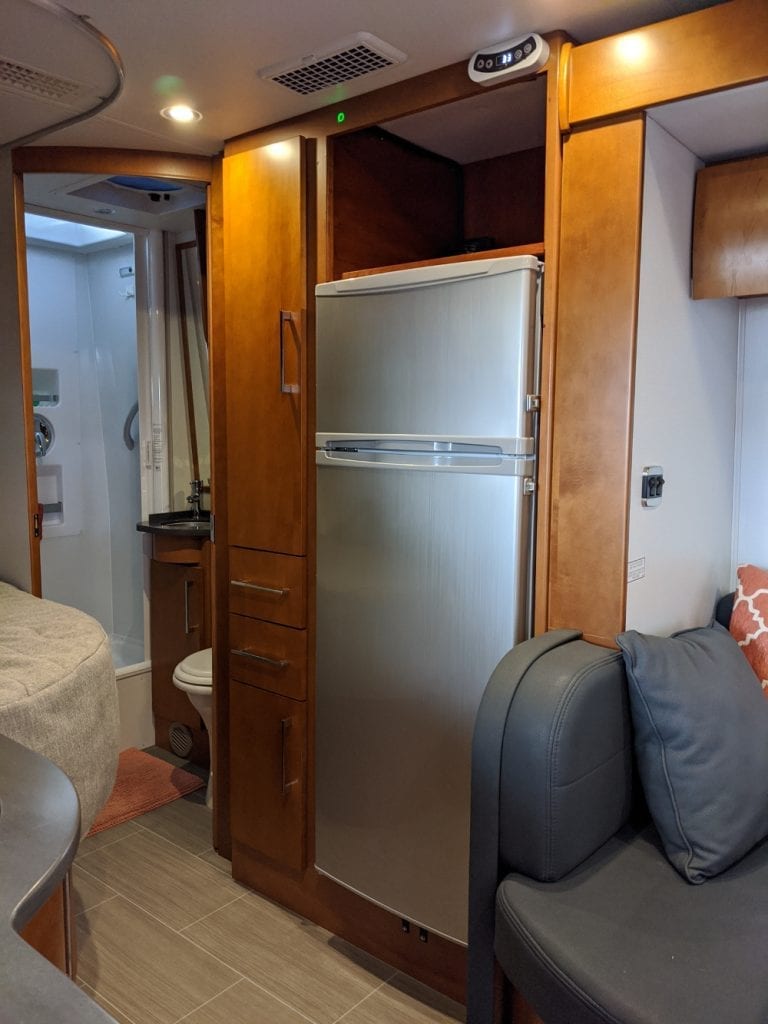
(Pictured on the left is the original Dometic refrigerator. On the right is my replacement.)
Also see my postscript article where I summarize the experience once I got things ironed out!
My RV came with an industry standard Dometic refrigerator. I won’t spend a lot of time on the deficiencies as they are well known. The technology has some great advantages. You can run them on propane or electric, and this is probably the main reason they are standard on most rvs. You don’t have to worry about running down your battery.
The downsides are considerable though. In extreme heat we found the refrigerator temperature rising to 50 degrees at times. Because they are so underpowered you can’t even consider putting warm food or leftovers in the fridge, severely limiting their usage.
In general we found our Dometic totally usable in cooler climates or higher altitudes, or anytime we had the coach AC running with hookups. In the extreme heat of Florida or the midwest, especially while driving or dry camping, not so much.
So on to compressor fridges. They are simple, cheaper, and work better for some applications. They also don’t have a pilot flame and are considerably less likely to burn down your RV while you are sleeping.
But household refrigerators are huge energy wasters. If you spend all of your time camping with full hookups, and just drive in between campsites, an “El Cheapo” small home refrigerator might work just fine. But we tend to enjoy camping without hookups the most.
Fortunately, there is a solution for almost everything, and this is no exception.
It’s called the Danfoss compressor, ands it history dates back to the 1930’s and 1940’s when a small company in Denmark and Germany – The Danfoss Group – started making valves for the refrigeration industry.
The “Danfoss Compressor” became one of those things – like Band-Aid – where a company name become a product name.
Todays its changed ownership and now marketed as Secop / Danfoss by a German conglomerate.
No matter what you call it, its a variable speed compressor that sips energy compared to the other alternatives. It’s also relatively inexpensive, runs fine using industry standard R-134a refrigerant, is (somewhat) easy to service and repair, and is made for 12 or 24 volts.
Its so perfect you would think you would find them in just about every RV made, only you don’t, most of the time.
There are probably a few reasons, but the main one I can see is, even with its relative efficiency , I first had to upgrade to Battleborn lithium rv coach batteries. This solution, although it will work just fine, is just marginally enough at 2 batteries. And I needed to install a shunt battery monitor to keep a close eye on them. It’s not like propane where you can just fill the tank once a month. So rv manufacturers have been slow to embrace this technology as it ultimately costs a lot more and requires some monitoring.
And also I upgraded my solar controller. An MPPT controller with a series/parallel wiring gives better results, especially on overcast days, and I am going to need every amp I can get.
So on to my install!
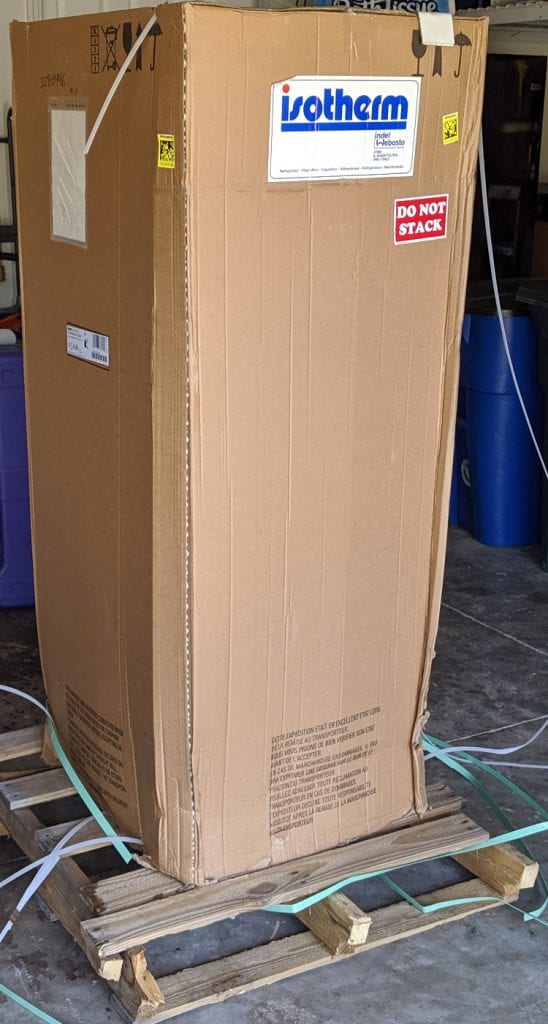
The refrigerator I selected is the Isotherm Cruise 219. Its huge, and in fact will require some significant cabinetry cutting and a smaller microwave install.
I picked this refrigerator for a couple reasons. Its relatively cheap (if you can call $1300 cheap), its huge, and it has an optional intelligent remote control.
Here is how the size compares:
Fridge storage volume: Dometic 149 Liters, Isotherm 178 Liters
Freezer storage volume: Dometic 35 Liters, Isotherm 41 Liters
So both compartments are significantly larger. The bad news is that the refrigerator is also about 6″ higher and 1/2″ wider, meaning that I will need to gut the refrigerator cabinet and also install a smaller microwave.
I don’t mind installing a smaller microwave. I hate the idiotic hotpoint one I have. You literally need a user manual to warm a cup of coffee. I will lose the convection oven feature, but we have never used it and from what I have heard you end up heating your cabinets up beyond what some consider a safe zone.
So lets get started already! Here it is in my garage, still on the palet:
First step is removing the old refrigerator, which is surprisingly easy.
Obviously you want to turn off the AC breaker pull the DC fuse first, and you need to turn off the propane.
Next, remove the lower external outside Dometic grill to reveal the wiring:
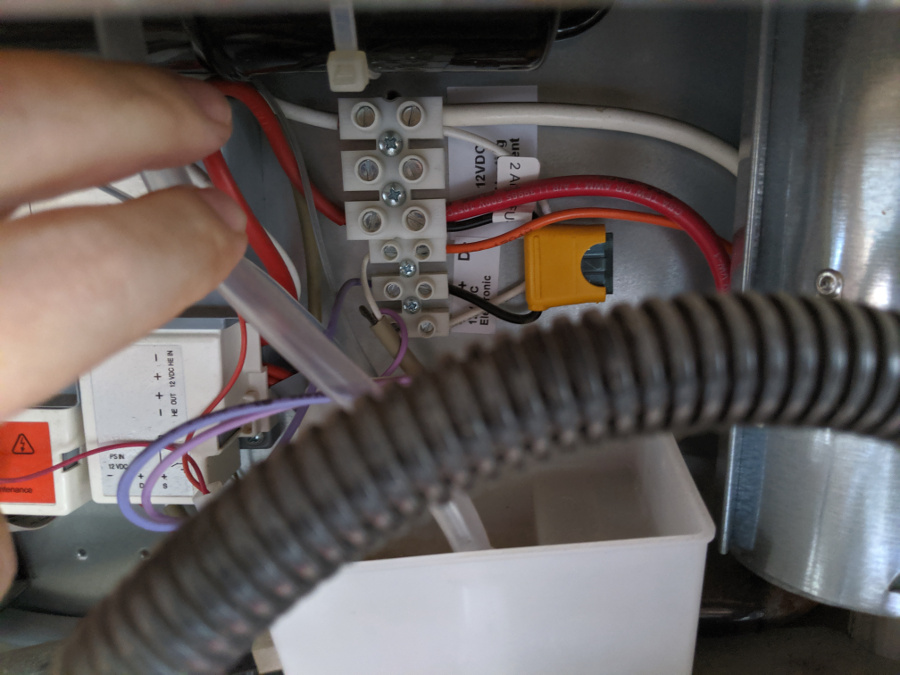
There are only 3 wires on the right side of the bus. 12 volts (white and red) and the orange ignition wire. Just pull these and cap for now.
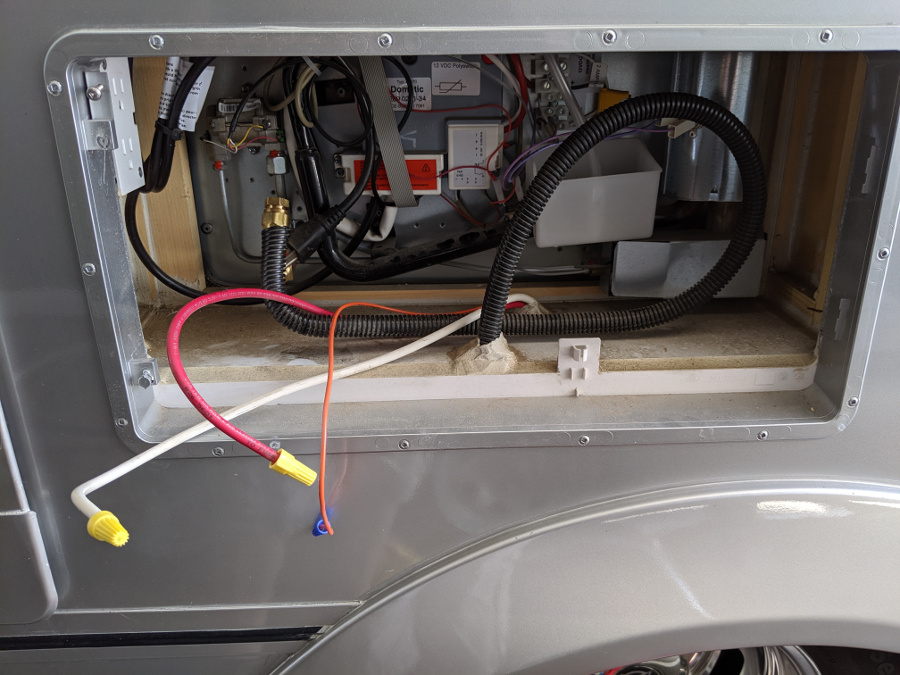
Next, carefully remove the flared propane connection. Be sure to hold both sides with a wrench to avoid damaging the fridge, and just cap it for now with a brass 3/8″ cap like this: Brass Flared Cap at Lowes. Since its a flared fitting, no dope or tape is necessary just tighten. I then bent it slightly up and out of the way.
So you end up like this:
Did I say unplug it?
After that, go back inside and open the fridge and you’ll see 4 plastic buttons in the door frame, just pop them off and unscrew the refrigerator from the cabinet frame.
Its ready to remove. Be sure not to tug on the door. I found the easy way was to push a bit from outside of the RV to break the seal, and the refrigerator slides out easily.
The refrigerator, although relatively light (about 100 lbs) is ungainly to carry inside the rv. We used a shoulder dolly. If you don’t know about this amazing product, there is an Amazon link below.
You basically just tug the fridge out halfway, then slide the canvass strap under it, pull it out the rest of the way, and then the two of you just walk out of the van. It was really easy, and my wife only weighs 100 lbs.
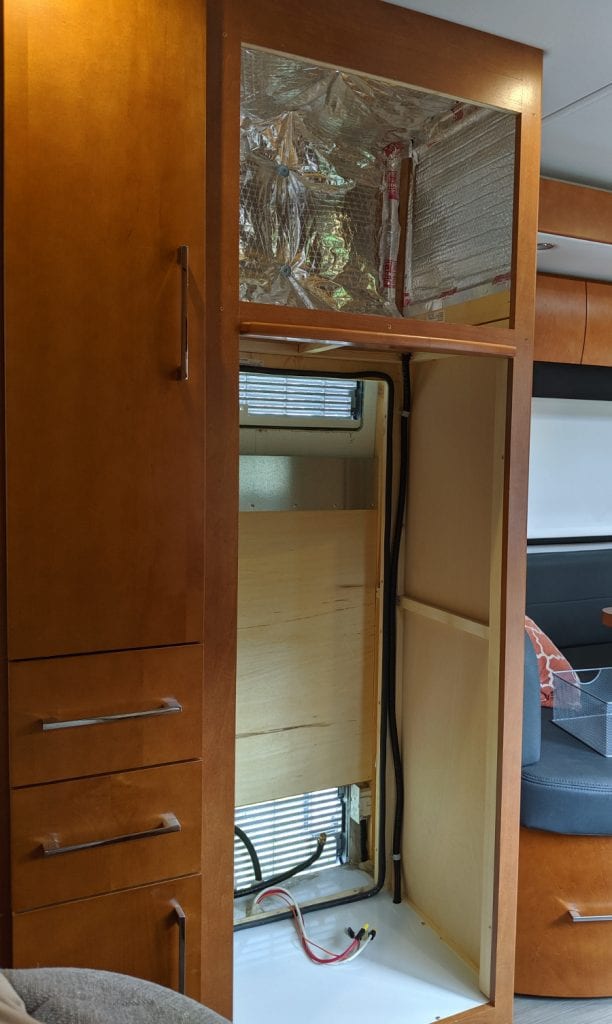
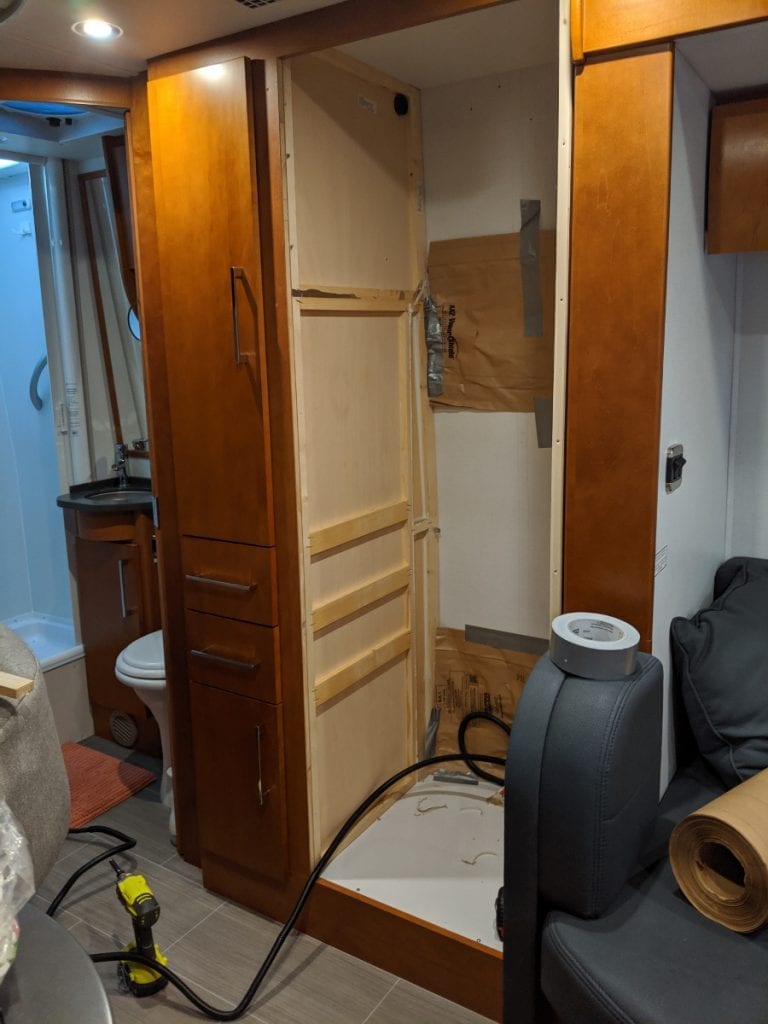
The empty refrigerator cabinet looks like this:
Let the demolition begin!
I just took my time, and carefully removed everything in the cabinet:
- The reflectix type insulation around the microwave.
- The AC wire that runs up the right side and into the closet for the microwave.
- The black insulation striip that runs around the back to seal the fridge.
- The framing that the insulation strip was glued to.
- The box frame on the back wall. (Unfortunately the factory screwed this on from the outside of the van before the body was attached. I was impatient and just pried it off with a crowbar without damaging anything.
- The microwave filler strip and shelf.
- The metal heat plate on the rear. It has some small screws embedded under the caulk, so I just carefully pried it off, destroying it in the process.
- Most importantly, the side trim piece. That was on the right side for me, other models may be reversed. Since I didn’t want to remove the floor, I just carefully hacksawed off the bottom using a fine bare blade. You need to remove this trim in order to rip some material off the side to accommodate the large fridge.
The whole innards were mostly just screwed and stapled together, so just take your time and go slowly. I managed to disassemble the whole thing without damaging anything I wanted to keep.
And finally I had a clean refrigerator/microwave box.
The beauty of this installation is that for all practical purposes once my refrigerator is installed it is the largest one you could possibly consider for this space. So I only have to do this project once.
If my refrigerator ever fails I can replace with a smaller model if I choose and just trim with some filler strips. It will be a quick and easy job. I like future proofing things.
The next step is to add some more insulation on the back wall and totally seal off the vents. Since we won’t be burning propane anymore its very important that we provide the compressor with air from the RV, not from the outside.
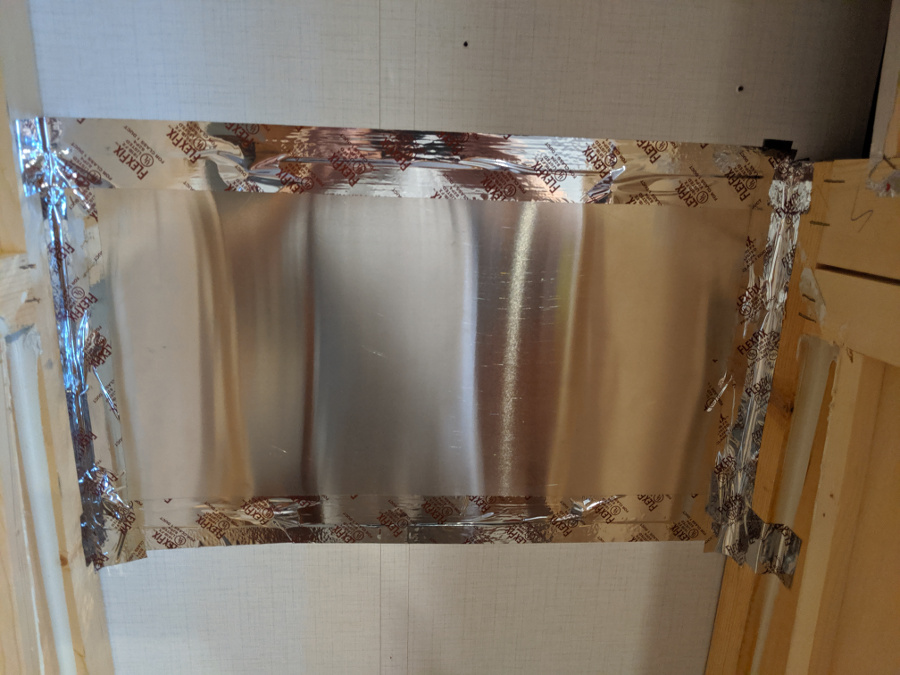
As a first step, I sealed off the top vent. I want to maintain access to service the fridge through the bottom vent, but I could see no use for the top one. So I stopped in Home Depot, and bought a small piece of aluminum. I cut it down with some tin snips, and screwed it to the wall with some stainless steel 3/8″ gutter screws. I finished it off with some HVAC tape:
Next I went outside and, removed the upper vent cover, and caulked around the aluminum using Dicor to create a perfectly waterproof seal. I used the non-sag Dicor on the sides and top. I would have used it on the bottom too, except a water guard prevents you reaching the area, so I dribbled an ample supply of self-leveling Dicor into the void.
I finished up the outside with 2 layers of Bubble Reflectix.
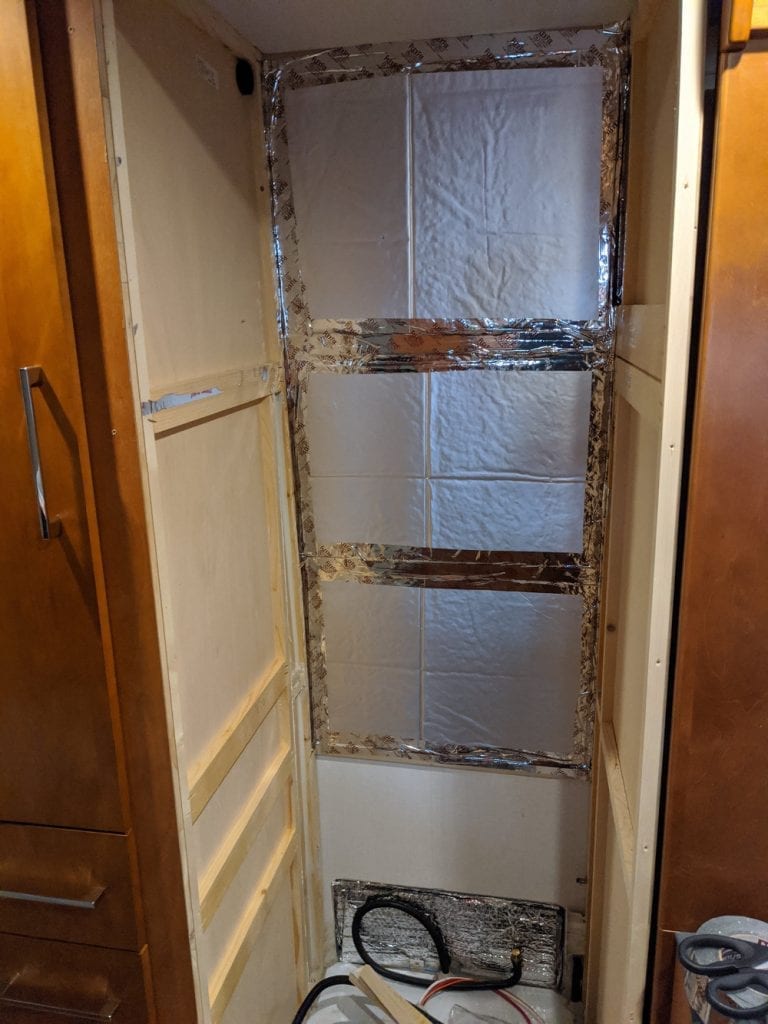
Back on the inside, I started installing 1/2″ poplar stringers across the back. I did this because I’ll be installing an additional 1/2″ foam board insulation, followed by 1/4″ plywood.
The stringers were connected with small 1/2″ angle brackets from Home Depot to secure to the side panels. Starting from the top down I installed them every 16″ or so, then slipped in the foam board and finished with vent tape:
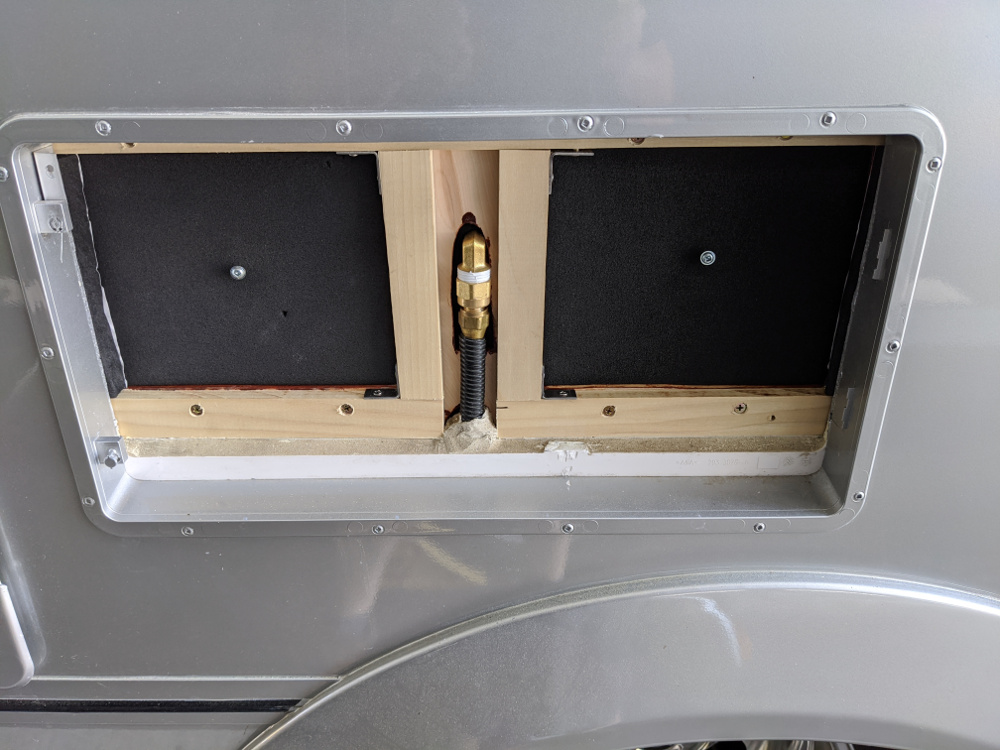
Meanwhile, I had an inspiring moment. The new fridge has a drain tube, which is mainly needed when you defrost I assume.
The propane line in the the bottom is in the way of the final insulation (which will be removable for outside service access).
So why not cut off the propane line and use it for a water drain!
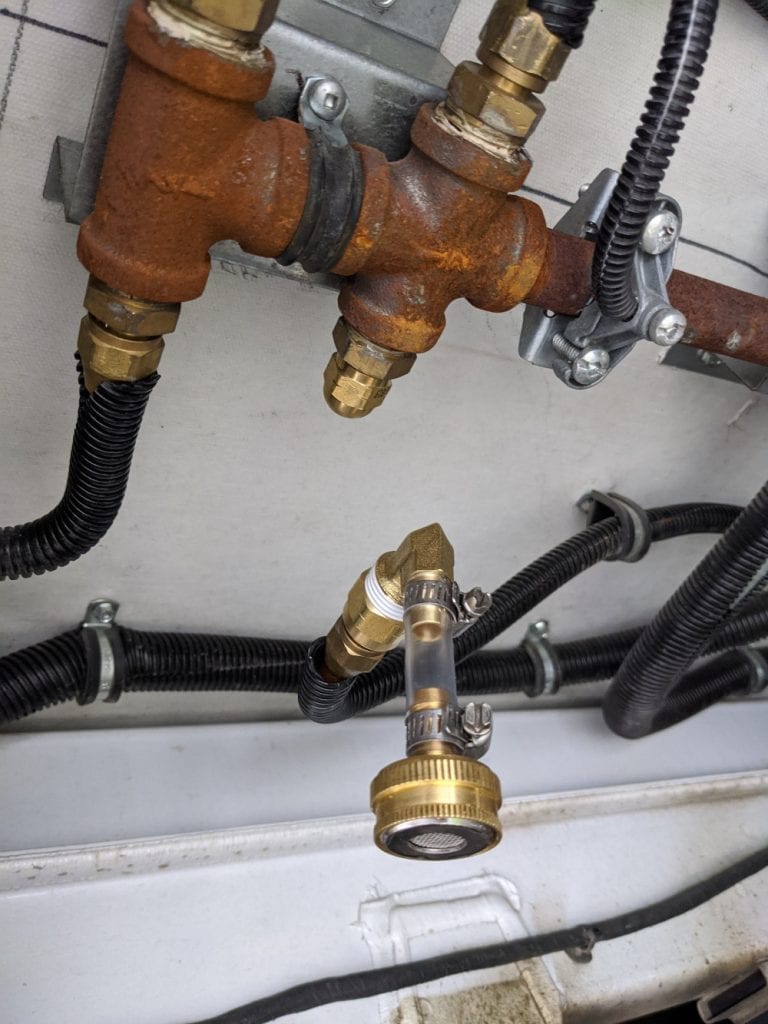
So that what I did. I climbed under the RV and found the propane manifold. There were 4 smaller diameter lines. In the image below you can see I removed the fridge line and capped it on the propane side.
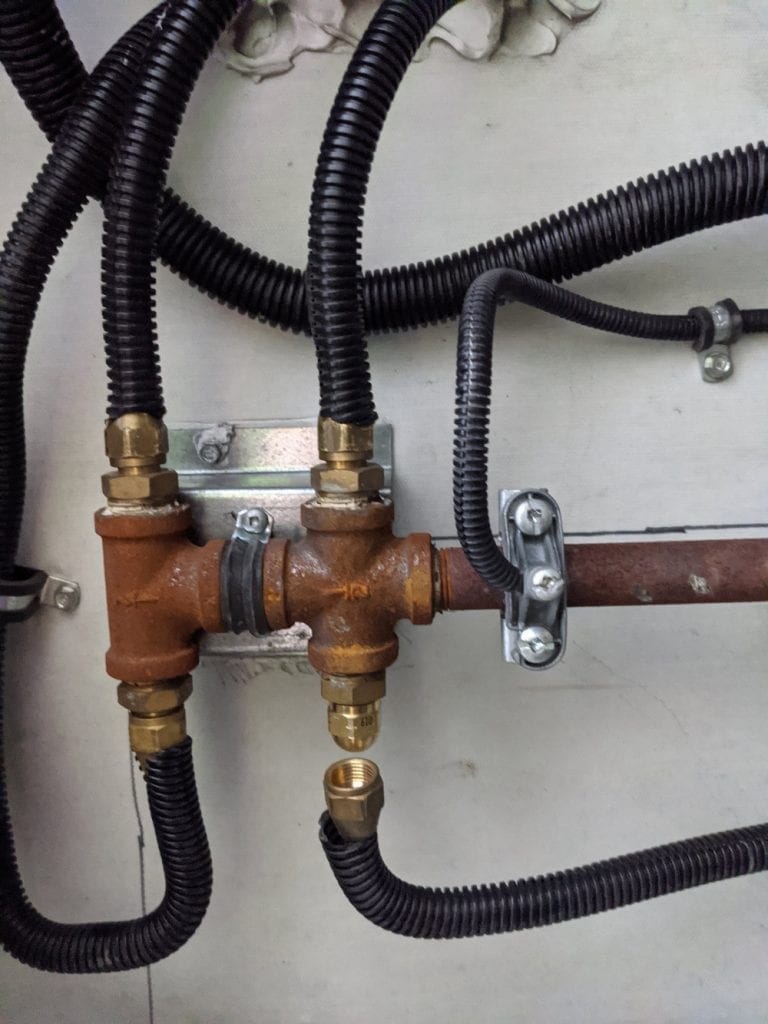
I should admit that, of the 4 possible lines, this was the last one I tried. I removed the other 3 one by one, because they seemed more likely, but in retrospect this one is obviously the refrigerator because nothing else is located in that direction.
This was not an enjoyable part of the project, but I found a low profile creeper (link below) made it easy to roll around under the van in many areas which made it (almost) fun.
I live in Florida, and tiny critters will crawl or slither into any available orifice, so I wanted a screen on the end. I couldn’t really find a standard plumbing part that provides a screen, so I made this Frankenstein adapter out of several fittings and a garden hose screen super glued in. Fortunately nobody will crawl under my rig to laugh at me:
Edit: Jan 2021 I had to remove the screen below. A weird thing happened I think its called “capillary action” if memory serves. After a while the water wouldn’t pass throw the screen, even though it was fairly clean. I think once a bit of slime stuck to the metal the water droplets created enough resistance to the flow. So I simply removed the hose and screen and will take my chances with bugs crawling in.
Back on the inside, I cut the propane line. I had to use a plumbers flaring tool to put a little flare on it and then a 3/8 flare to 1/2″ thread adapter from home depot, and finally the tubing adapter from Amazon.
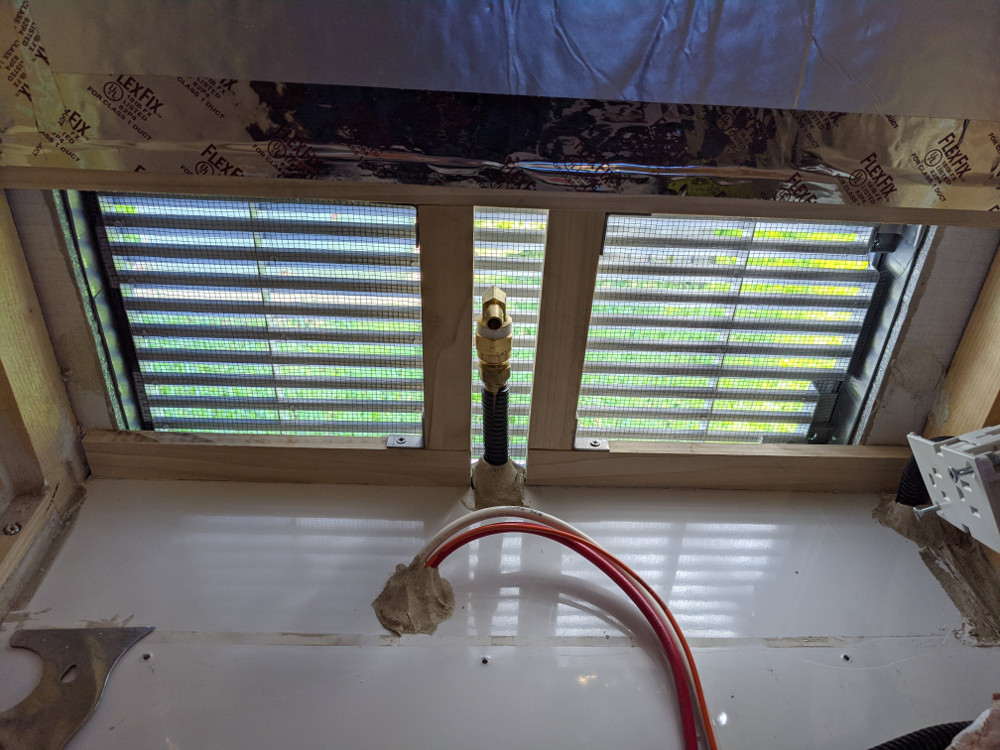
This picture also shows the same 1/2″ poplar I lined the back wall with – I made this frame in anticipation of making 2 rear access panels later. Rather than drill holes in the floor I used VHB tape.
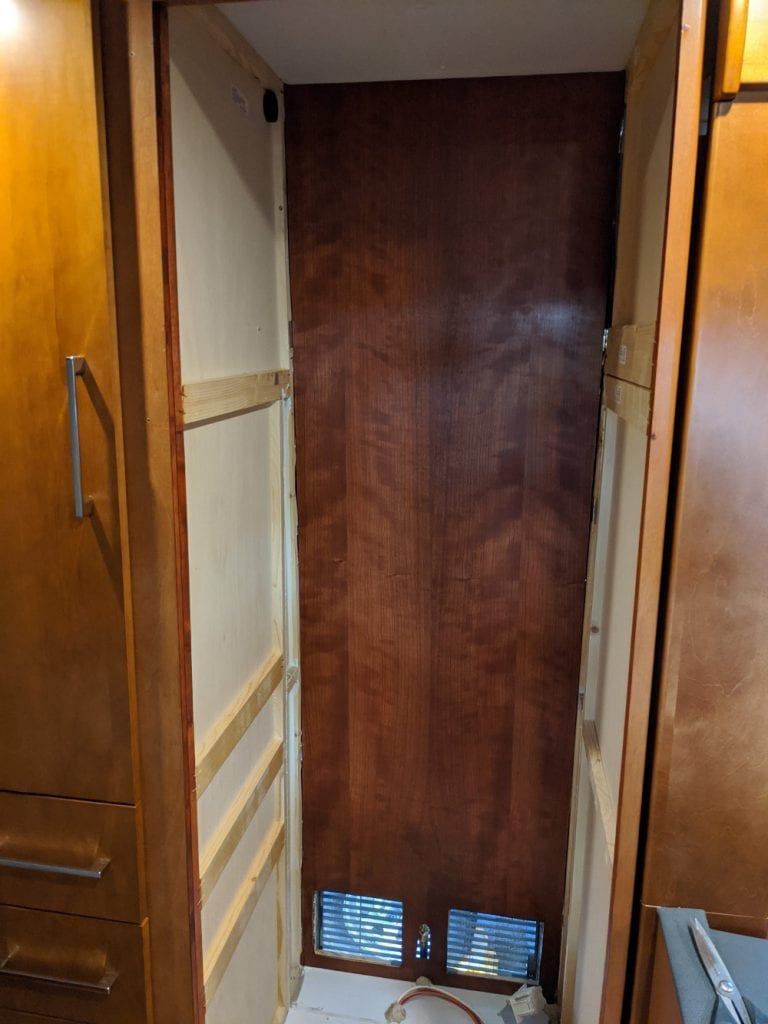
And finally I cut one large piece of 1/4″ plywood. As usual I went total overkill and special ordered a piece of cherry plywood from Home Depot.
It would have sufficed to stain just the top part behind the microwave, but my wife who is in charge of paint and stain projects wanted to practice on the lower part of it and just ended up applying stain and polyurethane on the whole panel.
We also put cherry stain on the unfinished sides of the plywood cabinet opening. It will be mostly hidden by the refrigerator.
I used tiny 18 gauge 1/2″ brad nails to secure the panel. Amazingly, my onboard tire air pump was perfectly adequate to this task, at least for these diminutive nails. Small RV Air Compressor
I was really tight for vertical space. The old shelf was 3/4″ but I would have had to skin it with something as it was unfinished. Also it was not really wide enough.
So I bought some 3/4″ cherry plywood from home dept and stained and applied polyurethane. The front of it I applied some cherry veneer banding.
Then I just reinforced the sides, installed more cherry 1/4″ plywood on both sides and installed some angle shelf brackets and test fit the microwave I selected:
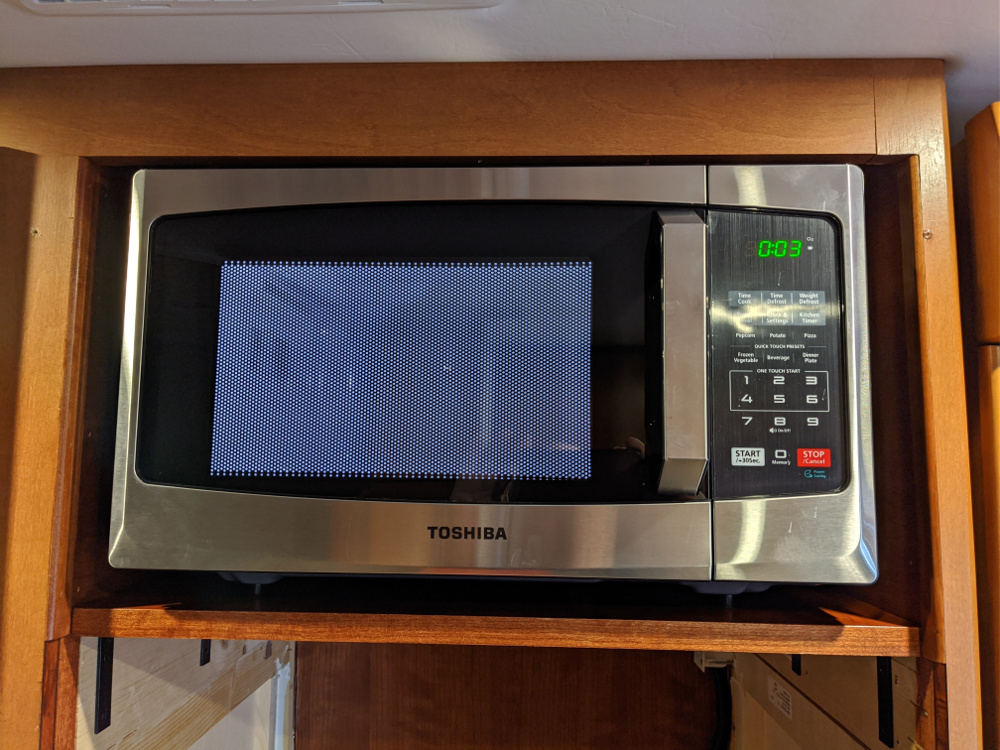
You can see how tight it is. I measured everything 3 times. I also installed some cherry scribe molding on the front sides to finish it off.
Note that I relocated the original microwave outlet to just below the shelf. The RV uses those funny miniature RV outlets with push on connectors. When I went to reinstall the wire I couldn’t find a single tool in the toolbox that would do the job.
I spent about an hour googling. You can buy a special tool for $250. Other people shove them in with a screwdriver.
I finally found an Amazon review with the correct answer. Just lay the wire in the box where it belongs and use the box itself as a clamp with a giant pair of joint pliers. It worked perfectly.
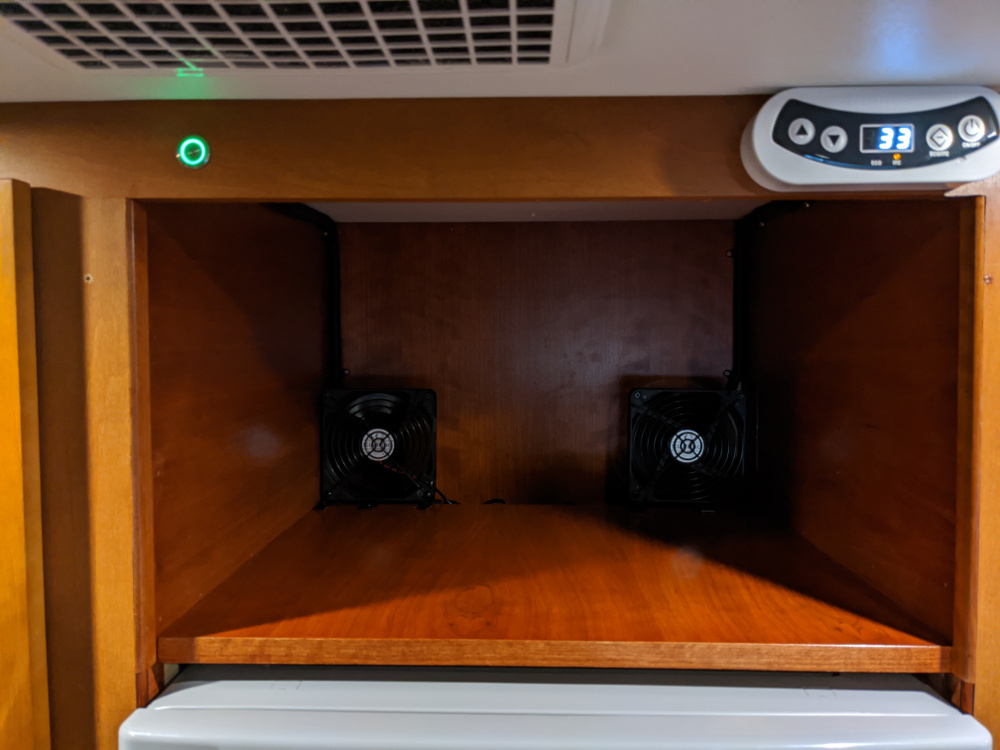
I installed a pair of fans topside, and the switch as pictured further below. I never liked the original microwave because it heated the cabinet excessively, and I suspect this one will too. But I rarely use the microwave, and if we do, its typically to reheat something so for short runs it should be fine.
The fans also will be useful when its really hot inside to help clear the air behind the refrigerator. Most 12 volt fans are made for 12 volts, not the 13 or even 14 that I see with Lithium batteries, so instead I used 5 volt fans and a buck converter.
The Isotherm will work fine as is, but I also bought the ITC (Intelligent Temperature Control). This is a cool little gadget that adds a digital remote panel with display and some additional settings and features including an “economy” mode when low on juice.
One of the hair raising aspects of its installation is that you must install a new temperature probe inside the refrigerator and drill 3 holes in the fridge as well.
The manual was not for my specific refrigerator, so just to be sure I emailed their excellent support center in Italy and my proosed location and they said that was correct.
So the newly installed temperature sensor looks like this:

This turned out to be the easiest part of the project. Isotherm assured me there is no plumbing here, and they were fortunately correct. The only odd part is that the mounting holes require a 7 mm drill bit. There are no do-overs on this, so I wasn’t confident using the closest imperial bit size would be “good enough”. Fortunately Amazon had a metric drill set.
The instructions are really vague about how to wire the system. You are basically rewiring the entire fridge. Clearly the manual I had didn’t make it obvious enough to me how to do that, and included several parts not mentioned in the instructions.
Back to Italian tech support, who told me because I had the AC/DC model I could use this guide which they supplied: Wiring the ITC
This is an “idiot guide”, which worked for me!
The only slight issue was the identified wire colors were wrong for the interior light. The instructions said it was red and black. By looking at the fridge schematic I could see that on mine it was brown (for the common) and blue.
Incidentally, on the interior light I replaced it with an LED bulb, link below. The new one is much brighter and whiter.
I had no place to install the remote display except above the microwave, so I mounted it there. I also installed a switch for the fans and ran all the wiring.
The actual fridge install was surprisingly easy – it slid right in. Its lighter than the dometic. Here is what it looked like initially:
And the microwave area:
I turned it on. The factory setting was set to 31 degrees. Amazingly, in a little over 2 hours it was cooled to 31. (The freezer I recorded at -8)
The instructions recommend a 6 hour cool down, but any way you measure it this is a dramatic improvement. (I didn’t carefully watch the power consumption, but it seemed like it was usually around 5-6 amps when running.)
The refrigerator has a mounting bracket on the bottom, which I removed. Amazingly, a pair of 3″ corner brackets did exactly what I wanted to do:
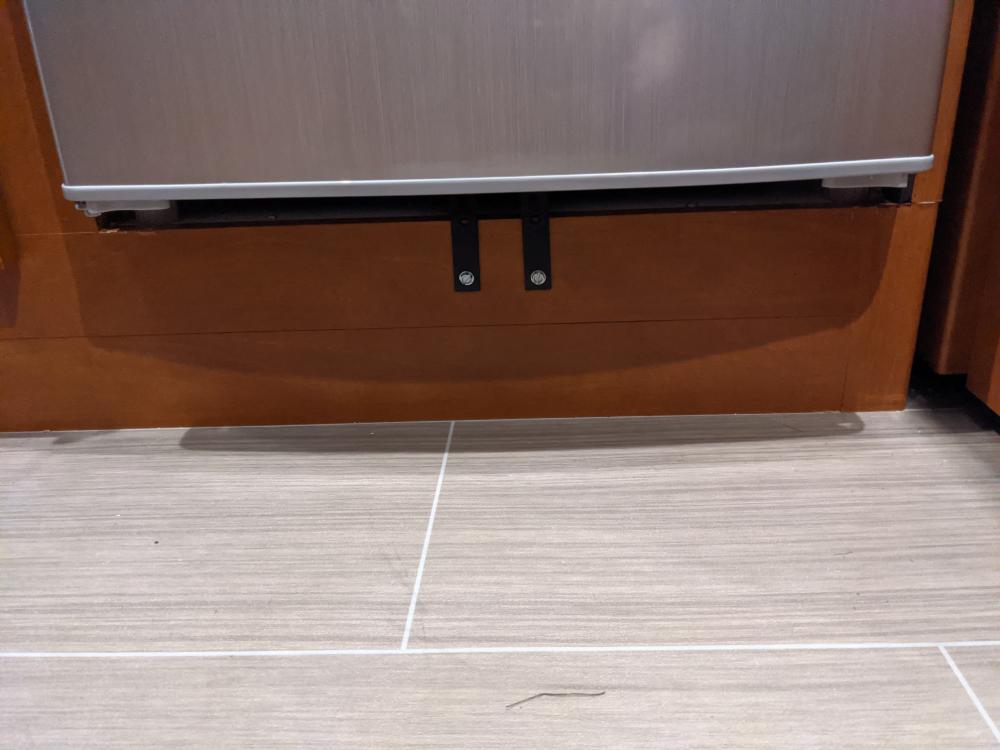
Well, almost. The refrigerator is recessed about 1/8″ to 1/4″ but it seems close enough not to bother fabricating a custom bracket.
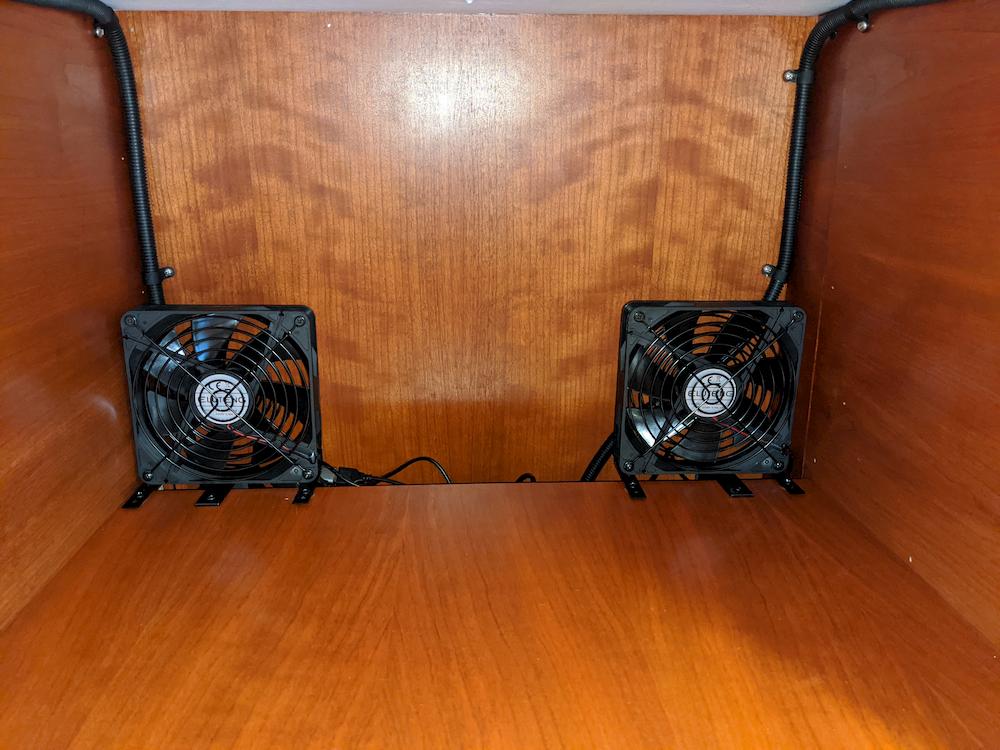
The Isotherm top mount is sort of silly and depends on a much wider cabinet, so I didn’t use it. Instead I took a pair of the same Home Depot 3″ corner braces and mounted them under the fans. They extend down and into a pair of slots on the rear of the fridge, securing that to the shelf.
In the picture below the bar in the center of each fan is the 3″ Home Depot corner brace. I just applied a square of 1/4″ insulating foam to the rear and pushed into the fridge tabs. (I don’t really know if these tabs are made for this but it seems they can take it.)
Finally I cut a number of 1/4″ foam squares. I applied them to the 4 corners of the fridge opening, and 2 in the rear, to cushion the refrigerator against hard bumps.
For the outside bottom doors, I make two 9″ square pieces of 3/4″ plywood to which I afixed 1/2″ marine foam insulation. Each is held in with 4 wood screws.
The little screw in the center of each is to hold in place while screwing in. Finally I filled out the cavities with more 1/2″ foam:
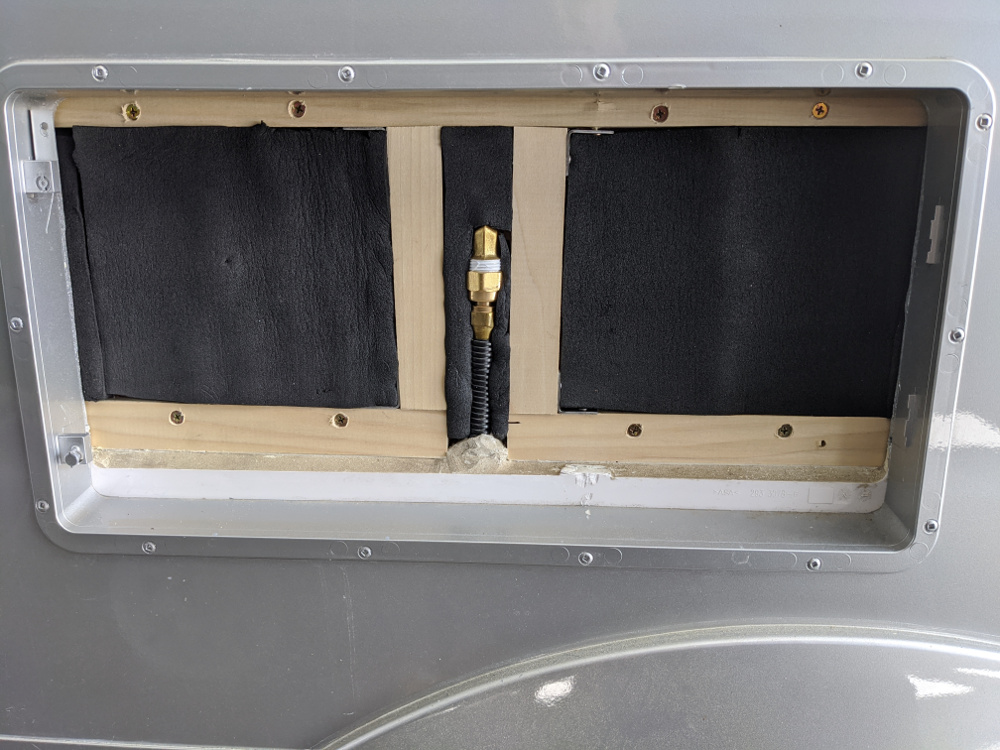
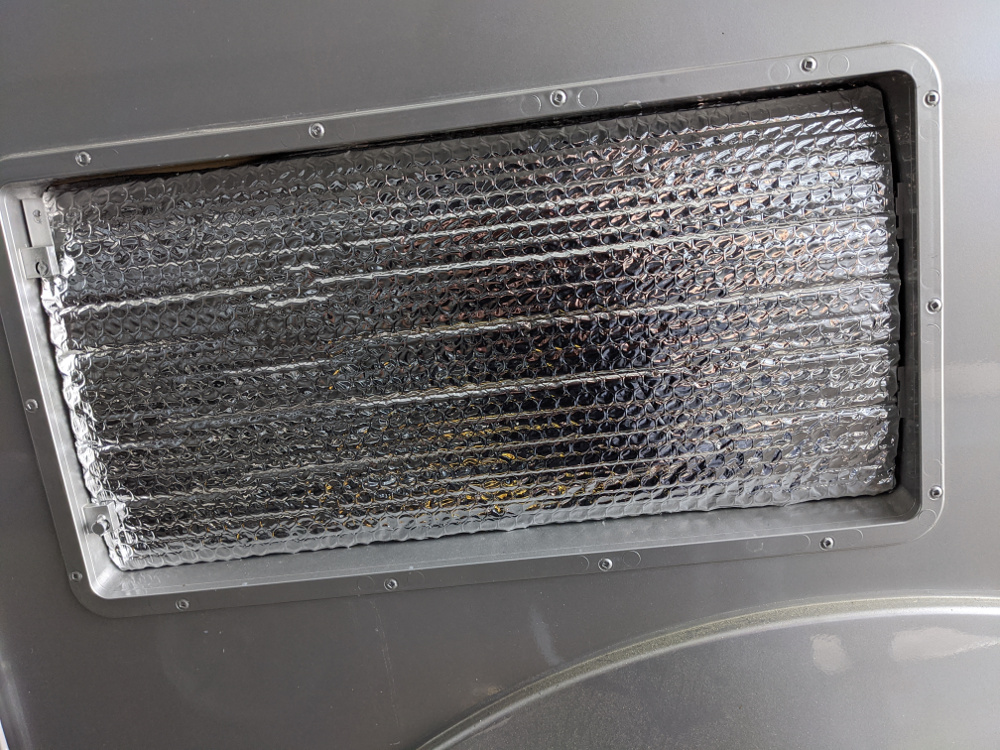
So there is 1/2″ insulation, followed by another 1/2″ insulation, and finally 3/4″ plywood. That should do it. I finished up with 2 sheets of Reflectix bubble wrap:
Inside the doors is the rats nest of wiring but there is plenty of room to slide them out of the way for maintenance. In all likelihood they will never be used except for installing or removing the Isotherm.
I replaced the original 20 amp fuse with a 15 amp as recommend.
Note that I also hunted down the Dometic winter covers which go on top of the outside grill. For some reason you can’t buy them in the US but Amazon UK has them. This will be a project for later because they’ll need to be painted to match the RV.
Mounting the microwave s going to be a future project also. The space is really tight and I have to devise a simple method to hold it down, so’ll I’ll update this post later.
We rarely use the microwave so I’m not really in a hurry.
The fridge and ITC I purchased here: (I joined their buyer club to get the better price)
The winter covers I found on Amazon UK. These are very difficult to find in the US. Ebay sometimes has overpriced sets. If Amazon UK still won’t ship these to the US, I have had very good results with Shippn.com. The way that works is, you can get a UK address (or anywhere else in the world) and then the person that lives there will forward for a small fee. I have used that a few times, try it!
Update: May 3 2020
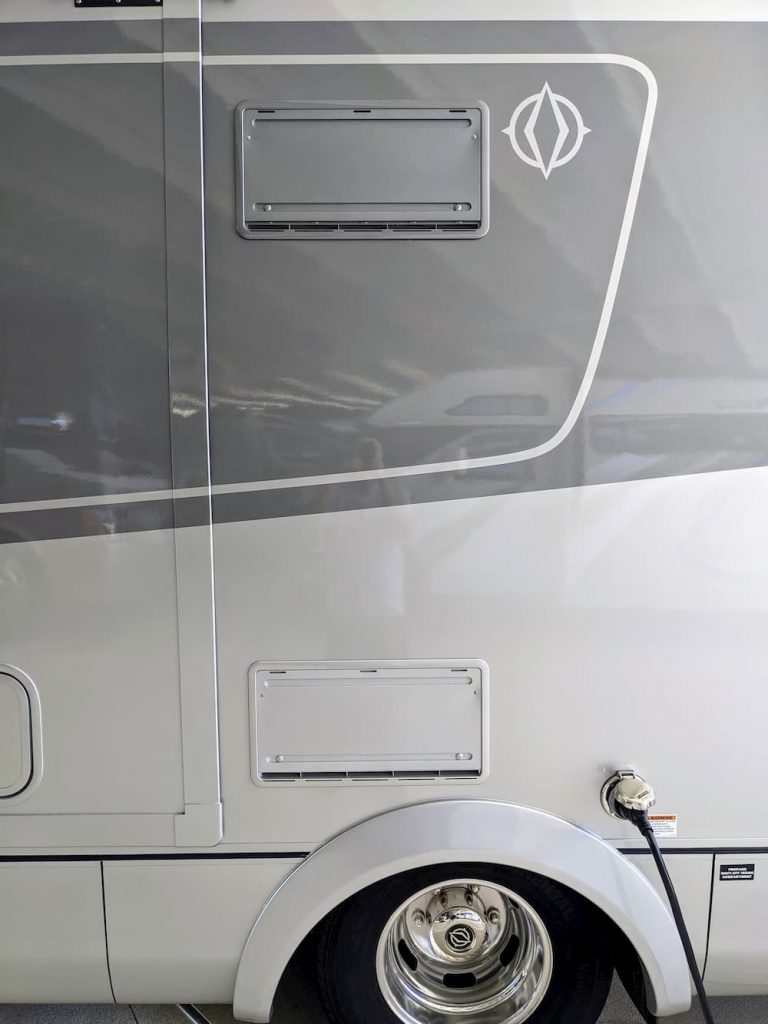
I finally got around to painting and installing the winter covers. I ordered paint from Automotive Touchup. I used their adhesion promoter for plastic, base coat, and clear coat, and just followed the directions on the can. The paint codes were on a sticker in my closet.
The came out pretty decent. I added 2 small screws towards the top as I didn’t trust the flimsy plastic locks. Note there is still a bottom vent but this significantly decreases potential leaks as the bottom area is well caulked inside.
Update: May 23,2020
Just completed a two week pandemic run up the east coast. Refrigerator worked perfectly the whole time. I set the ITC to 33 degrees. On the last trip is was set to 31 and the refrigerator seems to run continuously. On 33 it cycled more as expected. (Actually I experimented with it set at 35, which was fine, but sometimes it seemed some shelf items were on the warmer side – like in the very high 30’s or 40, so I dialed down to 33)
The temperature in the freezer stayed around zero the whole trip. In the fridge it was usually the mid 30’s. Occasionally some items in the rear like a milk carton would have some freezing, which I consider a good sign.
So we just stocked things like fruits on the door which tends to be the warmest and put cheese and milk and such towards the middle or back.
Upon return a bag of ice we had departed with in the freezer was still in perfect condition, each piece of ice still perfect indicating that it was well below freezing for the duration.
One really enjoyable aspect was the drain! Our old Dometic had a small box behind it for draining which quickly overflowed and flooded the rv unless you stayed behind to catch it with a towel.
The Isotherm has a proper drain line which I routed out the old propane line as detailed above. For some reason it was strangely rewarding seeing the nice overflow underneath the vehicle as we departed with the fridge turned off and the frost melting:
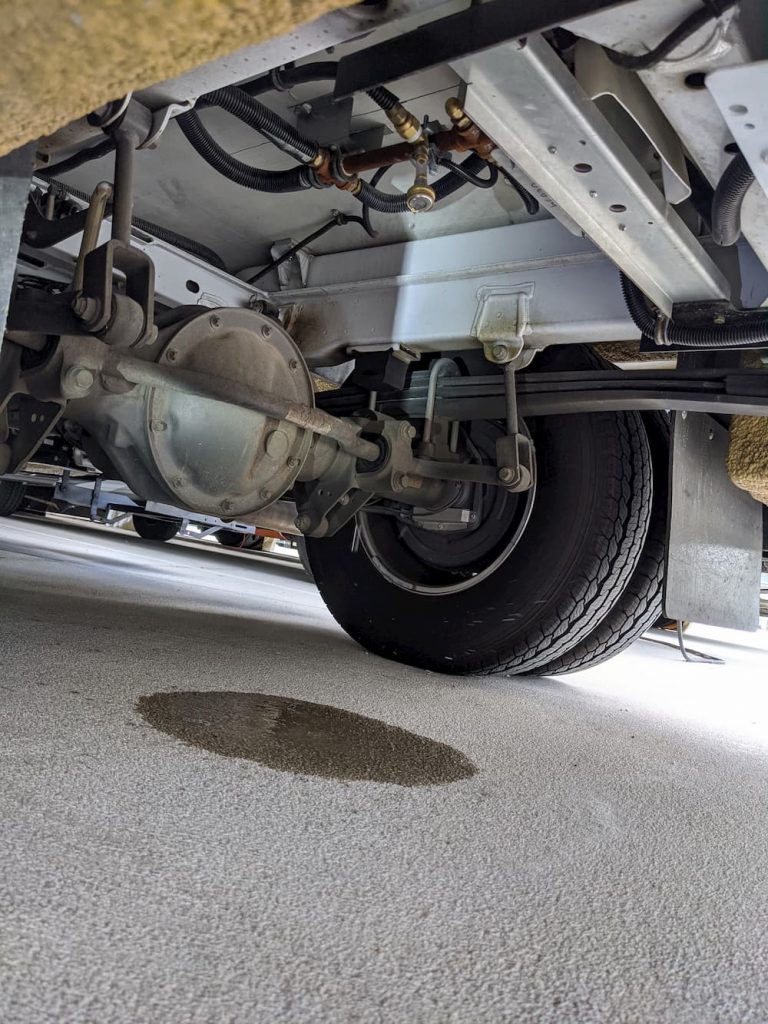
So basically we just turned off the fridge, opened the doors, and left.
Update: August 2020
Well everything went to shit. First, although the fridge worked fine, I always noticed it had really excessive run times. As in practically always. It was adequate but can’t be a good sign.
Then, just as we arrived in Maryland it died. The ITC (intelligent remote control) showed the temperature rising and it was obvious it stopped cooling.
After transferring everything I turned it off (it had a lot of frost) and tried again the next day – nothing.
So the first step was to eliminate the ITC and rewire to use the built in mechanical thermostat. Success – with a big caveat. It only ran on 6 1/2 to 7, the highest setting. Anything else the compressor shut off.
In conversations with tech support I began to realize I had 2 problems.
- Excessive run times and frost
- Failure of the ITC / weirdness of factory thermostat
The first one may be due to the door seal leaking. It seems perfect but when a flashlight is placed inside and the door closed in total darkness you can definitely see light.
The second issue is most likely the Secop 101N0510 controller which is mounted next to the compressor. Most likely that would explain the sudden failure that made it even worse.
The door seal is the most challenging. This thing has no latch incredibly, so I’ll have to engineer something.
Update: September 2020
Indel warranty service in the USA was a little slow out of the gate. After numerous calls and emails still nothing so I went ahead and purchased the Secop 101N0510 controller on my own off eBay.
They are pretty cheap and since then Indel has agreed to ship me a replacement, as well as a new door if its needed to get a better seal.
That seemed to fix everything. One of the really great things about these is they are pretty easy to swap out without removing the fridge.
So back on the road! That still leaves the issue of lack of positive door latches possibly encouraging frost and cycling. I have some on order from Australia and I’ll update when those are installed.
Update: September 2020
Indel came through and sent a replacement controller. In addition they said they would send a new main door since probably I am getting some leakage there causing the excessive frost and run times. I’ll report on that when it arrives. In the meantime, you really need to build your own latch for these things!
Even if you don’t have the frost problems I do, sooner or later your door will fly open while taking a corner at high speed. Not fun.
The solution I chose was to order this latch from Australia. This is a beautiful latch for a nearly identical fridge painted the same color. It will require some modifications to fit which I’ll elaborate on later.
Update: September 2020
Well, if you are installing a compressor refrigerator because you think it will be like your home refrigerator and you can basically just forget about it for 10 years or so, it turns out that isn’t the case.
Now that we have been on some longer trips I have identified a few issues, which may be related (or not).
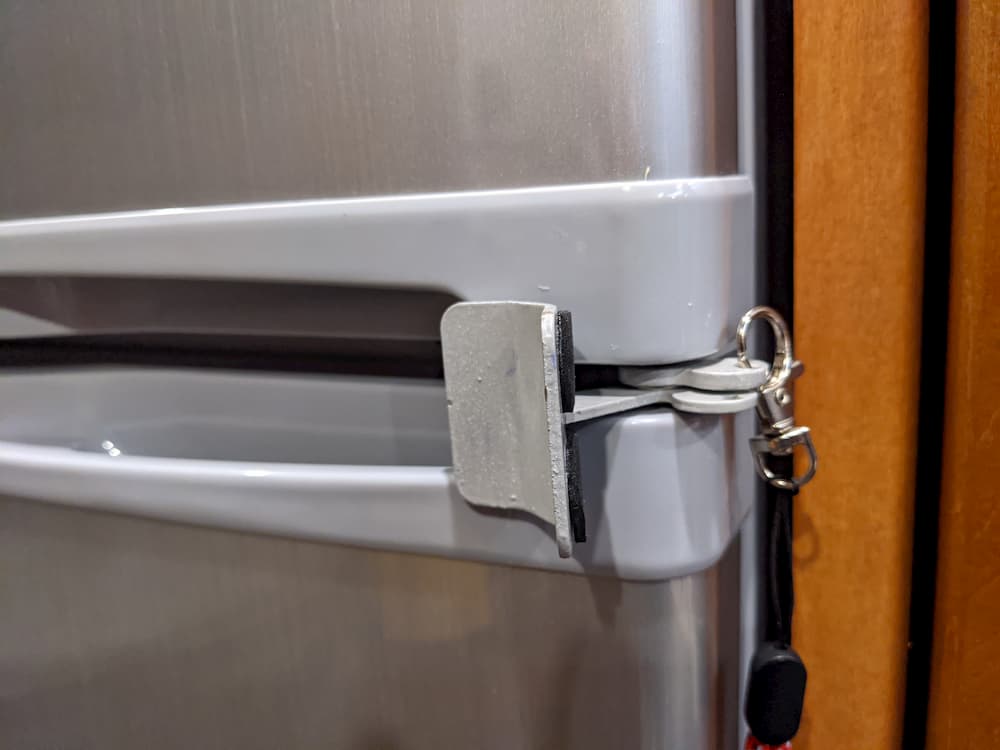
The most pressing one was the lack of any sort of latch. Isotherm includes some low quality stick on child locks which are largely useless. Its not clear why you would sell an RV/Yacht refrigerator without a door lock.
My solution was this latch from Australia. Designed for a similar refrigerator, it was pretty easy to modify. I simply drilled a hole to match my refrigerator. However at that point the latch was too far away from the door, so I simply inserted a locking clip behind the top hole:
Update: The Australian latch looks great and matches the fridge, but is sadly probably no longer available. I’ve linked an alternative latch below in the parts list. Its basically the same idea, but may take a bit of work to make it fit. I haven’t tried this one personally, so let me know in the comments below please if you were able to make it work!
Now that this is solved I have two remaining issues. The first is that my refrigerator typically uses around double the advertised amount of energy. 600 watt hours a day is supposedly typical. Mine is more like double that.
I could actually kinda live with that. It means it uses around 600 watt hours at night while we are in the RV watching TV and later sleeping.
The bigger problem is excessive frost. I mean REALLY excessive. The problem with frost is that once it becomes a few millimetres thick it insulates the refrigerator and the temperature begins to rise.
In theory the new door I received from Indel, combined with the latch *may* help mitigate – will find out soon on our next travels.
Update: January 2021
Well the fridge didn’t get better. It continued to run excessively. I tried removing the ITC remote and that seemed to make it even worse. The thermostat was completely non-nonsensical. Anything under 6 and it was too warm; anything over, and it ran continuously.
Indel Webasto has a location in Ft. Lauderdale, so I arranged for a warranty repair. The 1 year on labor had slightly expired but they graciously stretched it.
So we drove down south and dropped it off. It took over a month but they eventually decided the thermostat was defective and replaced it. They told me that since then it runs normally.
That doesn’t explain why it ran poorly with the ITC also (which has its own thermostat) but thats another story.
I’m perfectly willing to sacrifice the ITC. It doesn’t add any real value and is just another thing to break.
Picking it up next week with fingers crossed…
Update: February 2021
The fridge is fixed! Replacing the thermostat did the trick. I wouldn’t recommend the ITC as it didn’t add any real value and seemed to cause the excessive frost. Since I got back the fridge I left well enough alone and its working fine.
Update: May 2021
Fridge continues to work well. No problems at all with frost now. I realize in hindsight that trying to seal the door better was a wild goose chase. On these refrigerators a “defrost cycle” is supposed to run every hour. Basically the fridge is off for so long that the frost melts and runs down the back; hence the ample drain hole.
Also my new refrigerator monitors reveal that that constant cycle also causes plunges and rises in humidity and temperature during each cycle. The previous buildup of frost was simply due to the refrigerator running continuously. So I fully expect if I park in 95 degrees weather with no AC the issue will return. But that should work out fine if I only stay a few days in such heat as the frost should dissipate once the fridge cycles again.
Update: July 2022
If you have an Isotherm refrigerator, at one point you may be tempted to purchase the ITC remote display and controller. It adds a lot of features and looks cool – see pic above.
A word of caution though. When I had constant problems with my fridge I suspected the ITC and disconnected it, reverting to using the stock thermostat. I immediately noticed something wasn’t right and the thermostat now seemed to respond nonsensically. (7 was on, anything else was off)
I had problems previously with the mechanical thermostat, so I took it in under warranty and after long conversations and many discussions, Webasto replaced the thermostat under warranty and then replaced the Secop controller (ECU) also. That more or less fixed the fridge, and its been OK since with the mechanical thermostat.
I never reconnected the ITC out of caution.
Lately, the mechanical thermostat seems a bit flakey. Sometimes the compressor runs for 2 hours nonstop and the fridge gets extra cold. If I tweak the setting down it ends up too warm. In other words, a little inconsistent.
I’ve considered reconnecting the ITC, but started reading reviews in sailing forums and discovered a fact previously unknown to me (and all of USA Webasto apparently). If you install the ITC, it reprograms the Secop ECU and you can never again use the stock thermostat!
I just emailed their tech support in Italy and received confirmation that its true, to wit:
every electronic probe that is connected to the Danfoss ECU makes so that the ECU reprograms itself. This means that once you have connected the ITC and you switch back to the regular thermostat you can’t. the only way to correct this issue is to connect the ECU to a software and program it manually.
Not knowing this cost me about 6 months of trips to Miami and back. Now that I am considering once again reconnecting the ITC at least I know its a one way trip.
Posting this to potentially save someone else the grief.
Summer 2022
Well since the thermostat wasn’t working well again I decide to once again hookup the ITC which was already installed anyway – knowing I can not go back anymore.
We then travelled all summer for a couple months – the longest trip we ever made. As expected, it worked perfectly BUT once again caused biblical frost – so heavy that we had to defrost the refrigerator approximately every week or two.
That would seem super annoying, but it actually wasn’t that bad. We carry an ICECO JP50 backup compressor refrigerator chest. We just set that on freeze, wait a bit, then load all the frozen food in there (any anything that can’t get too warm like eggs and milk). Then we empty the refrigerator into a large insulated bag with a bag of ice. Then we go ahead and defrost the fridge, holding a fan in it to quickly melt everything.
Wipe it down, and turn it back on. The whole operation takes about 30 minutes, and then in a few hours we reload it.
While we can tolerate that, its not fun either. To try to mitigate the massive frost, my first attempt is to replace the glass shelves with wire. My theory is that air will more easily convect from level to level, causing the compressor to run longer (and then stay off longer).
I have no clue if this will help, but it can’t hurt. Home Depot shelves installed upside down:
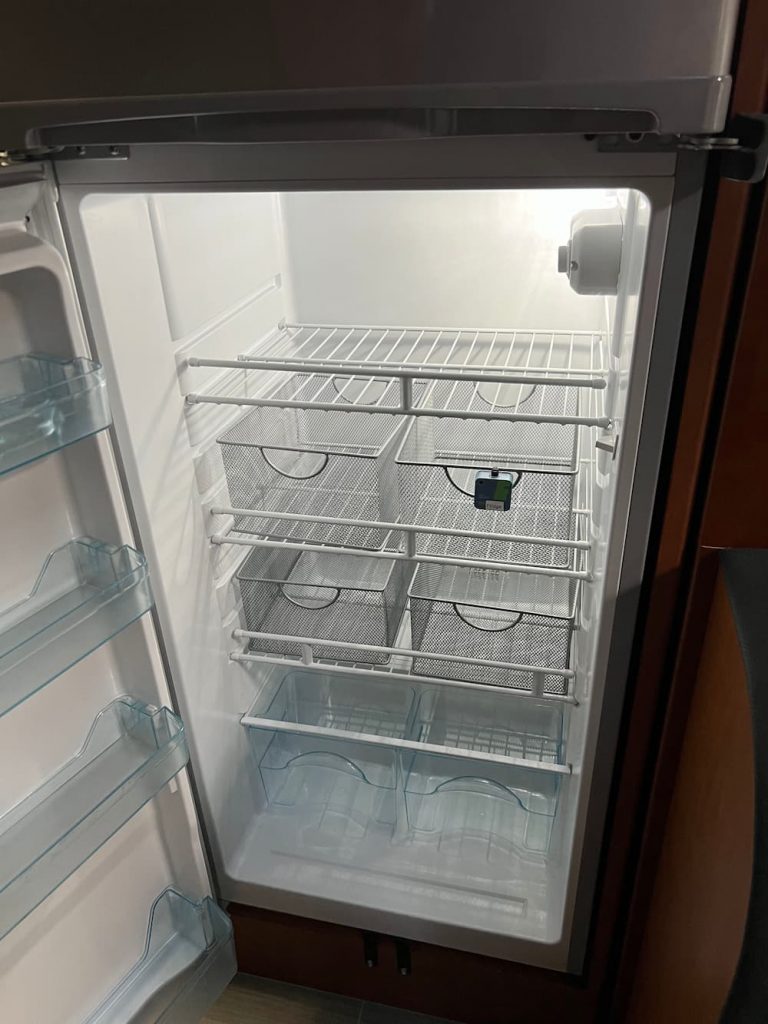
Guess we’ll find out next summer. My fallback plan is to move the ITC thermostat to the top front…
Here are a whole bunch of parts and tools I used on this project:
(Paid Links)


Leave a Reply