
When I ordered my RV I made the big mistake of ordering it with 400 watts solar, a costly option. It made sense as it was the most you could get and LTV must install the best, right?
Well as I learned in time it was actually awful.
The solar controller was a cheap PWM model so I upgraded that.
Over time I learned that the flex panels I had were also junk. Oddly, they are the most expensive. What makes them junk is that they have a very short lifespan, often just a couple years in the south.
Even worse, as they sizzle on your roof they start cracking the roof gel-coat (at the very least), or occasionally actually catch fire. Everything I read convinced me to replace them even though they worked perfectly fine.
And lastly because they are glued to the roof they are murder to replace. As I discovered when a tree crashed through one of them even my solar wires and connectors were all covered in dicor making it very difficult to do any maintenance.
Why do they install this junk?
Well they look great!
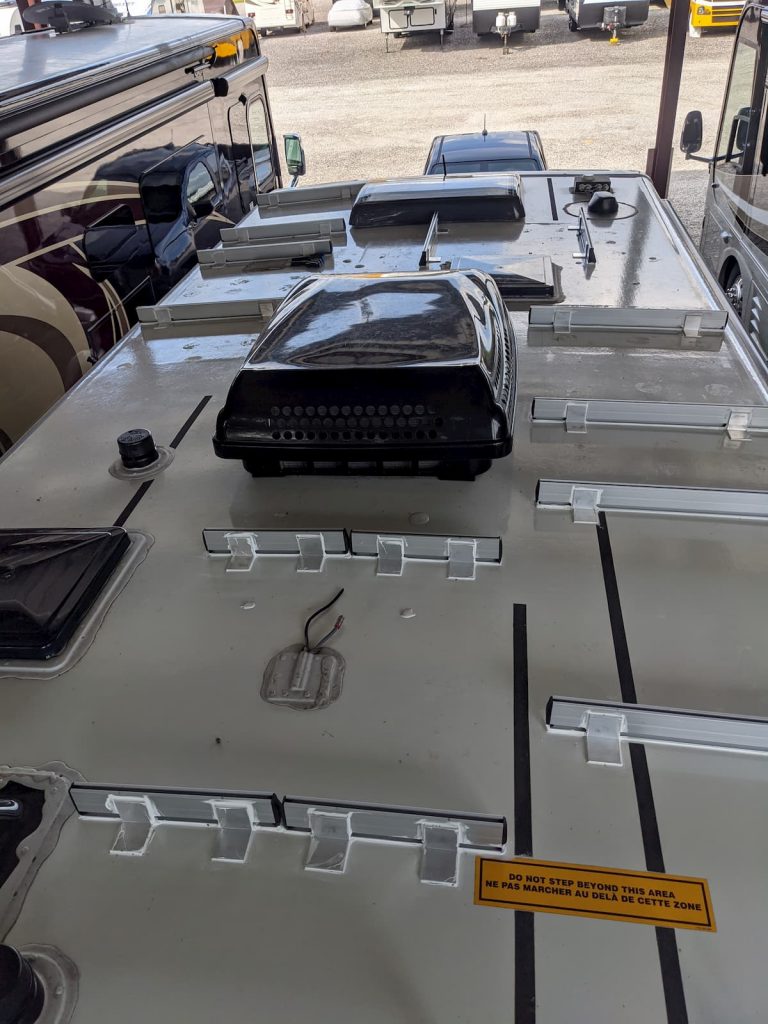
So here is my before picture:
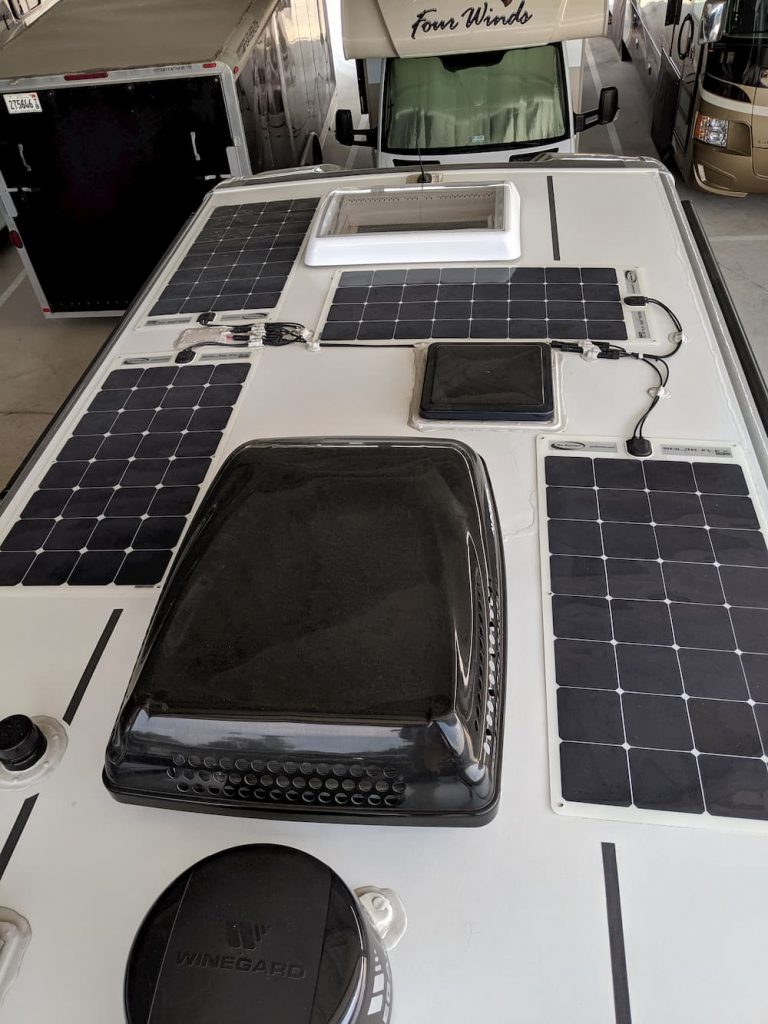
Since a proper solar panel is actually slightly smaller, I should be able to get the first 400 watts in the same positions. After that, there appears to be enough room on the aft for two more. I’ll have to ditch the Winegard antenna which I have never used.
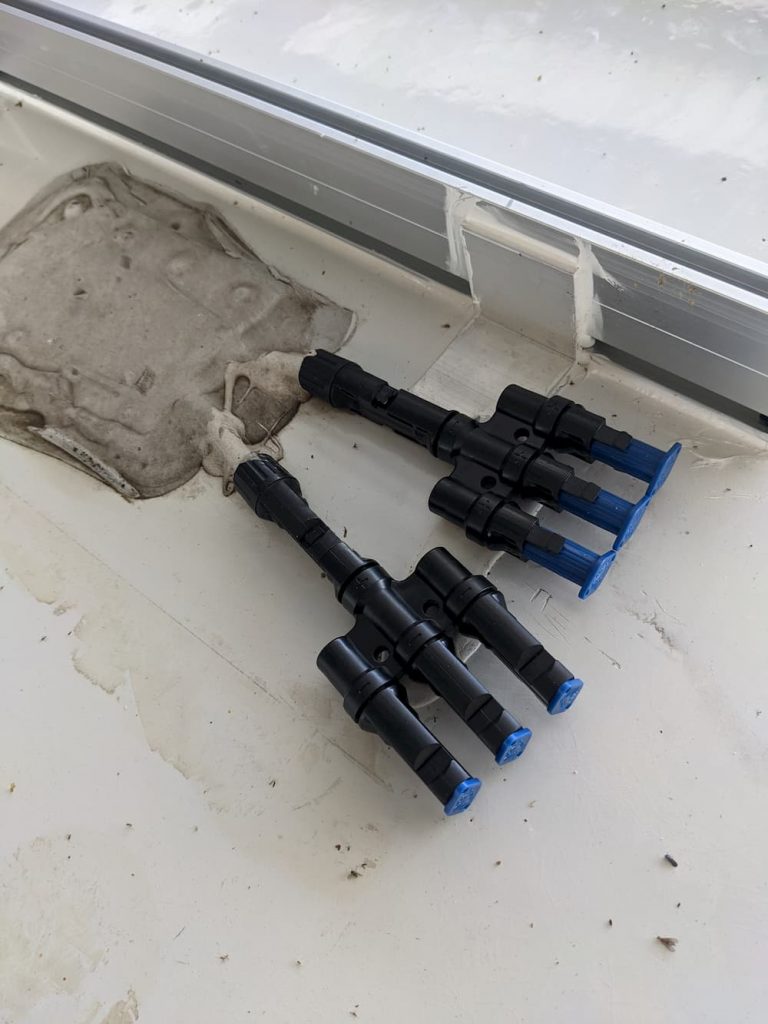
One of the worst things about the factory install is, not only were the panels glued down, but all the wires and connectors were glued and screwed:
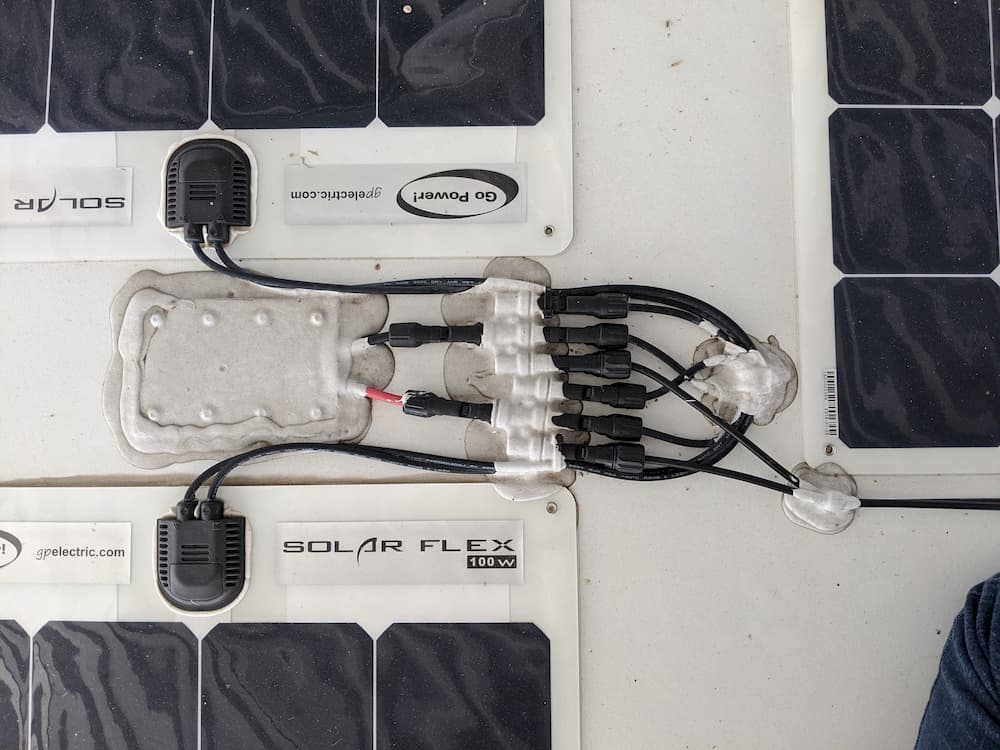
So the horror of this is that to replace a panel or change a cable you are also going to have to spend an extra 30 minutes scraping off Dicor first. Those branch connectors are also screwed to the roof so instead of the simple MC4 tool you have to get creative and use a zip tie to unlock the connector.
Did I say I hate stuff designed not to be ever serviced?
So after the tree crashed through the roof, that did me the favor of taking out one of the solar panels. The body shop that replaced the skylight did a nice job scraping off the panel and repairing and repainting, leaving me only 3 solar panels to remove.
So on to the demolition!
I found a simple “3 in 1” type Home Depot scraper worked the best to gently coax the panels off the roof. There was definitely some cursing and sweat involved. Going slow and carefully I spent about an hour on each one.
The initial removal looked like this:
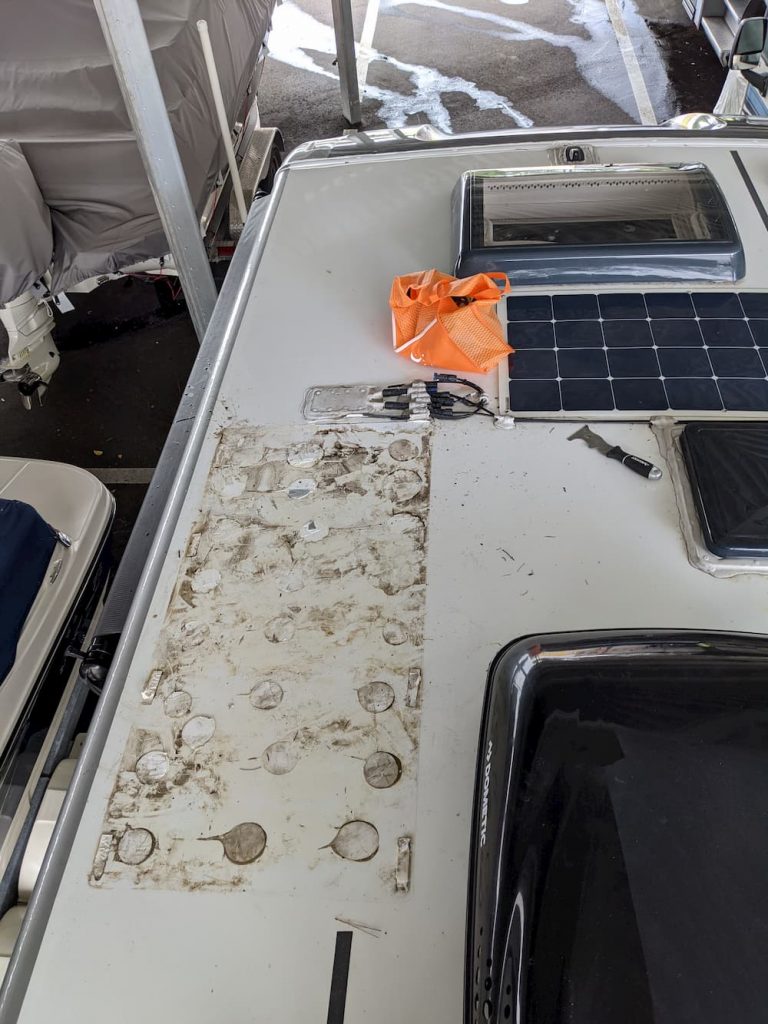
This may look bad but is actually as good as it gets. All of the pictures I have seen on the Internet are worse. In my case the brown stuff is not burns, just mold or mildew. It cleaned up relatively easily. All the Dicor dabs and VHB tape scraped off with the aid of some stuff I have linked below.
There were also 12 screw holes from the old wiring. I simply put new stainless steel screws in each hole and covered with some Dicor. Here is the first picture of my new cleaned up roof, looking pretty good actually:
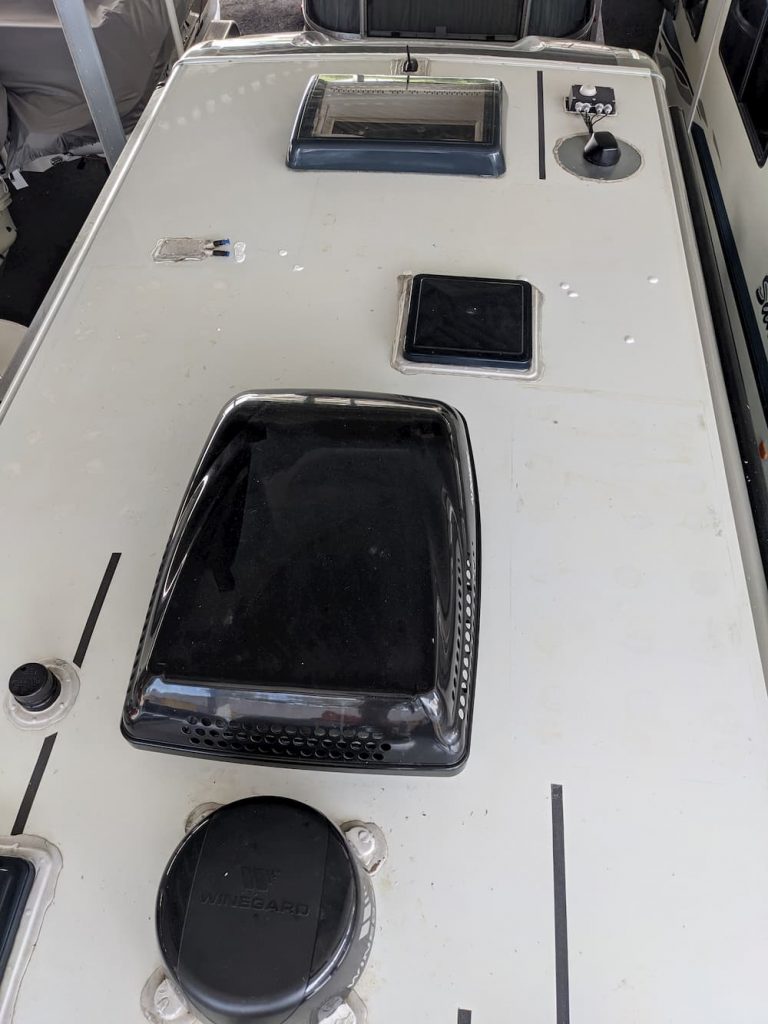
As you can see it cleaned up great! There are a few old stains here and there that I could probably improve if so inclined, but its pretty close to brand new. Note that the balls of Dicor covering old screw holes were just applied and should level out a little in a few hours.
(The new skylight is gray instead of white, and front right space is occupied by my RV Internet Antenna. The first oldest picture was taken before that was installed).
Lastly I removed the Winegard and donated it to somebody on Facebook.
For installation I selected Ironridge XR100 rails. This has the advantage of letting me replace or upgrade panels in the future by simply bolting them on.
The downside is a lot of extra work. I certainly don’t want a panel flying off at 75 mph, so I taped the rails down, installed 2″ aluminum “L” brackets for good measure, and sealed it all with 3M 5200 marine adhesive for extra safety.
(The 2″ L brackets were made by buying 4 foot sections of Aluminum L from Loews and cutting every 2 inches.)
5200 works nice like caulk and I really pride myself on long perfect caulk lines, but on the tiny brackets I just slopped it on as they are covered by the solar panels anyway. I ended up starting a second tube of 5200, so if I had known that in advance I probably would have cut one tube with a smaller nozzle for the little brackets. I think the most important part is working a generous amount to the front of the rail which is curved for extra adhesion.
When I got to the very last panel (behind the AC) the roof curvature was so pronounced that most of the rail would be 1/2″ in the air, so I cut them in half and went back to Lowes for more aluminum stock.
I replaced the 3-1 branch connectors with new Renogy ones.
The 5200 takes a week to dry. Here in humid Florida it was probably faster, but be advised in dry climates I have read it can be tricky to get it to ever dry.
Lastly I bolted on all six panels using the Ironridge UFO connectors.
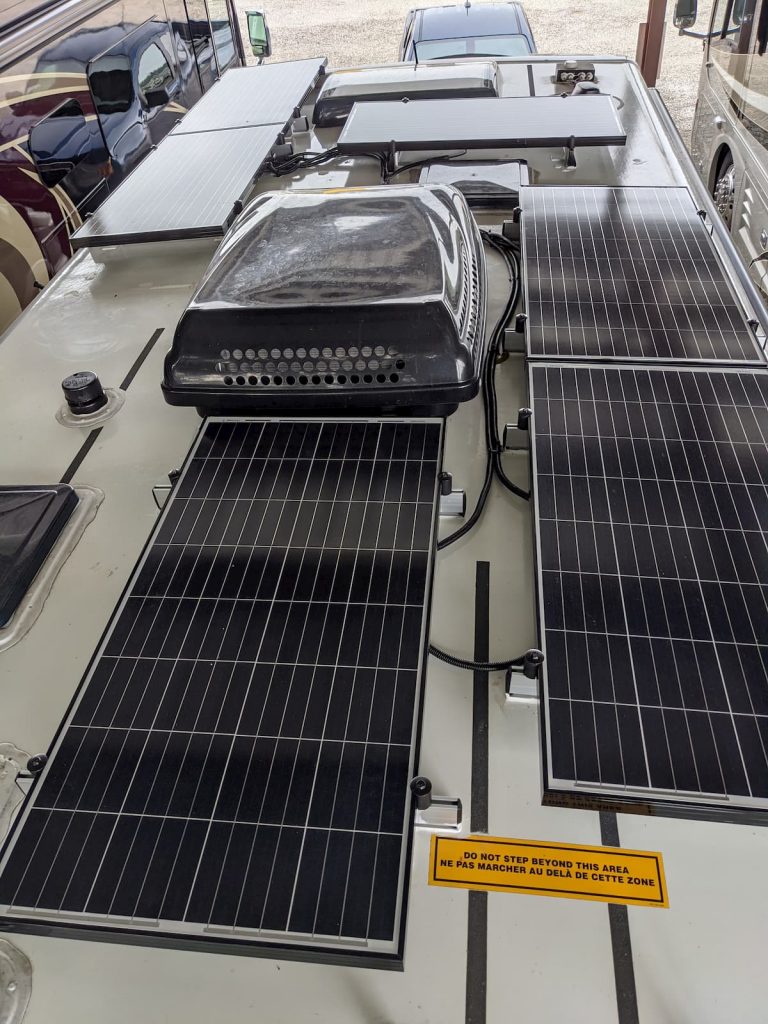
For wiring, I connected 3 sets of 2 panels wired in series. That minimizes wiring and works best with the solar charger.
I used the largest recommended wire – UV resistant solar 10 AWG. Being lazy, I ordered wire that had one MC4 connector already attached. That saved 4 crimps – not a big deal, as crimping turned out to be quick and fun.
The actual MC4 crimping is best learned by one of the many videos online and a little practice.
MC4 for solar wiring is a standard, but its adhered to somewhat loosely. Aphenol is one top quality vendor that is used by many factory builds. (They call it H4.)
I was a little hesitant about using Chinese clones but the ones I selected off Amazon had good reviews and seemed to be high quality and worked well.
I found my coax cable stripper took the outer jacket right off, and then a regular cable stripper did the rest. Once I got the hang of it each crimp took under 30 seconds.
I drove off to test the install. I am getting 500 watts peak which here in Florida, at this time of the year, seems about right.
I try to learn something from each install, and here is one thing I might do differently.
First, I cut 2 foot rails because… other people cut 2 foot rails. I measured and it seemed about right. But in hindsight, the rails came in 7 foot sections. I threw out almost a foot on each. Instead, I should have maxed out the rail size and made them as long as would fit.
The reason is, I was trying to keep them well away from obstacles like the skylight, so I could leave room for the wire cables.
But actually you can pass the solar panel wires underneath the panels and over the rail, so that is less of an issue than it seems at first glance.
I bought the Ironridge XR100 rails, UFO, and 35mm UFO hardware from AltE. Great outfit to deal with and super fast shipping. They also sell custom cut 7 foot sections that can ship UPS.
The rails, by the way, cut like butter in a regular “chop” saw. Just use an Aluminum specialty blade from Home Depot.
Note that I used some cheap 3/8″ split wire loom I already had on hand to cover the wires. I’m not sure how long this stuff will hold up in the sun. If it starts to degrade it would be a quick job to replace the wire covering in the future without disturbing anything.
So far I’m really pleased with the install! The RV also has a new “tech” look with an array of stuff on the roof now clearly visible from the ground:
Here is what else I usedl:
(Links are paid)
Leave a Reply to Steven Morgan Cancel reply