
Just like clockwork, after about two years of ownership I noticed my alternator stopped charging my batteries reliably.
Its always a little unreliable on my Lithium batteries. (I count on the solar to top them off.) But in this case the alternator completely stopped charging. (Although sometimes it would).
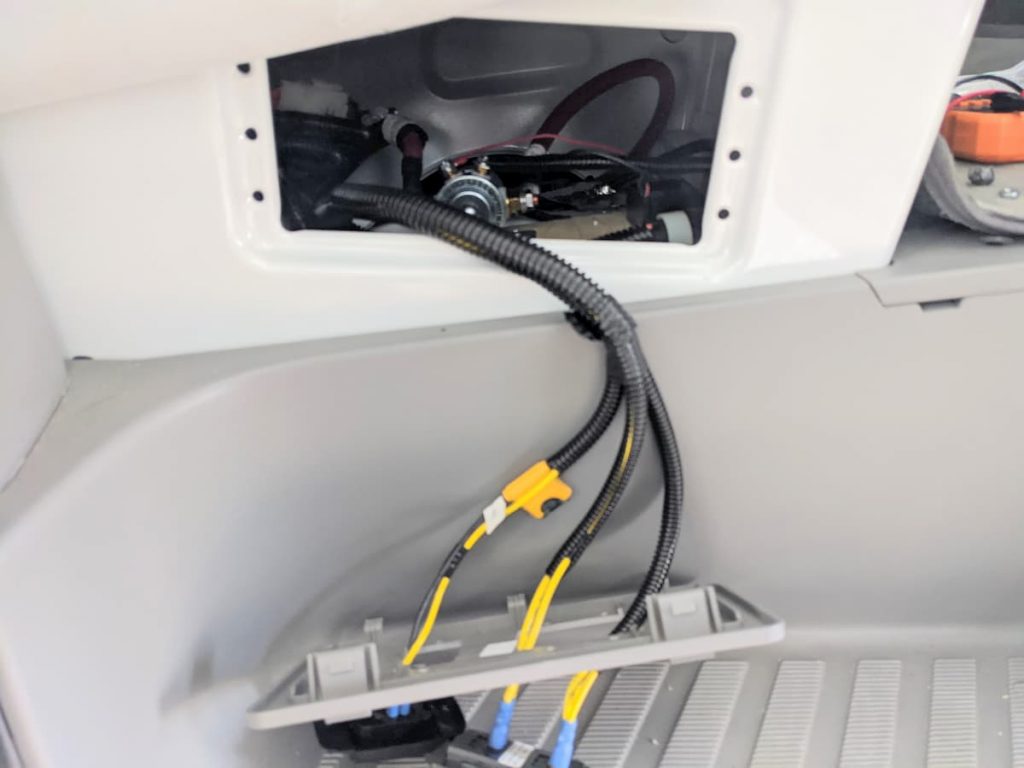
From posts on the internet I guessed that would be the White-Rodgers relay that LTV installs. Many people report it only lasts a year or two.
Supposedly the Cole Hersee 24213 12V 200A solenoid is more reliable. Time will tell I guess, but they are cheap enough that I bought a second to carry a spare.
The relay doesn’t come with any instructions. Since its a relay it doesn’t matter which side you connect the big cables. The activation or coil apparently doesn’t matter either, although I connected it the way I had seen on a photo on the Internet.
I may add a switch later to turn off the relay. For example when the batteries are nearly dead I am a bit sheepish about letting the alternator go all out at 90 amps which is above its recommended charge rate. So in a case like that I could wait until I got on the highway at least where alterbator is more likely to run cooler.
But I haven’t smoked the Mercedes alternator yet so I didn’t get around to it this time.
As it turns out, this is an extremely easy upgrade. On my RV its under the passenger seat and easily accessible via a side panel. You don’t have to remove the seat.
For safety, I removed the Mercedes engine ground disconnect near the gas pedal. Then I pulled the negative off the house batteries.
At this point the positives are still hot but with no battery negatives connected its safe to remove the wires, although I still carefully avoid shorting anything.
It literally only took a few minutes and the swap was done.
When I started the engine I was rewarded about 30 seconds later with the huge surge of Mercedes current. (I had purposely run down the batteries a bit)
So far so good. One of the easiest upgrades/repairs to date. This is the relay I used. Its rated 200 amps continuous, which is about twice the current I have ever seen.
UPDATED: Note that I later added a Alternator Charging Switch on the dash so I could turn off the charge at times.
(Links are paid)
Leave a Reply to Ron Drozd Cancel reply