Update October 2022 – Looks like Vantop disappeared from Amazon. There are many there that appear to be the same manufacturer, but Wolfbox seems popular and well reviewed. See Amazon link at bottom of this article for Wolfbox.
For my RV (and most others unless you have a really small van) the rear view mirror is useless. Mine shows a view of my galley and bathroom area.
Besides being annoying, its a bit of a pain. When I start to change lanes I can use the side mirrors to check clearance. But I don’t know if a car behind me is just starting to change lanes also at the same time, a common source of accidents.
If a cop pulled up behind me and turned on his strobe or flashed his lights I would not know it.
I get a pretty good view from my back up camera, but I have to select it and keep it on full time to be useful, and I’d rather use my Pioneer AVIC Head Unit for maps or music.
And then I found this clever gadget. You just slip this over the stock mirror. Its hard to tell its even there. But its actually a sophisticated video display that runs a new rear camera (included). It also has a bunch of other features like a forward facing camera, recordings, etc.
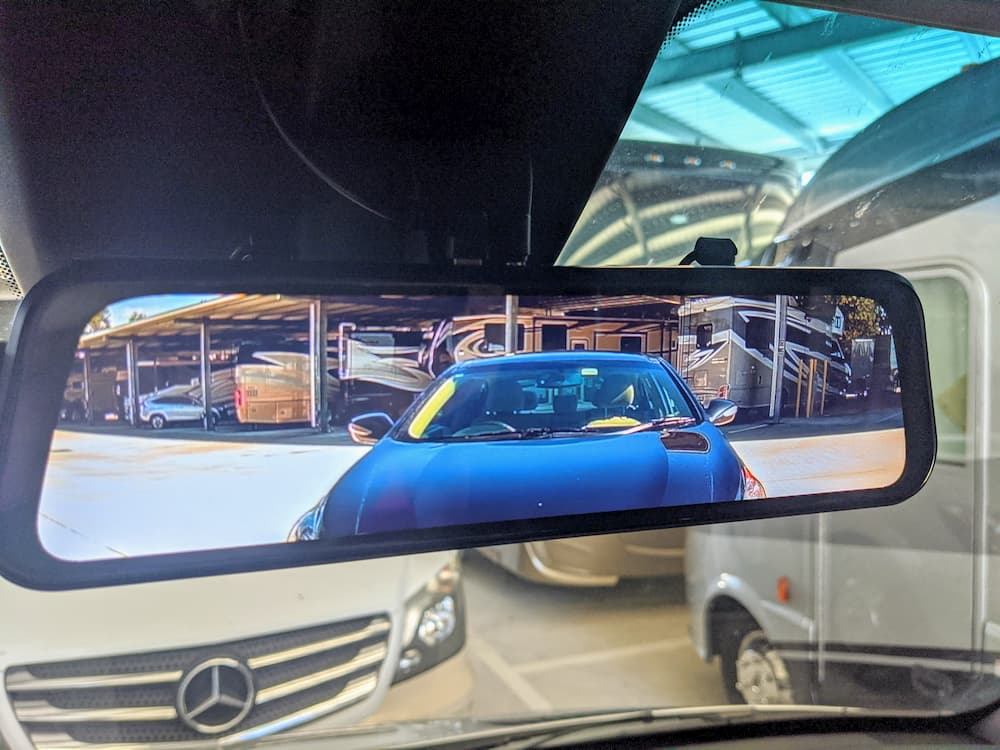
You end up with a rear view mirror that has a pretty convincing replica of what a normal car’s mirror looks like, only better.
What you are looking at above is the view from my rv in storage. My car is just behind.
So on to the install…
The mirror includes the cable and everything you need for most cars, but the camera cable is too short for my RV. You can just buy an extension on Amazon, but I elected to buy a 33 foot cable that will go from the rear of the RV all the way into the engine compartment, and from there a 10 foot extension runs up to the mirror with a couple feet left over which I coiled up in the engine compartment.
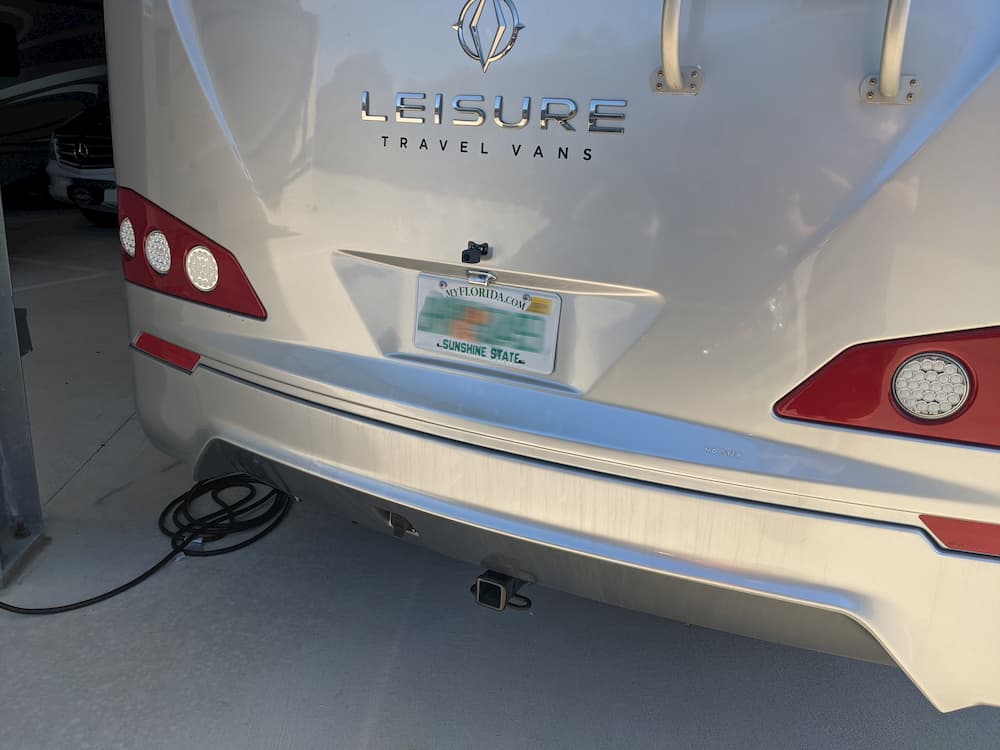
You want to start by mounting the camera. As you can see I drilled a small hole right above the license plate and mounted the camera there.
And close up:
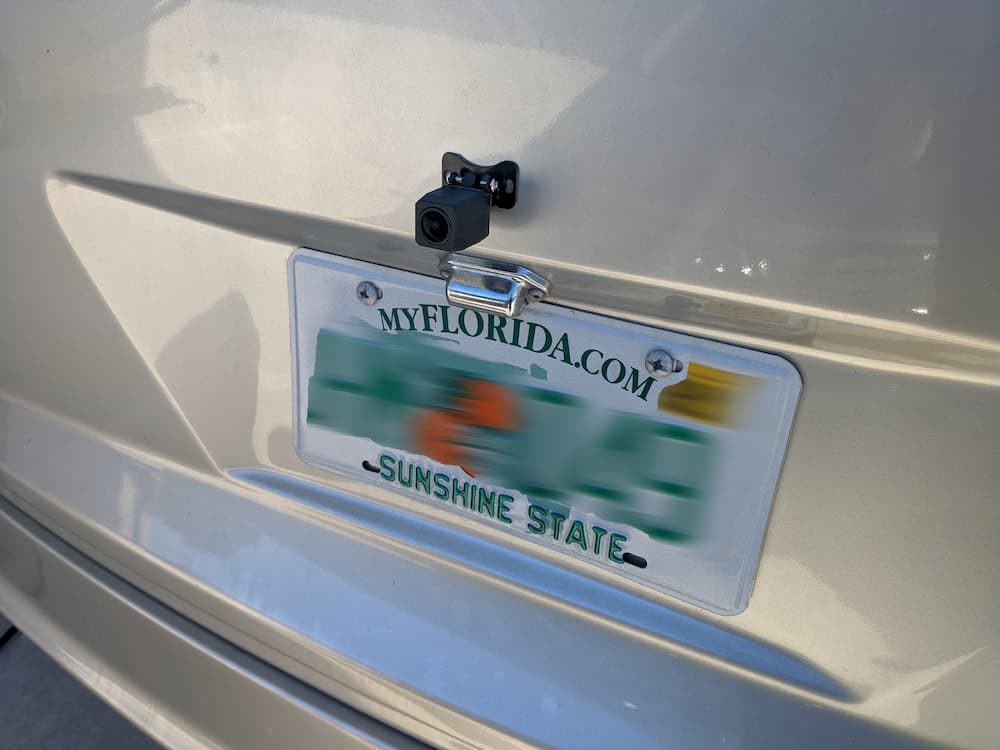
This looks pretty decent. Its stuck on with the vhb type tape included. My RV has a mask which is hollow inside so I was just able to reach my arm up behind to connect the main 33 foot cable to the camera.
From there, it just a matter of wrapping the cable with a wire loom to protect it and wire tying it to whatever you can all the way to the engine compartment. I followed other wire bundles as much as possible.
Some grunting and swearing is involved. The first half of the journey was very pleasant on my low profile creeper (link below). As you work your way up my van though the ground clearance diminishes and I barely fit under the last half even after ditching the creeper.
I just took my time. The entire project from rear bumper to mirror took 5 hours.
Once into the engine compartment, there are a couple rubber caps just waiting for you on the firewall, I popped one off and sliced a little flap in the rubber.
From there all the hard work is done. I hung the mirror, pushing the wires along the open ceiling headliner. A round cable clip to the Mercedes mirror mount kept the wire neat and nearly invisible.
Then pop off the left side “A” pillar and drop the wires down to the floor.
From there you can exit the hole in the firewall into the engine compartment and connect to the camera cable you just ran.
The kit also includes a cigarette lighter style power supply. For now I plugged that in to the top power outlet so it doesn’t draw power while parked. . When I get a chance I’ll hardwire the power supply under the dash for a more tidy installation.
It was really exciting to turn this on and see a crystal clear rear view mirror in my RV for the first time!
This is probably going to be one of my favorite projects. Fast, cheap, and something I’ll probably use about once a minute while driving.
Lastly I also ordered a class 10 SD card. The memory card, while not required, will record front and back video while driving and could be useful if something bad happens.
As usual I’m posting the parts list here, as well as the link to the creeper that made at least part of the job super easy.
Note: working under your van can be hazardous to your health! If you have stabilizers or levelers at no time should you have part of your body under them, and watch out for sharp or hot objects, also propane lines, power, etc!
Update: August 24 2020:
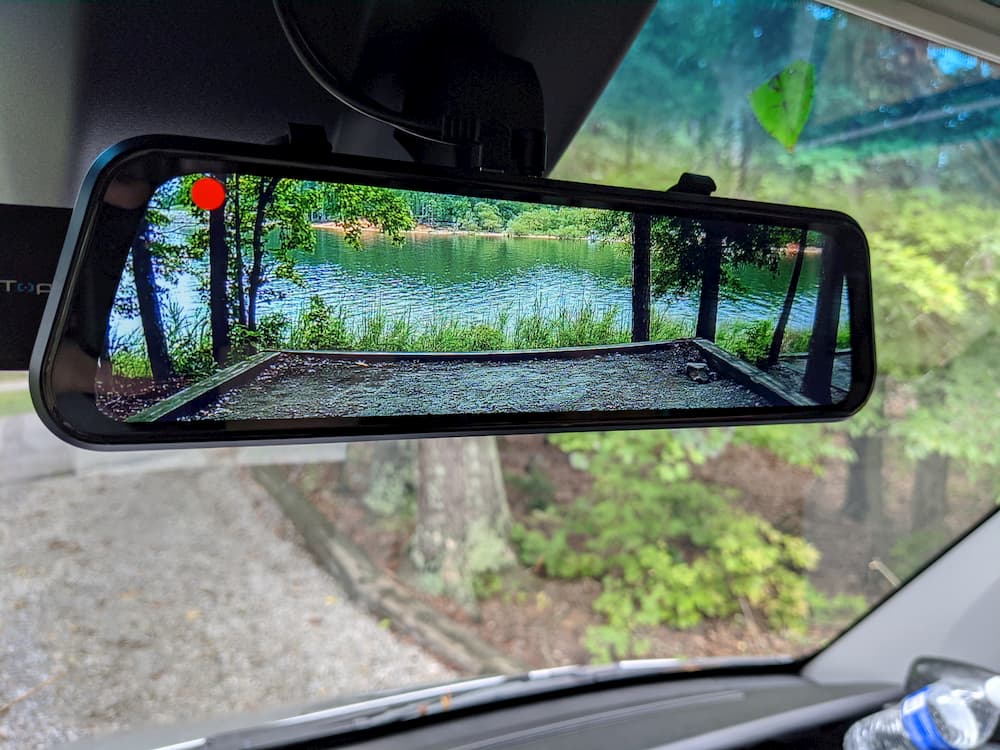
Well after using it a month I can’t say enough good things about the mirror. It crashed twice (reboot fixed it) but otherwise has worked as expected. At times the image seems too dark but its still usable. The other day while backing into a campsite we got this great view:
Update: Dec. 2022 Got tired of the dangling cigarette lighter adapter. You can buy a hardwire USB adapter, but I figured why not just install a hidden cigarette lighter socket under the dash. Then I can just plug this in, or any future mirror.
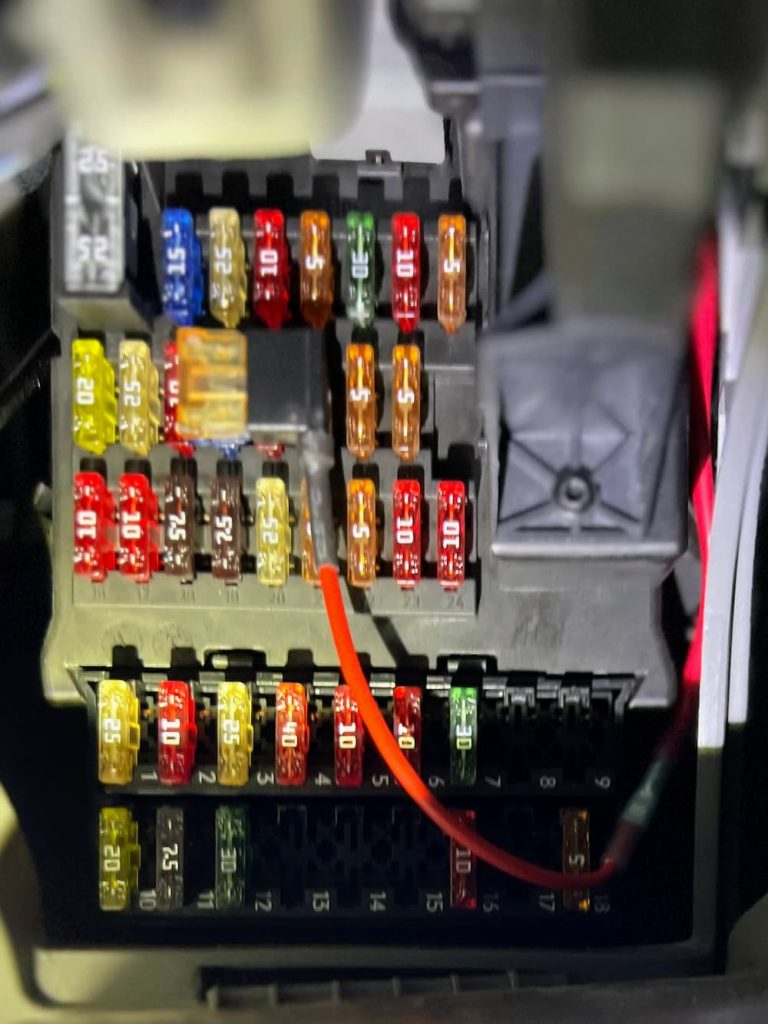
The first step is the “cheater fuse” (link below). This is a “piggyback” fuse holder that just snaps in where an existing fuse is. I thought #13 was my radio, but I’m not sure it is even used which is even better. So I just piggybacked a 5 amp fuse and wired a remote cigarette lighter socket that is hidden under the dash.
The piggyback fuse went here:
Leave a Reply to Franxisy Cancel reply