The “Fantastic Fans” in our RV work pretty well, but are definitely less than fantastic. The main issue is that water can come in when open. So they have elaborate rain sensors which work perfectly to close the fan at the slightest drizzle.
Which is a major problem when trying to sleep with the windows open. In our RV bedroom the fans cause a steady breeze in the window. When the fan closed the tiny bedroom can quickly become stuffy as the breeze stops.
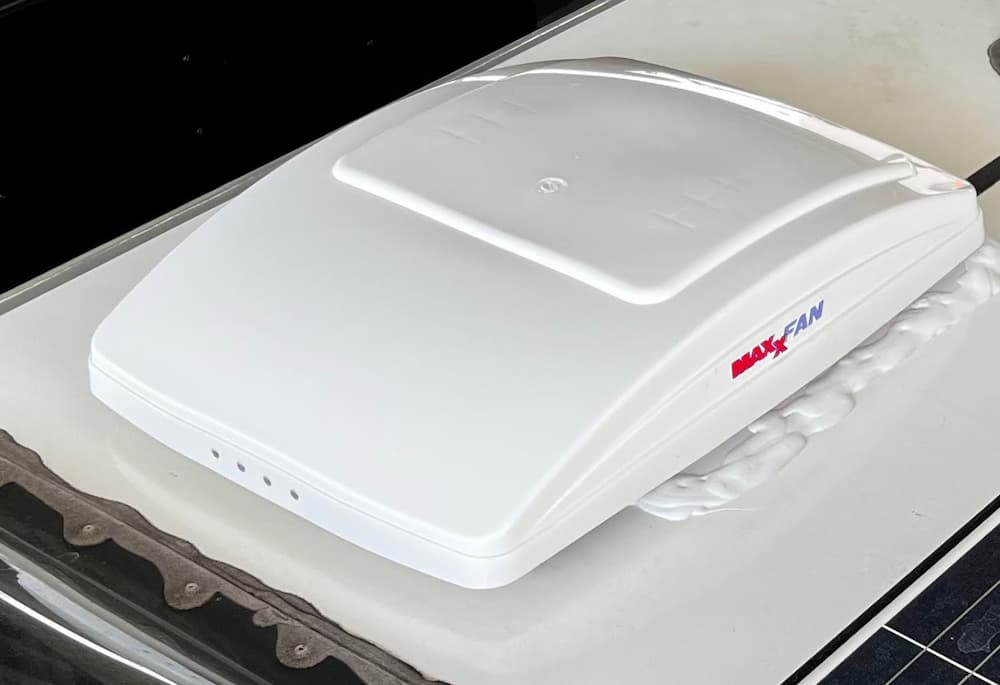
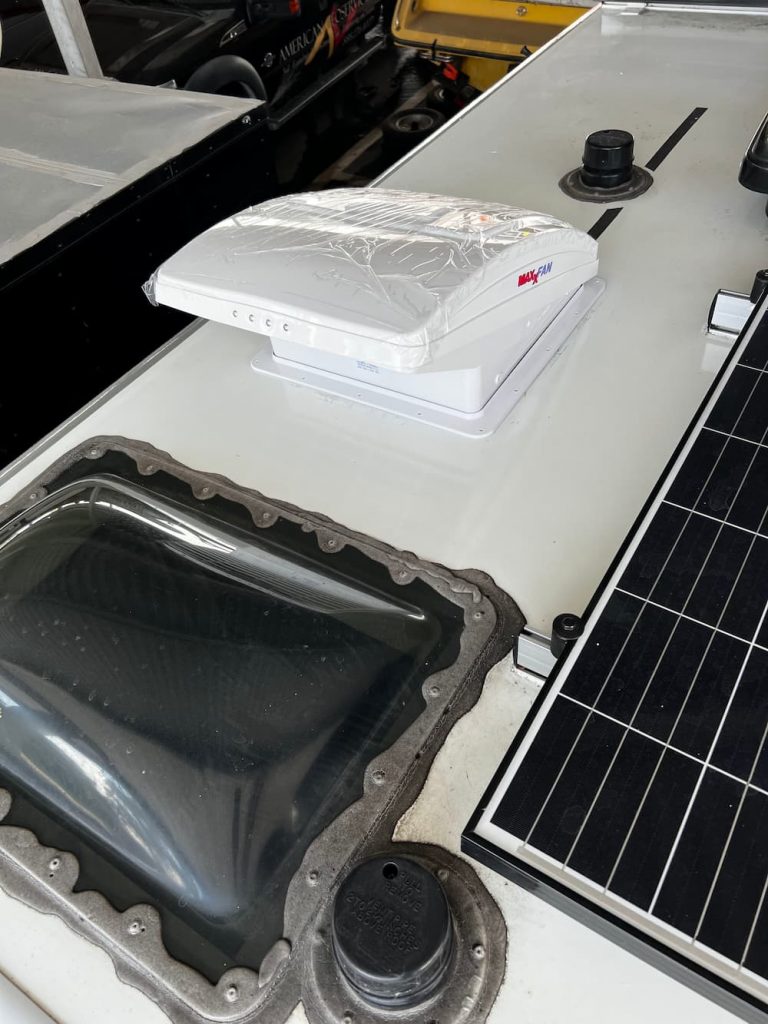
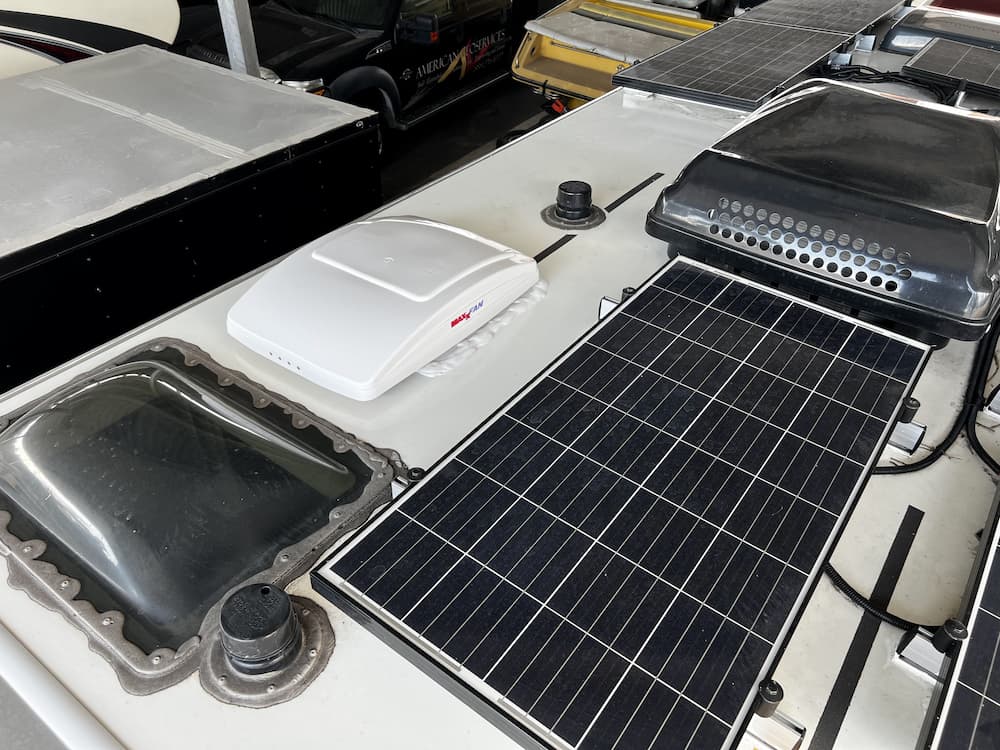
One solution is to just cover with a huge shroud. That was on our radar, until we discovered the “Maxxfan”. This fan is pretty slim and opens in a way that sucks in air from underneath the shroud, eliminating the need to ever close. It also has a lot of extra features such as 10 speeds and a reversing ability.
Unfortunately its larger, and my galley fan has solar just to the rear. But the bathroom fan has plenty of room aft, so that is the one we’ll be installing.
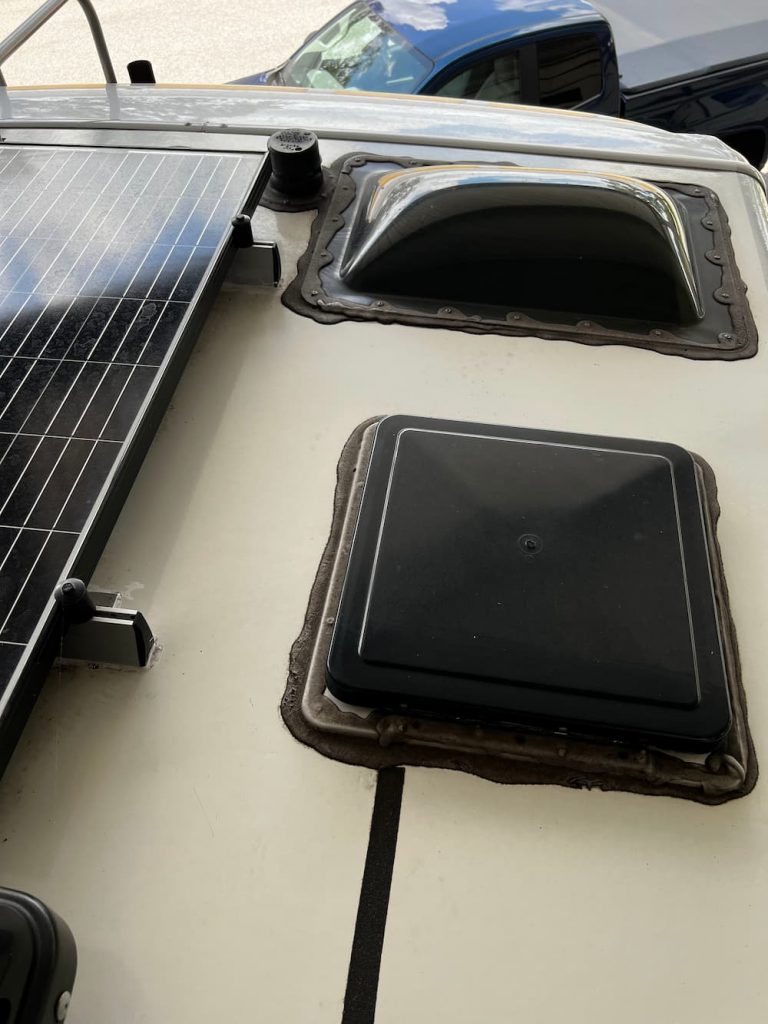
So lets get started! Here is the before pictures:
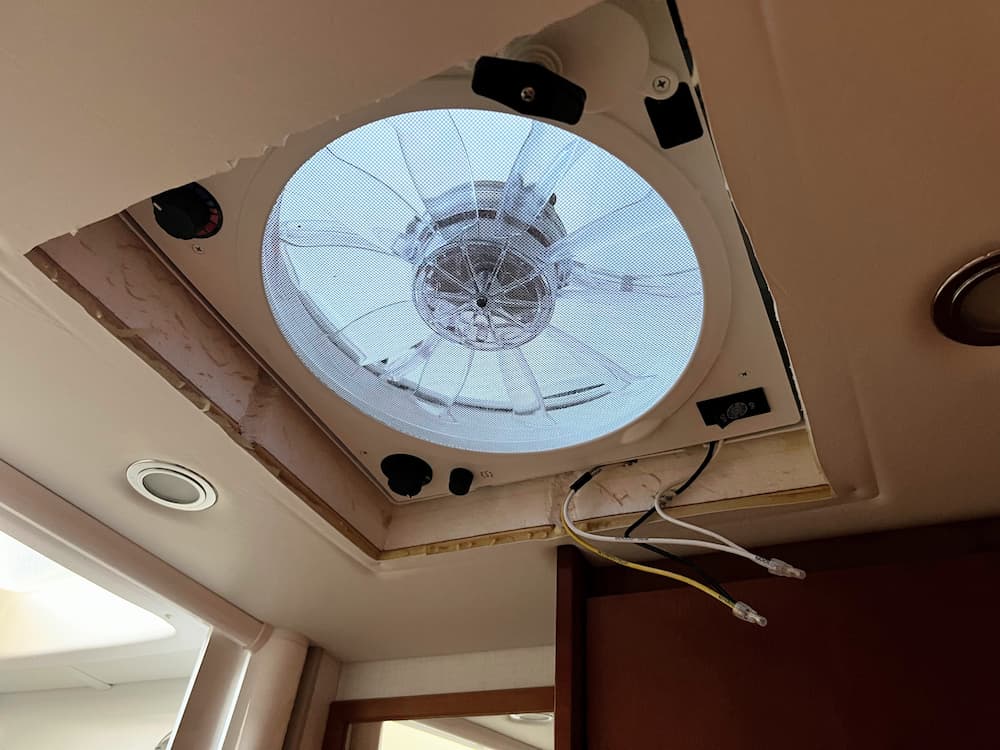
And underneath, after I removed the 4 screws holding the ceiling trim ring:
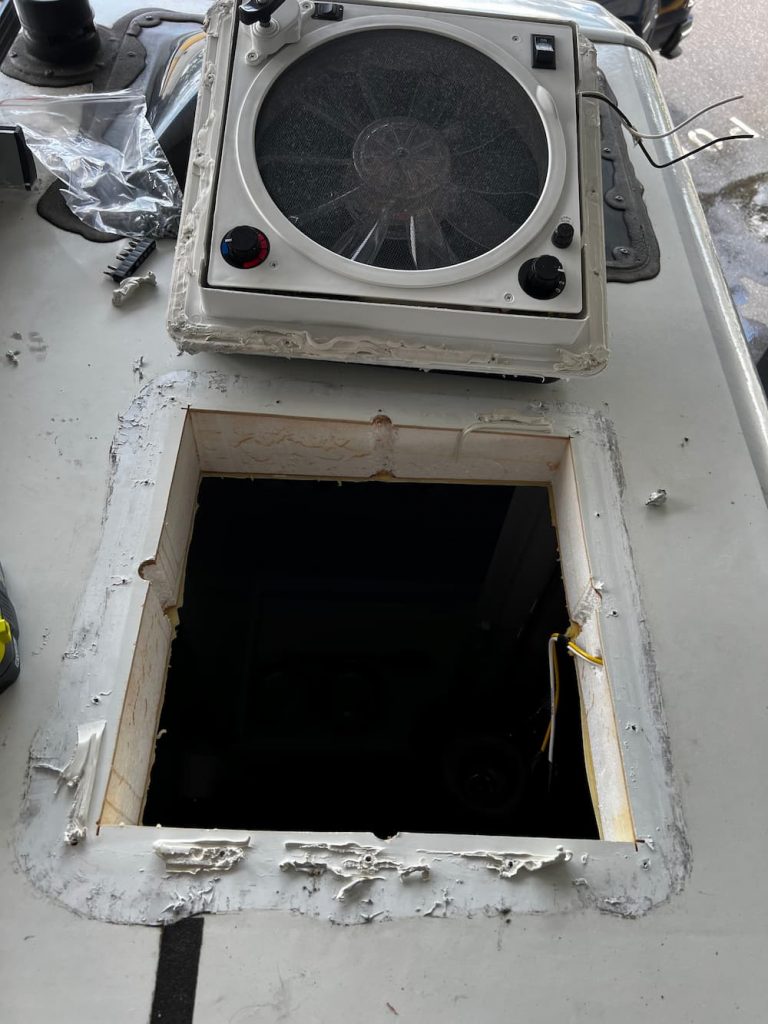
The first step is to remove all the screws from the roof. You can see the heads on some but I used a scraper to pry back a layer of Dicor first and then removed all the screws. Finally gently prying with a scraper after cutting the caulk around the edges.
Its was actually quite easy, and then you gently remove the whole fan assembly. (First cut the wires below of course.) In theory you should turn off power, but I was careful not to cause a short.
After that a little bit of preliminary scraping with a “5 in 1” scraper tool from Home Depot.
Its not a bad job. I used some alcohol, the scraper, and some elbow grease, and it was clean pretty quickly. It doesn’t have to be flawless as you are going to immediately cover the hole anyway.
Nest I did a test fit with the trim ring and dropped the fan on, just to double check everything. It comes with pretty good instructions. The safety wrap is still on the fan here. Towards the bottom you can see the two screw holes that secure the fan to the external trim ring.
The next step is to glue and screw the topside trim ring on. The instructions recommend applying caulk (Most use Dicor) and that appears to be what LTV did for the old fan. I thought that might be messy as all the caulk shoots out all over the roof as you tighten it, so I instead placed 1″ eternabond tape on the bottom of the trim ring before pressing it down.
In hindsight, both methods have their advantages. The eternabond is potentially less messy but that stuff is so sticky its annoying to use. Also once the trim ring touches the roof you cannot reposition it with eternabond.
After sticking down the trim ring I installed all the screws and then finally used a full tube of self leveling Dicor to cover all the edges and screw heads.
There are 4 screws that hold the fan to the trim ring. The instructions said to push the metal clips all the way down, but on my fan they all had to be backed off about 1/8″ for the screws to align. From the sides I used a pointy awl tool to align the metal clips to the screw holes.
Inside, you are supposed to cut the trim ring to fit the slope of the roof. The old fan trim ring was near identical and still fit fine, so I simply reinstalled the old ceiling trim ring after connected the 2 wires and crimping the connectors on.
Also, you get a remote control which I mounted in the galley. The remote is nowhere near as useful as it could be because it uses optical transmission. So you have to remove from the holder and point it at the fan.
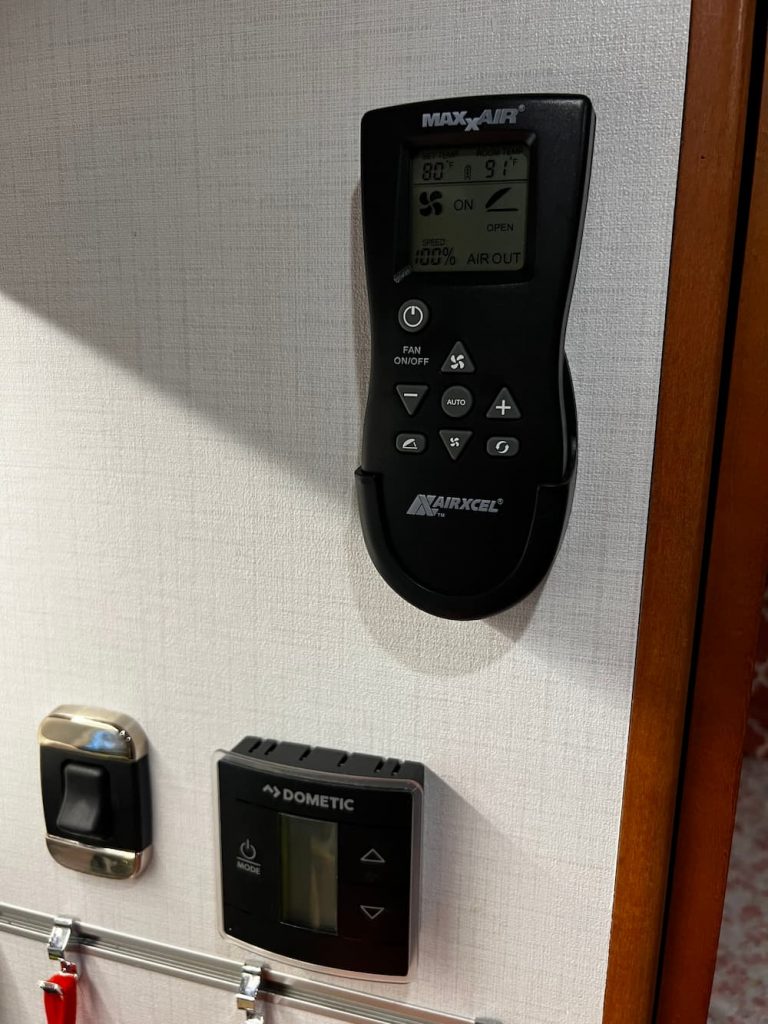
Other than that minor annoyance this was a quick install and a really great addition. It sounds minor, but being able to use the fan continuously is really important. For example, in addition to sleeping comfort, in mild weather we can leave the dog in the RV and not worry about the fan shutting off.
Here are all the parts and supplies I used for the job. Note that there are several variants of the fan (white or black and “deluxe” or manual. (I bought the better “deluxe” model in white.)
<Links Are Paid>


Leave a Reply