The Epoch 300 is so popular that they are literally everywhere. And for good reason. It’s a high quality budget battery made by Roypow, which is a Chinese conglomerate with a good reputation. It normally sells for $995 but with the Black Friday sale after thanksgiving I purchased mine for just $799 each. The price, quality reputation plus their diminutive size, made them a no-brainer for me. I got them ahead of any tariffs coming which may affect pricing in the future. $1600 for 600 amp hours is incredibly cheap compared to just a few years ago when the equivalent Battleborns would have come to $6000.
For starters my Discover Blue 200’s are going to be a tough act to follow. These batteries have a bunch of killer features almost never seen in lithium batteries. A user replaceable BMS, built in terminal fuses, and screw down simplicity to begin with. The Epoch has none of these, but packs 50% more spinning electrons in (roughly) the same package size, so I am willing to forego some convenience to raise my battery farm from 400 AH to 600 AH.
I always start with a full capacity test to make sure the batteries are working properly. So using my old Magnum inverter, a small Vicron charger, and a cheap battery shunt off Amazon, I fully discharged each battery to around 4% to be sure all is good. I’m too lazy to go through all the bother of installing these only to discover one was damaged internally by being dropped by Fedex. For testing I used a hair dryer set on low, which is around 750 watts.

As expected they worked great.
For background info, I use some clever Marinco products to simplify and improve installation. The genius of the BEP line is that these products all connect together using heavy duty busbars. (Links to products below).
On my desk, it looks like this:
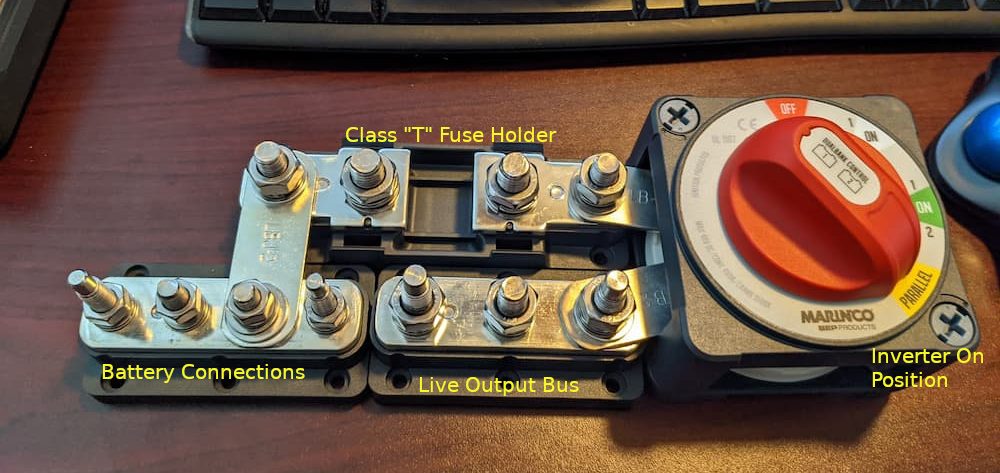
Originally I designed this for 3 batteries but for now I am using only 2. If you follow the battery bus bar, it leads to the class “T” 350 A fuse. That connects to the switch, so you can easily turn off 100% of the rig for safe long term storage with no parasitic drains.
The first 2 switch positions are both “ON” but the “Parallel” click is where the inverter is connected. You can’t see it in the picture but the inverter is connected where the switch says “Parallel” with huge 4/0 wire. So there is another safety/convenience feature here that unless you click down to “Parallel” the Inverter is 100% disconnected from 12 volts, which is useful for storage or maintenance.
So in one convenient package here we have the ability to switch off batteries and/or inverter and all without any wires.
Mounted, it looks like this:
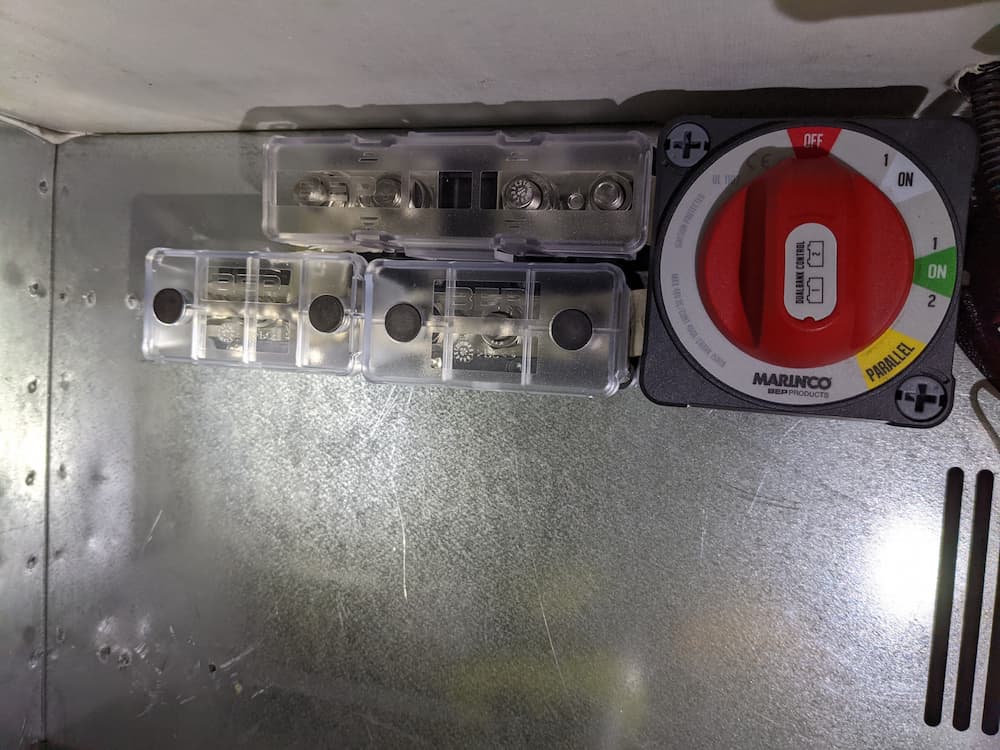
The “bus bar” method is the safest and best way to interconnect batteries. Each battery will have a terminal mounted Blue Seas 250 A fuse and use 2/0 wire.
The connections to the Marinco assembly above use 4/0 wire as they carry the aggregate current. The class “T” fuse is conservatively rated at 350 amps which is less than the 2 batteries can continuously produce but much more than I could ever be wanting to use at once. It also keeps it around the 300 amp continuous rating of the factory installed Bussman Mega fuse holder.
So on to the batteries themselves. I added Blue Seas 250 amps terminal style battery fuses so each battery is individually fused. This protects a high load or dead short in one battery from ruining the other one hopefully. (I never trust high current overload shutdown after the Lithionics debacle where they were found to melt internally under high load.) While the Lithionics failures were particularly egregious, Will Prowse has pointed out this feature is not always reliable on other batteries as well due to software errors or just poor design.
I bought a 4 foot long piece of aluminum 1″ angle stock from Home Depot, and cut sections to use as battery mounts. It is extremely important that these batteries be mounted permanently and rigidly to prevent vibration damage or worse (like a fire from loose connections). Also a 1″ flat aluminum bar to hold down the top, with some Amazon “J Hooks” holding it down.
If you look under the hood at a modern car the battery is typically housed in a metal box and held down with bolts. If you look at a typical aftermarket house battery mounted in an RV by the owner, not so much. I’ve seen everything from nothing to packing foam blocks to string being used, none which works as well as metal.
The greatest challenge by far is mounting these in a small enclosure! I sure wish battery makers would take a hint and add screw mounts like my Discover batteries. But lacking that, I bought some Home Depot Aluminum 1″ angle stock. Its hard to see in the other pics so I zoomed in:

So basically I installed one in the rear and both sides and although its quite rigid now with the top bar I will put a little foam spacer between the batteries and the front metal just in case the top bar should rattle loose someday.
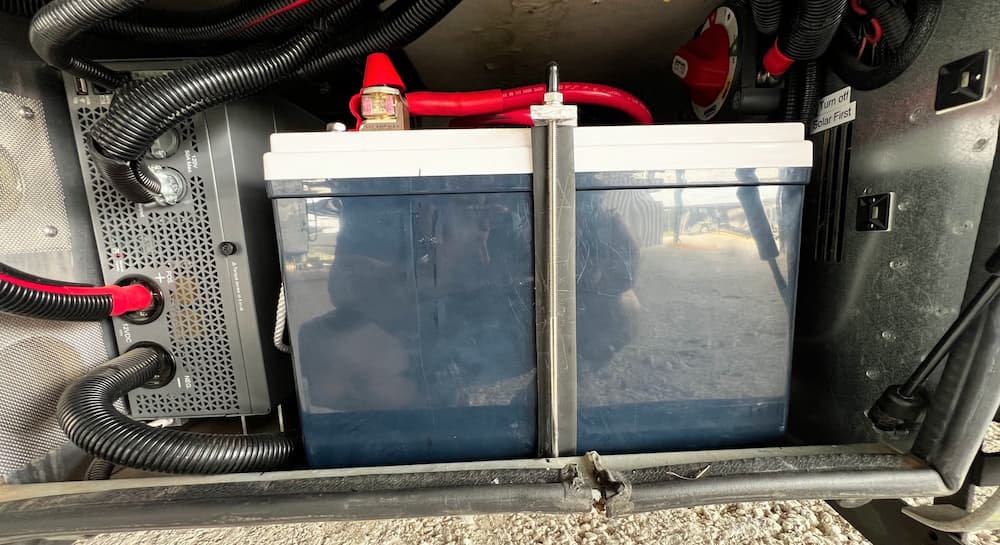
This is the final picture powered up and running. The mount is tough enough to take the jostling that we sometimes encounter on back roads out west leading to remote camping spots.
Note that my inverter was moved to the left side (long story) so I installed the batteries in this orientation. This way the bms (which is now on the right side of the battery in picture above) is right next to an air vent for cooling and away from the inverter. For a standard Unity with the inverter on the right side the batteries would usually be flipped around with the Epoch logo showing on the front.
When connecting, I first checked to make sure both batteries were very close in voltage, with less than .05 volts difference. Then I connected the positives first (both batteries) and finally the negatives after making sure my Marinco master switch is off. There is just enough room inside to (barely) connect the negatives, and fire up the app and with satisfaction watch the battery that had a tiny more charge drain off to its neighbor.
And lastly turn the Marinco switch to on. Wait a few seconds. This is to allow the battery to fully boot and stabilize. (Not really needed in this scenario, because the Epoch BMS seems to be always on and my Xantrex inverter does not have a huge inrush current like the Victron does, but good practice anyway). Then to “Parallel” to connect the inverter.
The Epoch bluetooth app is pretty good and includes the ability to turn the MOSFET (internal transistor switches) on and off – both charge and discharge. Since the battery uses an off the shelf “JIABAIDA BMS model jbd-sp04s060” there are probably a dozen apps you can use. I’ve tried a few. Some allow you to save the (dozens) of bms settings.
Which leads to the only thing I hate about the battery. There is no provision for a Bluetooth password. Because of that, a camping neighbor could, through mistake or willfully, turn your batteries off, or even worse, change an internal bms setting and fry them. (The Epoch app does not allow this, so most campers woudn’t have that ability).
This is all extremely unlikely obviously, but still, in the world we live in today, it would have been better if Epoch had setup the Bluetooth dongle to enable a password, or only allow pairing when a switch was pressed or something.
The Epoch BMS is very standard. I setup all my chargers for a 14.2 volts absorption, a 13.5 volts float, and a 30 minute fixed absorption time with zero tail current. I let the Xantrex top them off, and everything looks to be working great so far.
March 2025 Update:
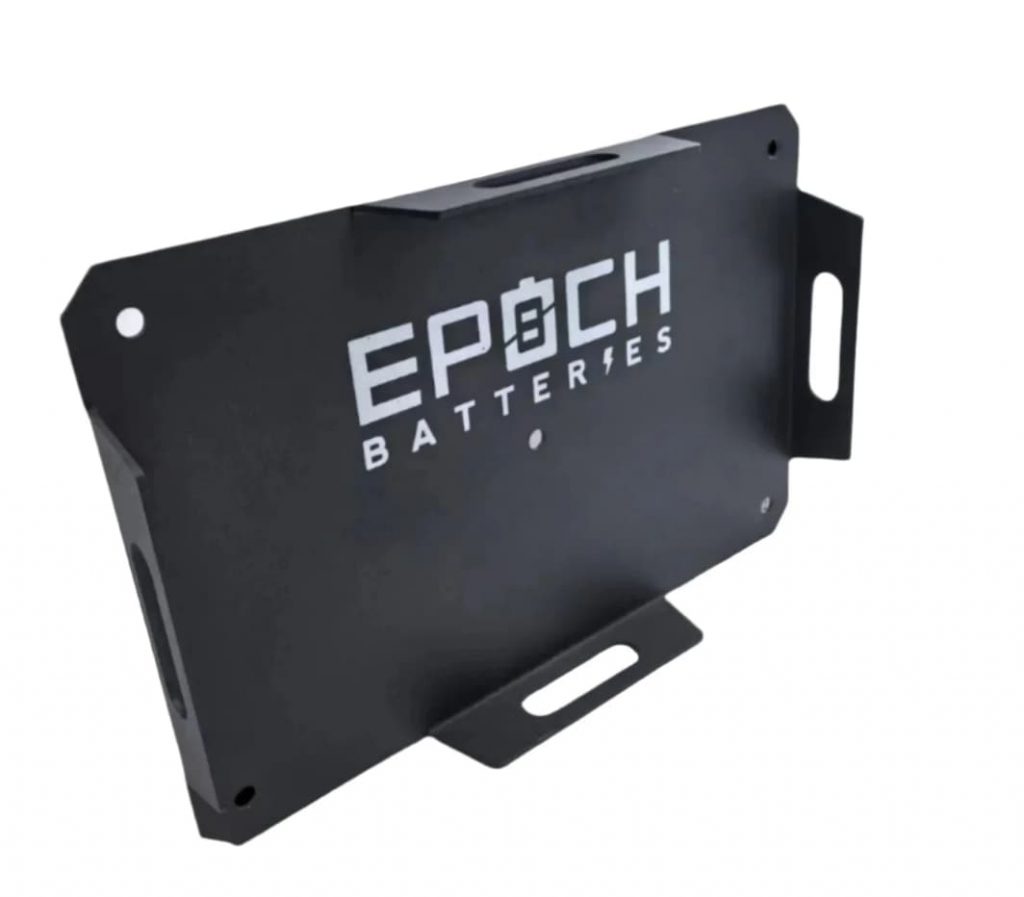
Batteries working as expected. I happened to visit their website one day and now they sell these gems: Would have saved me an hour or two’s work buying, cutting, and installing sheet metal brackets, so this would be the way I would go if installing now!
October 2025 Update
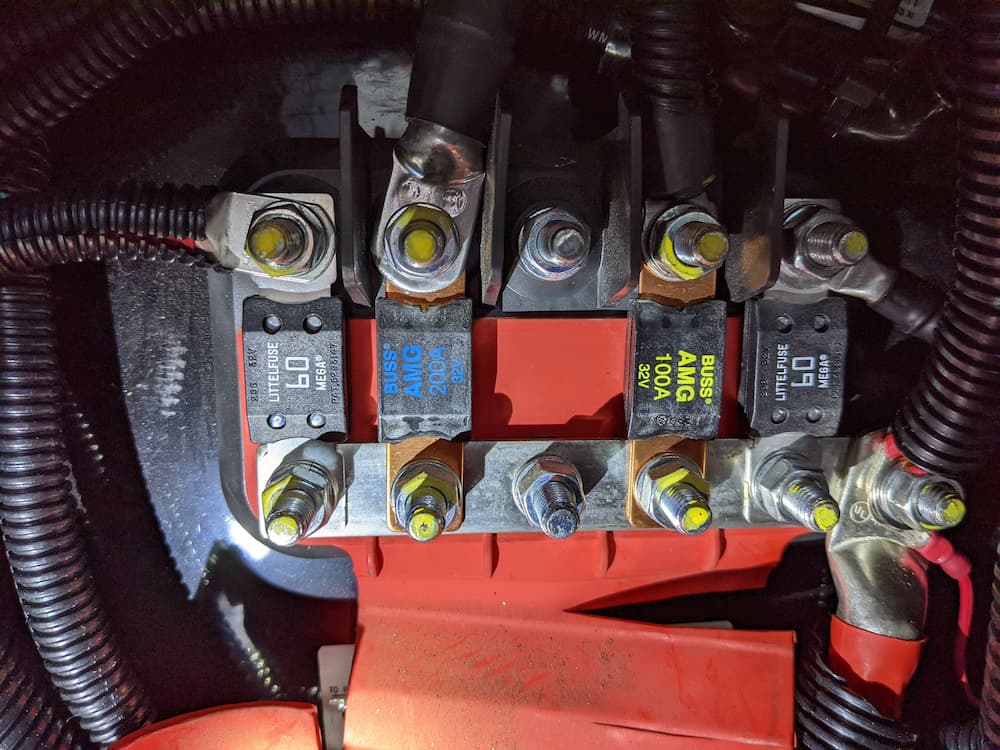
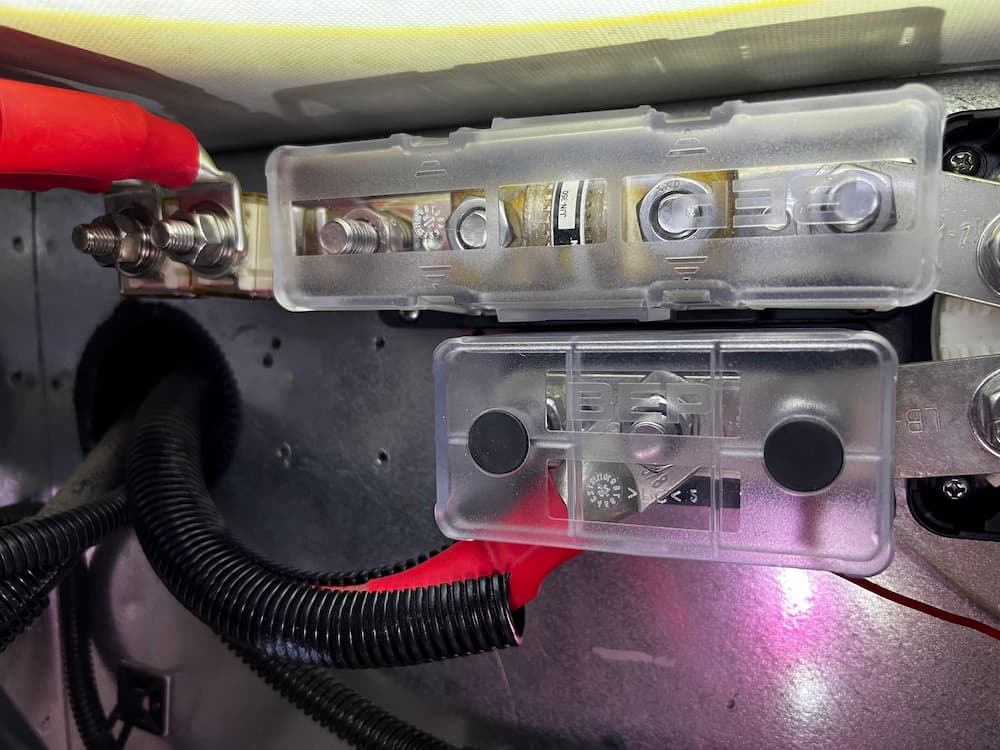
After my Xantrex failed on the road I had to remove the batteries to service it. The battery mounted terminal fuses became a real pain! I don’t have much clearance, and they were a friction point getting everything torqued down easily and safely. Thanks to a conversation with another LTVer, I became aware that they also make a dual terminal fuse. The beauty of this is I could just hang it off the Class T fuse, eliminate a bus bar, and make it much easier to slide batteries in an out.
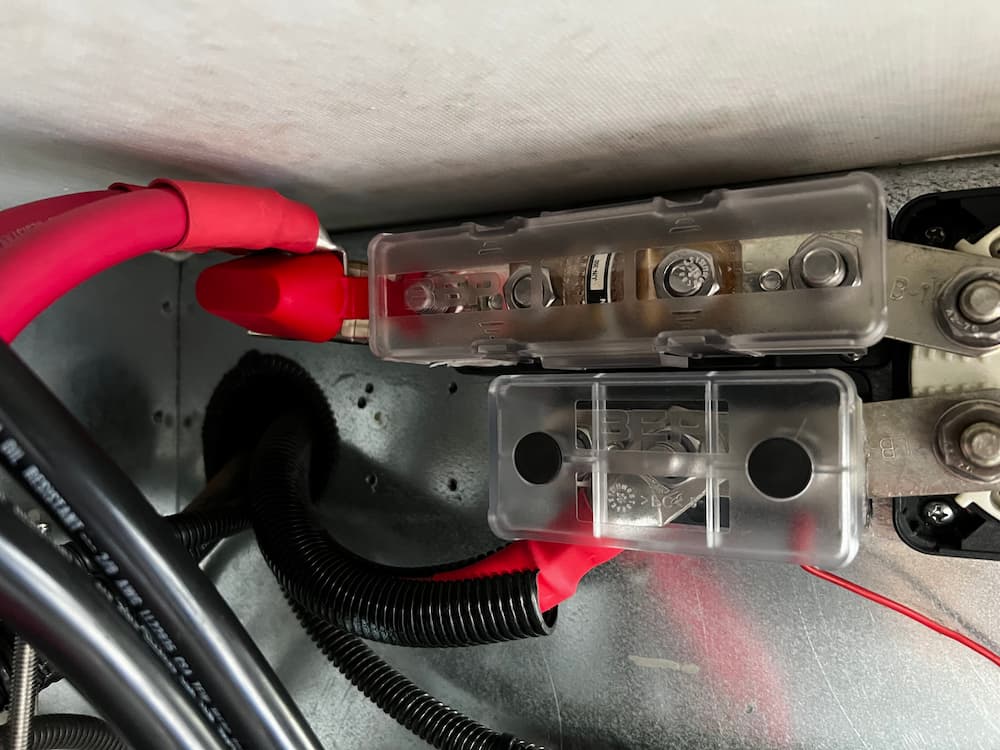
So in the picture above you can see the fuse bar hangs directly on the Class T fuse, and gives each battery a 250 amp fuse – but moved the fuses off the battery for simplification. Before I mounted the red safety cap it looked like this:
Some of the stuff I used, besides the batteries themselves:


 MRBF Dual Fuse Bar
Leave a Reply