Now that I have successfully “hacked” my RV refrigerator, I would like to improve the thermostat. My goals are:
- Lower frost by lengthening cycle times
- Remote internet monitoring and settings!
- Add dual thermostats so the freezer can be monitored as well and the compressor started if necessary
Most of all, add the ability for something that engineers call hysteresis. This means, sure we can turn on the compressor when we begin to hit unsafe temperatures (around 40 degrees in the fridge or anything above 15 or so in the freezer), but how cold should we then shoot for?
Since we only have a single compressor, if we zoom it down to 32 degrees and then wait for it to get back to 40 until we turn it on again, we will have a nice long defrost cycle and all the ice crystals on the wall will melt and flush away. But being off for 40 minutes, the freezer may drift too high.
The factory thermostat works perfectly in the “average” conditions it is set for (probably around 72 degrees ambient). But if it is very hot or very cold, the fridge does not work ideally anymore, and in a nutshell that was the impetus for this project.
Since I have *way* too much free time right now, I kinda went overboard. But hey, safe cold food storage is real nice to have while traveling.
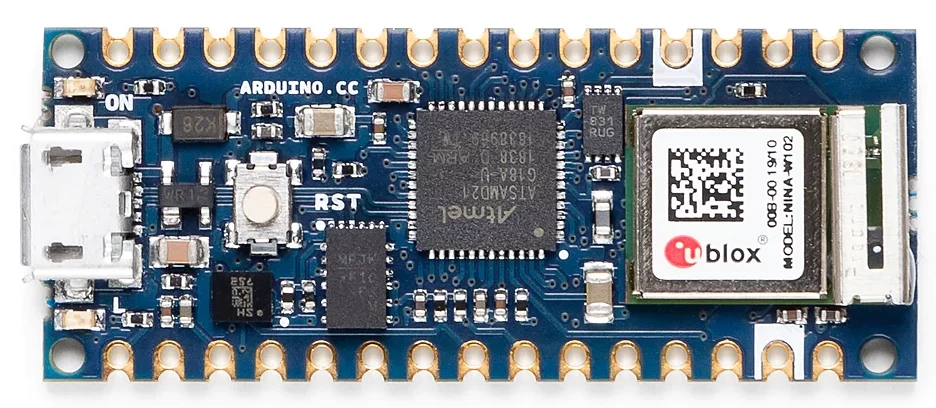
For this project I thought I might use an Arduino board. I have never seen one before but was vaguely aware of the low cost tiny microprocessor boards that are easy to use. After a little Googling I selected the Arduino Nano 33 IOT (Internet of Things) pictured:
Why use a microprocessor for a thermostat? Well the Adruino has both Bluetooth and WiFi. I already have the super nice SensorPush Wireless Thermostat in both my refrigerator and freezer. So my idea was to monitor the Bluetooth thermostats and then start and stop the compressor accordingly.
The first little bump in the road I found setting this up was, while the Nano 33 has WiFi and Bluetooth, you can’t use both at the same time! At least without a whole lot of hacking.
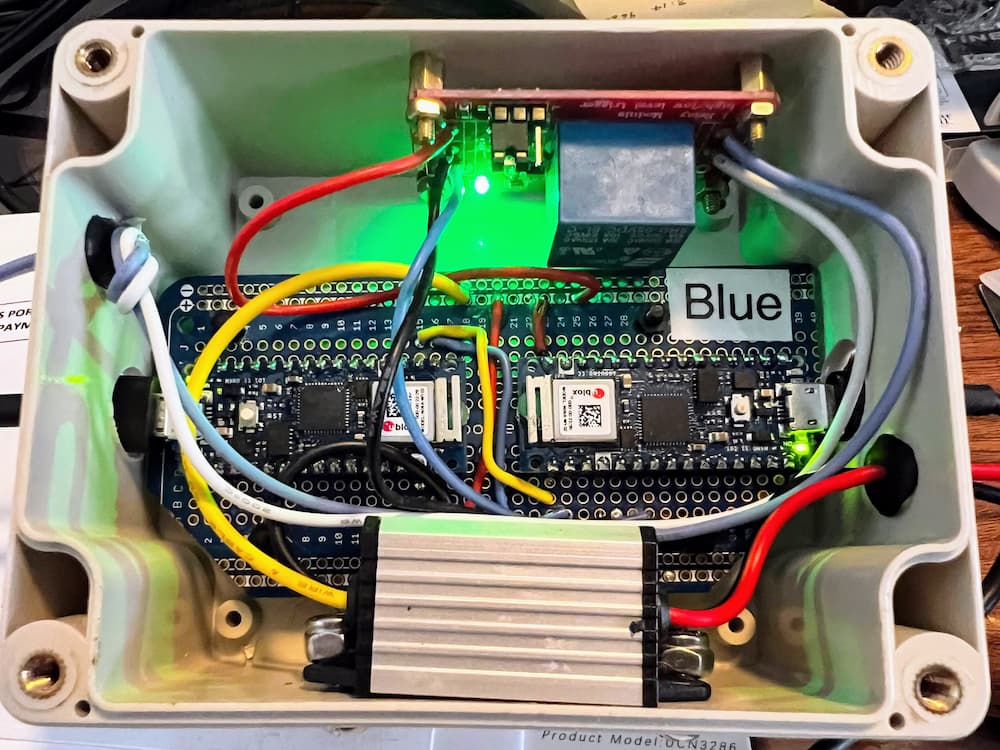
So my solution was, just use 2! So here is a breadboard of my experimental project. (Later on I will solder a permanent version for bumpy roads; this is just for testing).
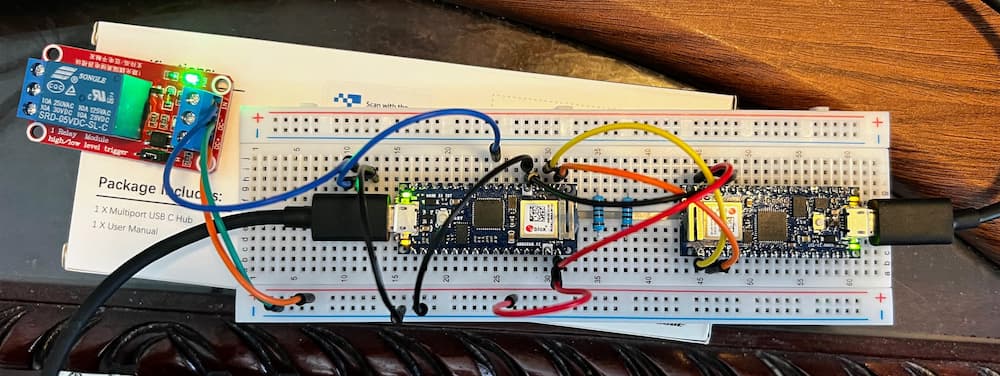
So, what we have here is, the board on the left will control the refrigerator. As you can see its wired to a 5 volt relay that will connect to the Secop thermostat contacts. This board reads the current temperature via Bluetooth of both compartments, and starts or stops the relay as necessary.
The board on the right is totally optional. This one is the “IOT” (Internet of Things) part of the setup. It exchanges data through a serial UART connected to the companion board, and relays information to the Arduino Cloud where I setup this nifty dashboard.
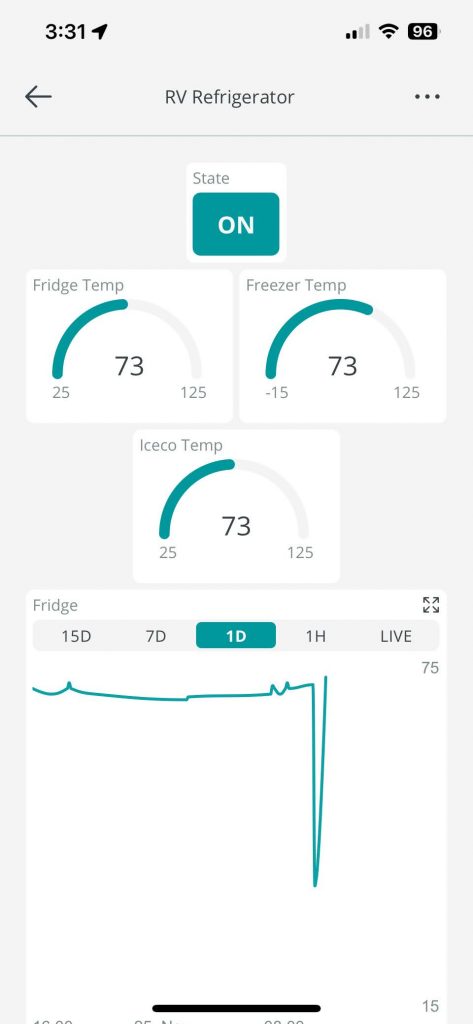
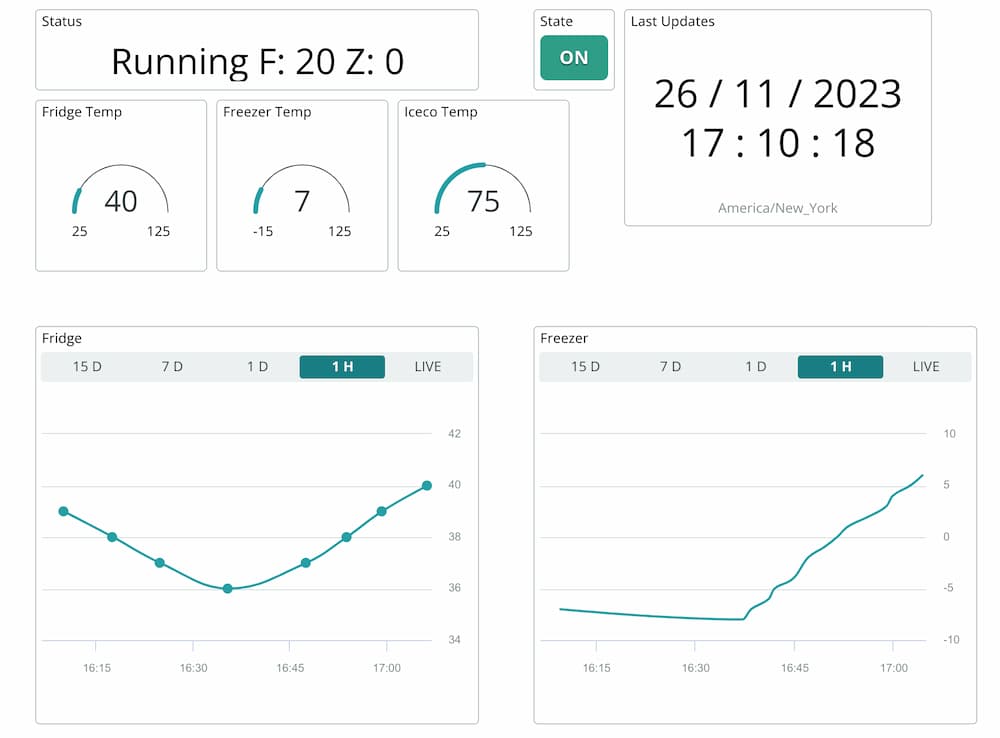
The first page shows if its running or not. It also shows you the current temperatures. (The third sensor is my Iceco wine cooler). The graph shows you the historical temperatures as well.
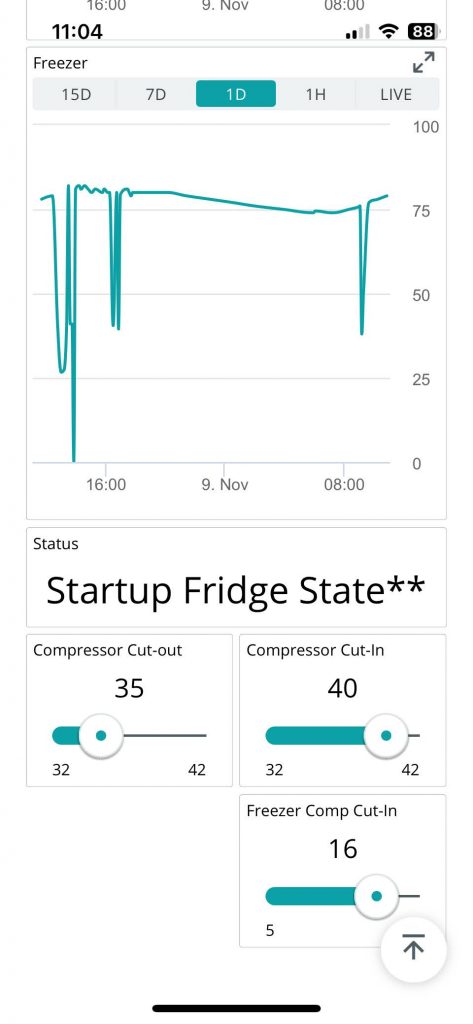
The second page of the App shows the freezer historical graph. And at the bottom 3 settings:
- Compressor cutout – stop the compressor at this temperature.
- Compressor cutin – start the compressor at this temperature
- Freezer cutin – start the compressor if the freezer reaches this temperature
Sounds confusing at first, but makes sense if you think about it. You primarily want to keep the fridge between 35 and 40. (I keep these sensors in the warmest parts of their respective compartments).
The freezer you want as close to zero as possible (sometimes its well below zero), but occasionally, if the compressor is off for a long time (usually during cooler weather) the freezer can start to get too warm, so at 16 degrees I will start the compressor even if the fridge is not calling for it.
I can tweak these settings later. And I may have to play with them if in different climates. In 100 degree weather for example, I might find that the fridge never gets below 35 and thus runs continuously, so I could bump it up a degree or two. But my hope is that 90% of the time I would never need to change anything.
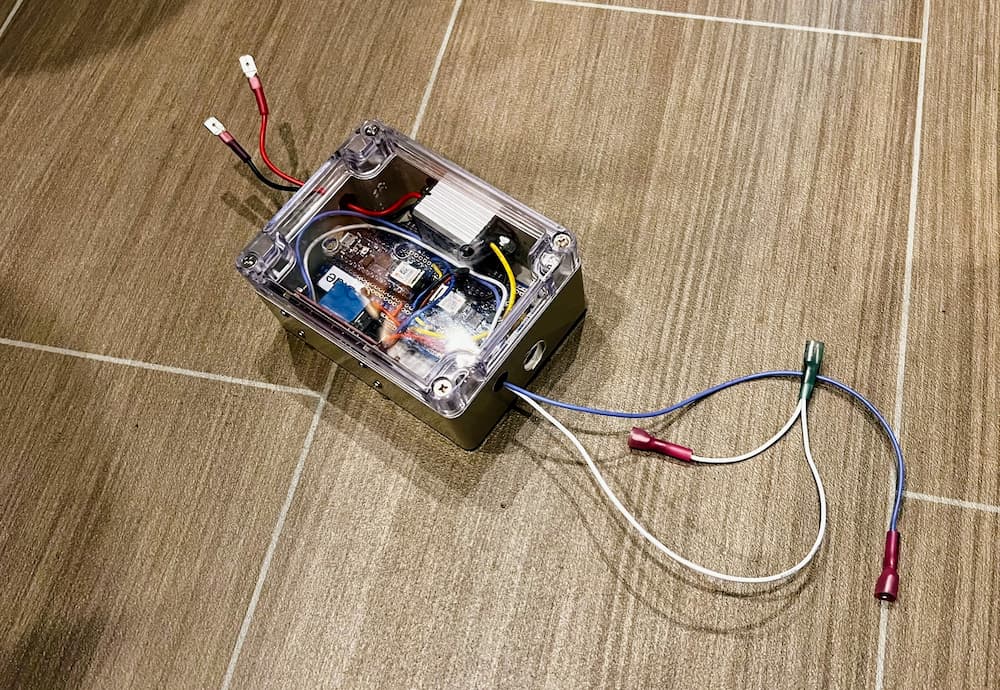
After a bit of programming I have a prototype that seems to work pretty good, so I soldered together a more robust version:
This permanent version has a small “buck” converter that will convert my 13-14 volt RV battery to the 5 volts needed, the relay module, and the (2) Arduino processor boards.
The blue and white wires connect to the refrigerator and the red and black wires are for power.
I’m off to run some preliminary tests connected to a real fridge, and see how it works, but so far its all looking great.
I will post the results in the coming weeks and month, as I test this in real travels…
(Later the same Day)
Holy Crap it works! Fridge cooled down in about 2 hours. Compressor cut off at 36, back on at 40. Freezer ranged from -8 to 7 degrees. Defrost (off) cycle was about 30 minutes, so these are good settings at this pleasant weather of 75 degrees anyway…
Leave a Reply