Note: This is an older post and I have subsequently upgraded to 300 AH of Renogy Lithium and a Xantrex 3000 XC Pro Inverter.
Its like a domino. Each thing I kick in the RV causes some new deficiency to be noticed, that either wasn’t there before or had escaped my attention.
After all my upgrades I noticed that the stock Magnum inverter/charger doesn’t work well on lithium. It sorta works much of the time, but on generator instead of the constant 50+ amps that I expect it enters yo-yo mode, i.e., it zooms up to 55 amps or so, then after less than a minute stops, then starts to creep up again.
I called Battleborn and they said that model “doesn’t work for Lithium”. I called Magnum tech support and they said there was a voltage drop from the generator (there isn’t).
So I decided Battleborn is right.
I looked around at inverters/chargers, especially the Victron, but they are big, heavy, and expensive, and I don’t have any problem with my Magnum 1000 watt inverter. (The only thing I ever run off it is the TV and the Roku.)
Then I started noticing you can get really cheap but good quality chargers and inverters if you buy them separately for some reason. So I decided to add a seperate LifePo4 charger in the adjacent compartment.
The magnum has a setting to turn the charge down from 90% to 0%, so the great thing about this is, if my new charger ever fails I already have a backup.
So on to the install!
The Progressive Dynamics PD9180ALV 80 Amp Lithium Charger requires a 20 amp commercial style outlet, so I decided to cut the 20 amp circuit feeding the magnum and install the outlet to share.
As long as I run only one at a time that’s fine.
The first step was to punch two holes in the compartment with an electrician’s greenlee punch set. Those holes come out surprising smooth and free of burrs but I covered the hole with a “bumper” anyway:
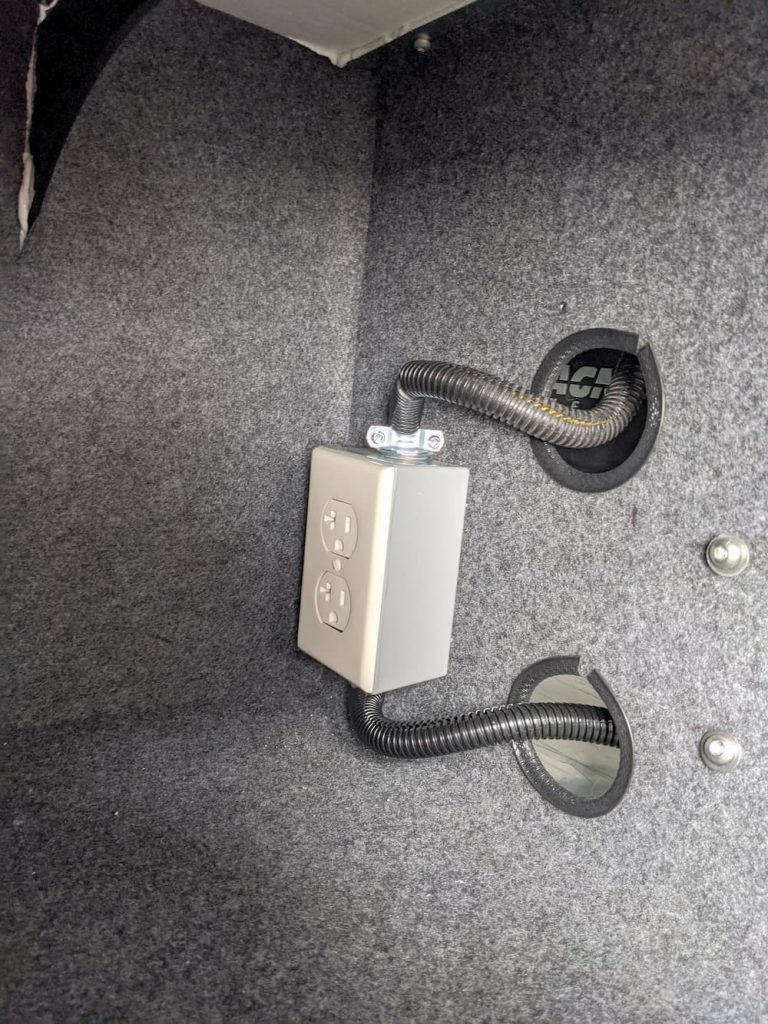
Then I was able to (just barely) open the magnum AC cover and pull out all the wires without dismounting it. Then I ran that over to a new AC receptacle to share the 20 amp circuit.
This whole operation was not hard, but its a really tight space and cramped and it was a bit tedious for sure.
After that it was just a matter of hanging the thing on the wall.
I ran 3 foot 2 GA wire to the Magnum posts to share the battery connection, again, because I will run only one at a time.
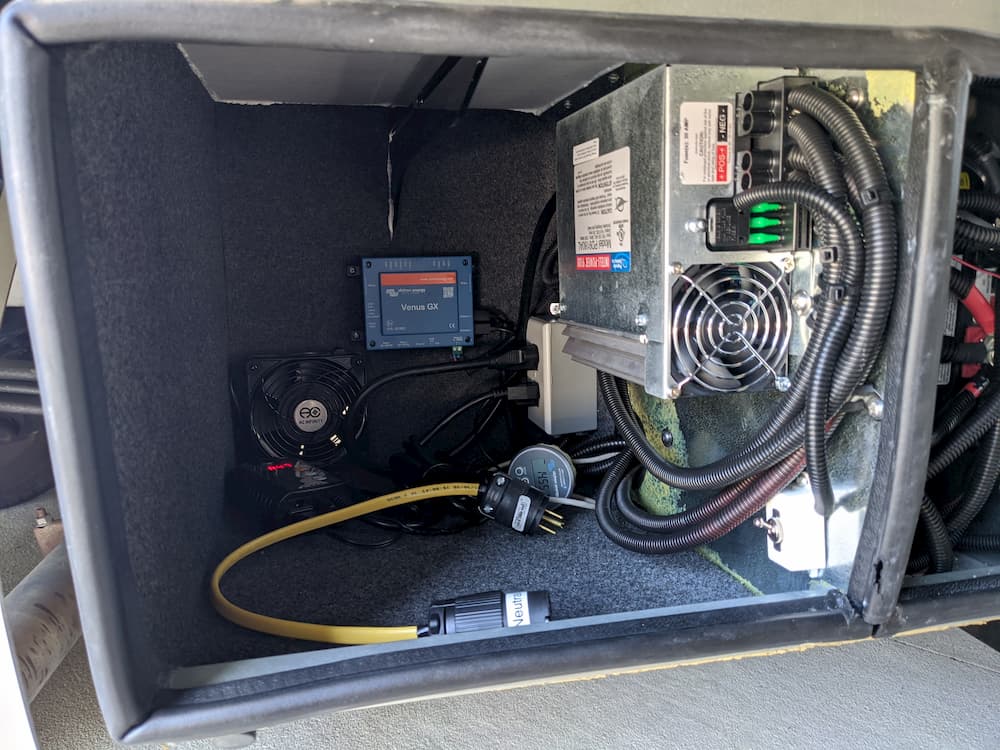
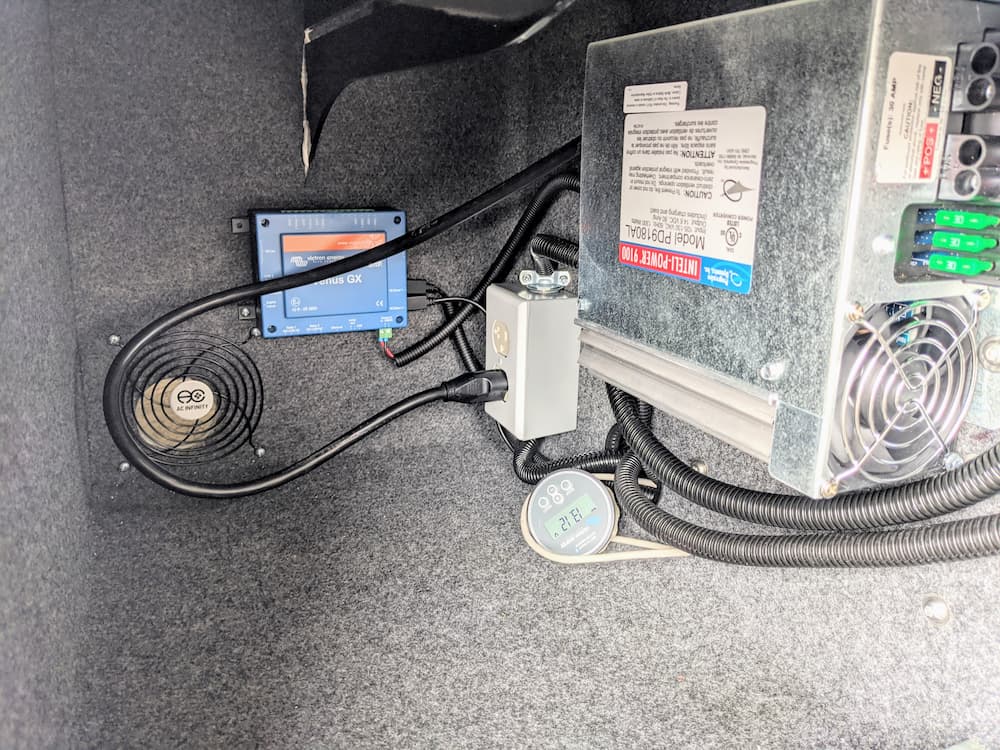
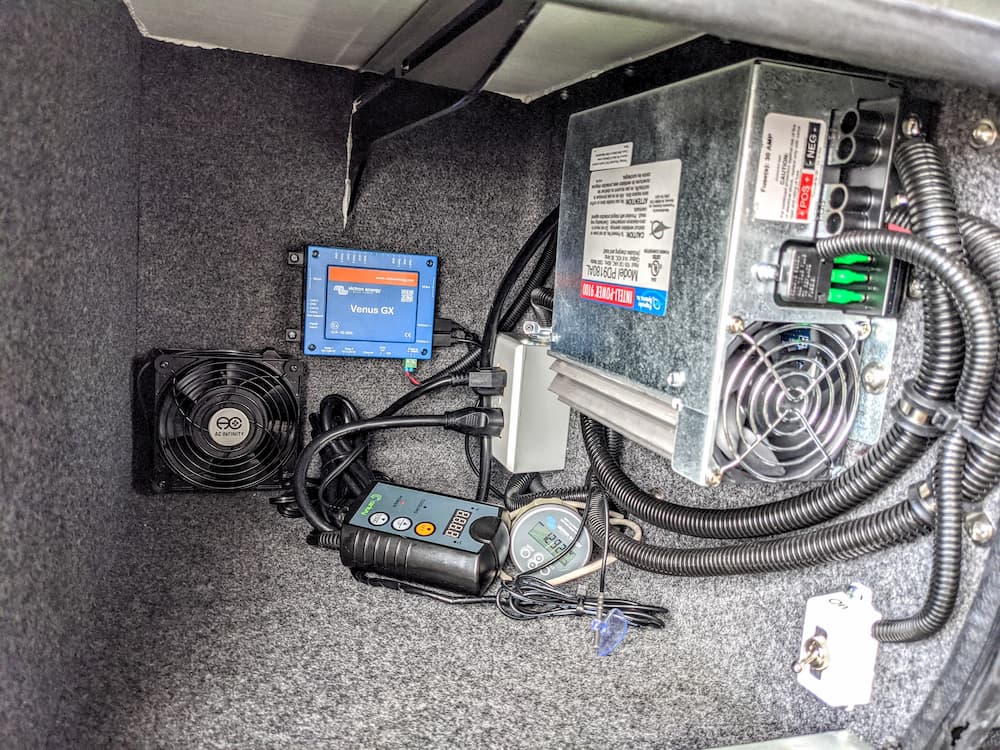
In the final picture at the top of this post you can see how the installation looks. I took advantage of this project to move my Victron Battery Monitor into this compartment and also install a Victron Venus GX which you can see on the back wall.
Also on the back wall is another 2″ hole and a fan shroud I mounted over it.
When I fired up the generator, I was slightly disappointed. The good news is that unlike the Magnum it didn’t yo-yo, but supplied steady current, albeit only 70 amps. My initial guess is that to get the 80 amps the battery has to be more deeply discharged.
While vastly better than the Magnum – my battery was only at about 70% SOC – I was expecting 80 amps.
The other disappointment was that I really hate the screw on terminals, although nowhere near as bad as Victron supplies.
The 2 GA wire barely fit, and its possible that trying to shove it into the (too small) hole I didn’t get a perfect seat. The charger quickly warmed up to 105 degrees and the cable entrance 127. I’m not sure if the later is higher than expected.
I ran it about an hour on generator and it otherwise performed really well. The charge only tapered slightly over time unlike the Magnum which always fell off a cliff.
Since the charger has dual terminals, I ordered some 4 GA wire. I’ll run two positives and two negatives, which is more amps carrying capacity that a single 2 GA. (Actually just a single 4 GA would suffice, but I always enjoy overkill.)
The other thing is that this generates a lot of heat! It was about 85 degrees, but I am concerned that in 100 degree weather it could get too hot (it tapers the charge in that case) or even discolor the paint on the compartment door.
(After some more testing on a hotter day I could consider widening that outside hole and installing a fan to bring in fresh air, but I don’t think it will be needed.) In a pinch I can always crack the compartment open while charging.
Lastly after the first time I used it (duh) it occured to me that normally I turn off the Magnum charger and let the generator cool down as recommended, but I had neglected to provide any switch for the new charger.
It can be unplugged or the breaker can be turned off, but I noticed the charger does have an external port on the back and its possible to wire a soft remote switch – which I’ll do next.
So preliminarily I’m going to give this a 2 thumbs up. I’m going to beef up the cables and drain my battery down further for a final test, but it seems a valuable tool to quickly and cheaply get (up to) 80 amps of charge and to have a spare charger onboard for redundancy on a long trip.
If I ever get around to running a new 20 amp circuit I could run both chargers at once I suppose but that is another project…
Update 20-Mar-2020 – I went back to the RV and unplugged the charger and plugged into my Ecoflow Delta 1300. The beauty of this scheme is that now I can carry the Ecoflow as another (approximately) 100 AH battery that can be used to recharge the RV if needed.
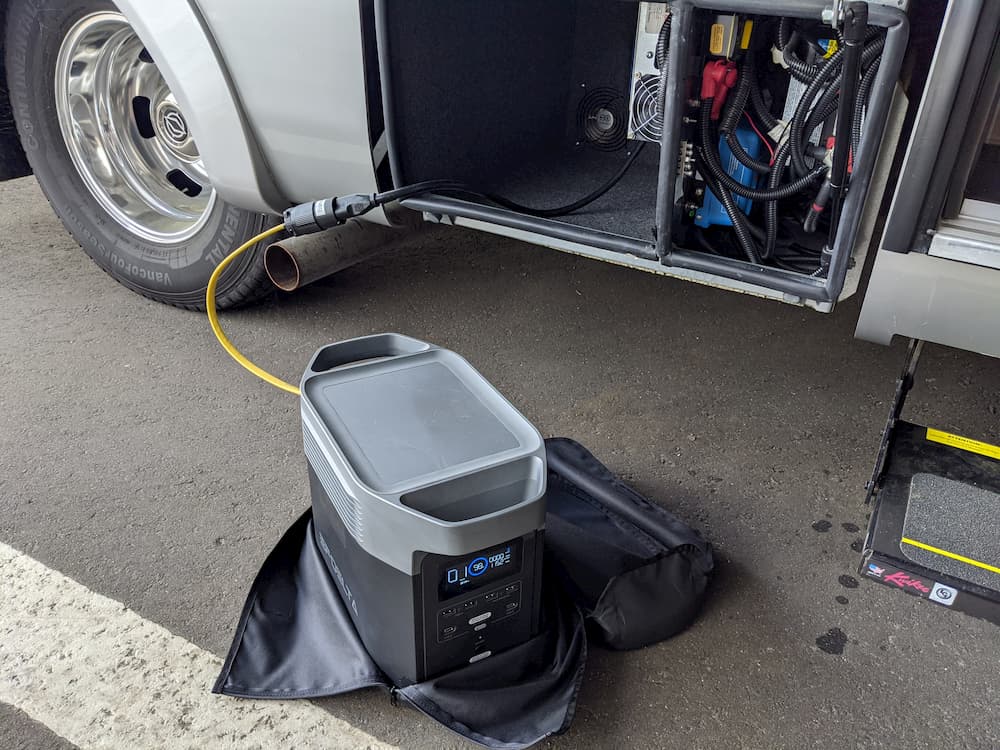
I lost about 25% of the 100 AH (approximately) while transfering, but that still yields about 70 AH, i.e., about 1 full day of operation of my Isotherm Compressor Refrigerator.
I had to make up a cheater cord to convert to a 15 amp plug and bond neutral to ground for safety. I previously had tried to plug the whole RV into the battery but it blew my Progressive Surge Protector. (The good folks there sent me a replacement logic board and said not to plug the RV into an inverter).
So this really simple solution gives me a way to quickly get another 70 amp hours or so in 1 hour if I find myself low on battery and unwilling to run the generator, say at night in a national park like Yellowstone.
Update 26-March-2020 I decided extra ventilation is in order. I bought a 120 volt fan, a temperature controlled switch, and a TEMCo 3 1/2″ punch. (Actual size closer to 4″). The big punch uses the same 3/4″ draw stud as the Greenlee. So with this setup the fan will turn on and off only if there is power to the AC receptacle and only above a preset temp, say 85 degrees.
I also got the remote control plug here and mounted a small switch so I can turn the charger on and off without unplugging.
The 4″ punch was a bit difficult to use manually; it’s designed for a hydraulic tool. It got stuck about 90% through. I bought a 1″ impact socket and tried my cheap Harbor Freight impact gun.
That worked! However at a later date I’ll have to figure out how to remove the draw stud from the punch now that the impact gun cemented it in…
This seems to be complete now, although I may clean up the install a bit and maybe mount the thermostat. One weird quirk is that if you don’t snug the auxiliary port hold down screw the charger doesn’t work at all regardless of the switch.
Update 6-Apr-2020 I actually can’t say enough good stuff about this charger! Its cheap, reliable, and always keeps the batteries 100% charged. My only initial misgiving was that if I someday update my inverter it could become redundant. But my plan in that even would be to keep this anyway for backup. If my inverter goes I could live a long time without it, but losing the charger in a middle of a long trip would be a real pain.
At the bottom of this post is a bunch of stuff I used on this project. I already had the Greenlee “slugbuster” punch set, but if you don’t have a hole punch handy you can find used ones on Ebay or probably get a Harbor Freight clone set for a lot less.
Update 8 May 2020: I decided that having a hot charger mounted on felt carpet may not be the smartest thing I have ever done. The charger box is all metal, and just above is wood flooring, so maybe there was no actual risk, but it just bugged me.
The glue was murder to remove. I tried alcohol, hydrogen peroxide, acetone, glue remover, etc. Nothing did much. Finally a heat gun and scraper started loosening it. In the picture below you can see I gave up and left a bit of yellow glue above and behind the charger. Someday when I redo the compartment I’ll set the gun on high heat and remove the rest of the felt and glue.
Also, the 2 gauge cable barely fit. I hated trying to insert it which was nearly impossible. For now I decided to replace with 2 pairs of 4 gauge cable which fits easier and carries even more current. That seemed to raise the charger output another 5 amps.