In order to install Starlink in an RV you are probably going to want custom cables so that you can mount and dismount the dish easily and neatly.
There are lots of articles on the Internet about this. Since the cable is a standard shielded Cat 5e (with large 23 gauge wire for dish power) it makes sense to use standard RJ45 jacks.
Its simple, but a bit intimidating, so I’ll go through the steps that worked for me. Note – this post digs into the details of making RJ45 cables for Starlink. A later post shows how I went on to install and outside jack on the RV and completed the installation.
I was pretty confident cutting my cable because in a pinch you could literally solder, crimp, or even wire-nut it back together and it would still work. And they make RJ45 jacks that are tool-less for the completely incompetent.
Lastly with 75 feet of cable you have plenty of room to make mistakes and try again!
I’ve listed the tools and parts below that worked for me.
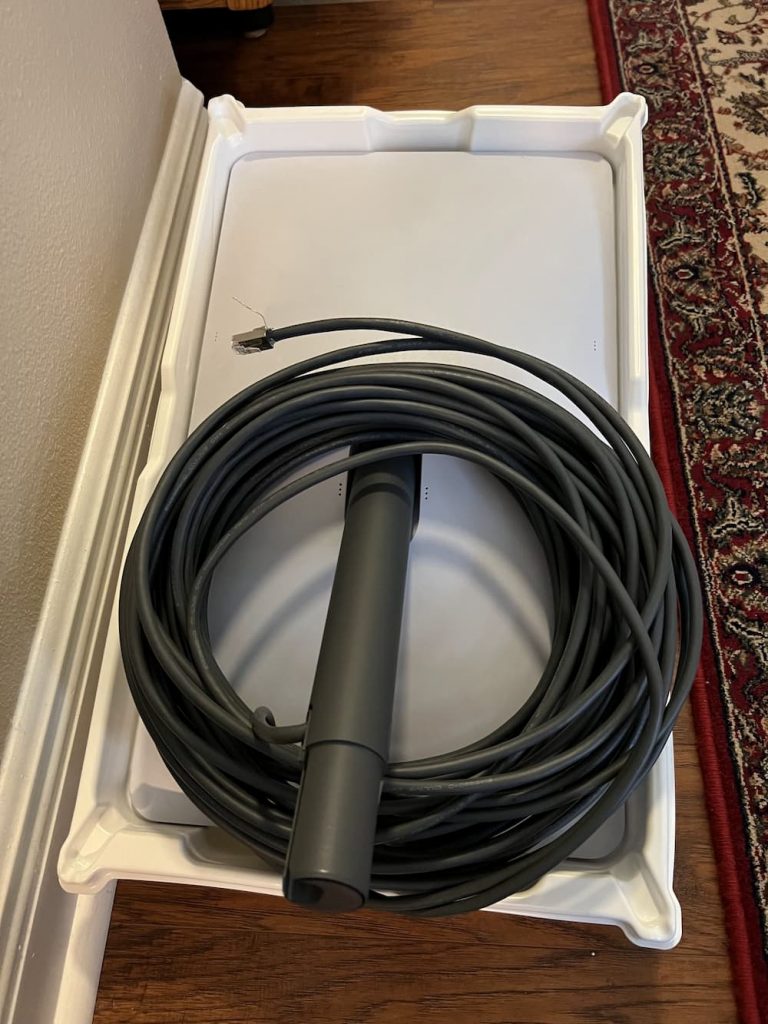
So the first step is to just cut it. I made the initial cut just a few feet from the router and crimped on the first connector there.
I plan to eliminate the router (more on that later) but this is the first step. Then I just put an identical plug on the other side of the cable (coming from the dish).
For the RJ45 connectors, I used the “passthru” kind made for beginners. Far easier to use.Technically a little noisier because of the open ends, but the consensus seems to be it doesn’t matter for these (relatively) low data rates.
With these connectors you simply push the wires all the way through. The crimp tool slices off the excess.
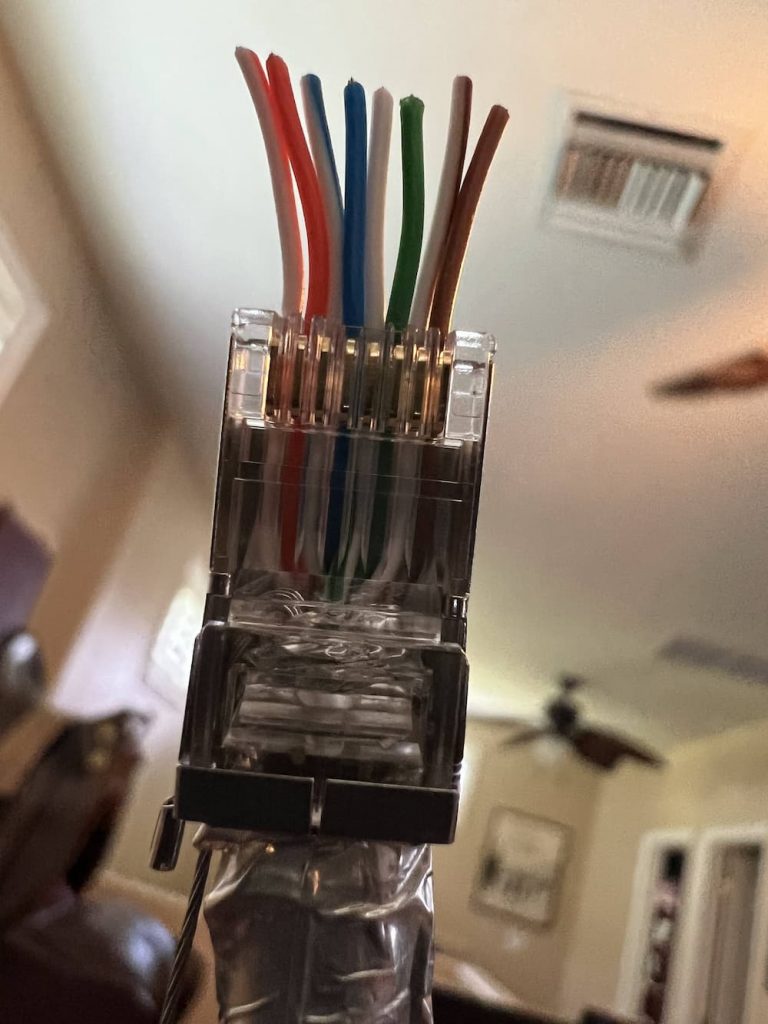
The wiring standard is T568B:
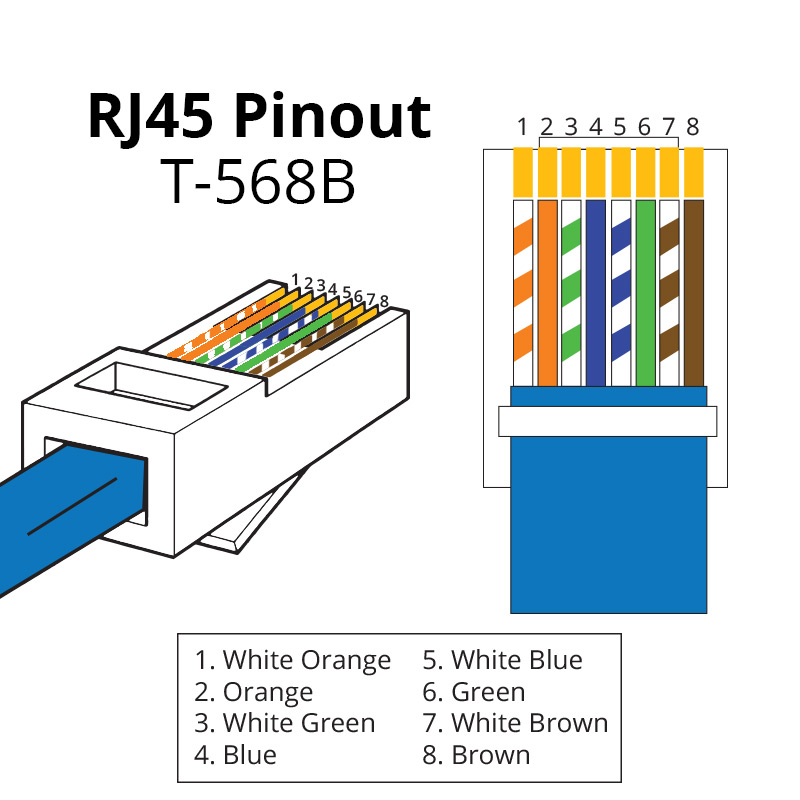
Cutting and terminating both sides was relatively easy. The best method I found online was to wear a glove and use a round screwdriver to straighten the wires – works like a charm. Watch a few videos on terminating shielded cables and you’ll get the idea.
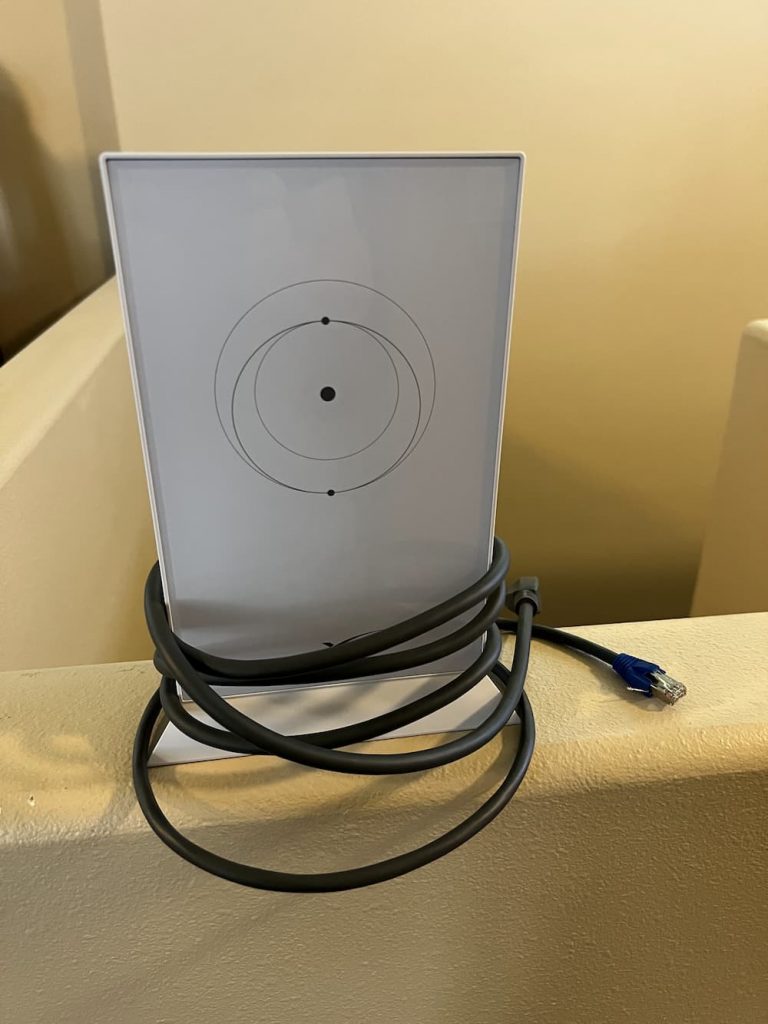
Afterwards I joined them to test using a bulkhead connector I plan to install later:
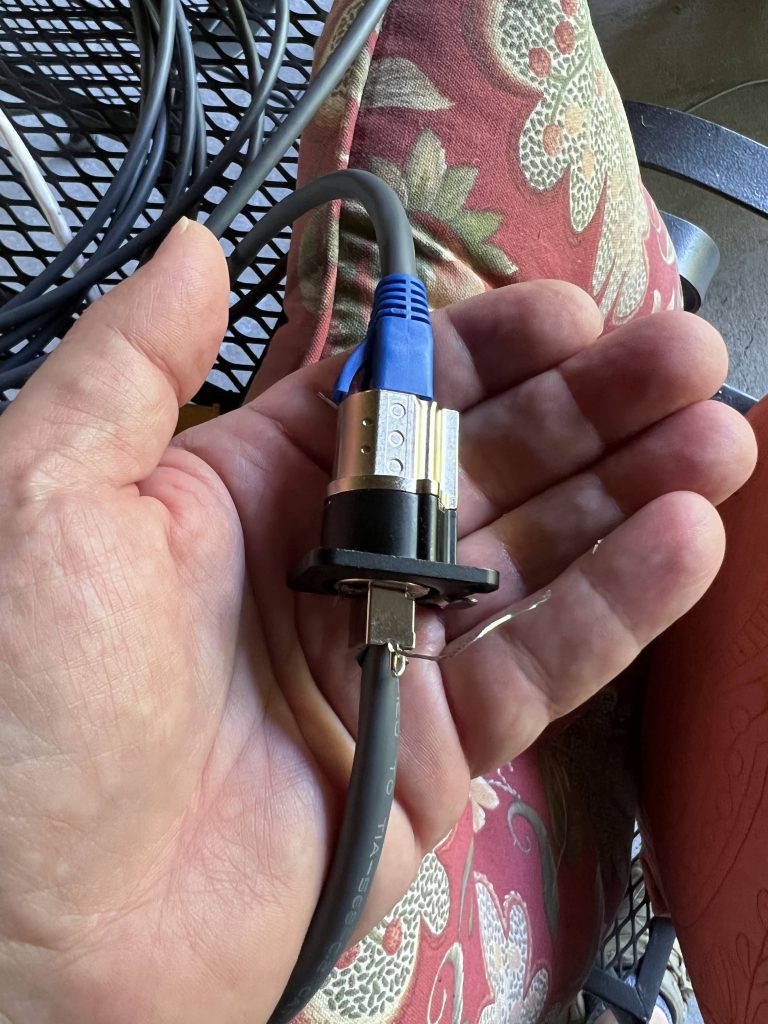
The inside bulkhead connector used above to join the 2 cables is part of a line of locking (some are waterproof for exterior) plugs and jacks. Pictured above is the Neutrik NE8FDX-P6-B D-Shape Cat 6a Shielded Feedthrough Panel Connector. A future post will show that part of the install.
Next I deployed the dish outside and… surprise! Dead router; wouldn’t even turn on.
The problem with Starlink using proprietary cables on the other end is that you have no way of testing these connections!
So here is what I did. First I unplugged the router and disconnected the data cable. After observing that this time the bottom LED on the router turned on I assumed that at least it still worked.
Next I turned off the router and plugged in the short data cable pigtail I just made – but with the dish unplugged from it.
This time I also observed the router booting correctly, so that told me at least this side of the cable had no shorts (could still be bad though).
So since plugging in the dish caused the router to not boot, I assume I must of had a short on the dish cable (or maybe some bad pins) and crimped a new end on, which worked perfectly as Starlink now boots and works as normal.
So what happened? Well somehow the very first crimp I made was bad. These plugs don’t fit very tightly in my Klein tool, so I subsequently pushed them in while crimping.
The bottom line is that debugging a bad cable connection is going to be a bit of trial and error since there is no easy way to test. (When I permanently wire jacks inside and outside that will be easy to test with a RJ45 cable tester.)
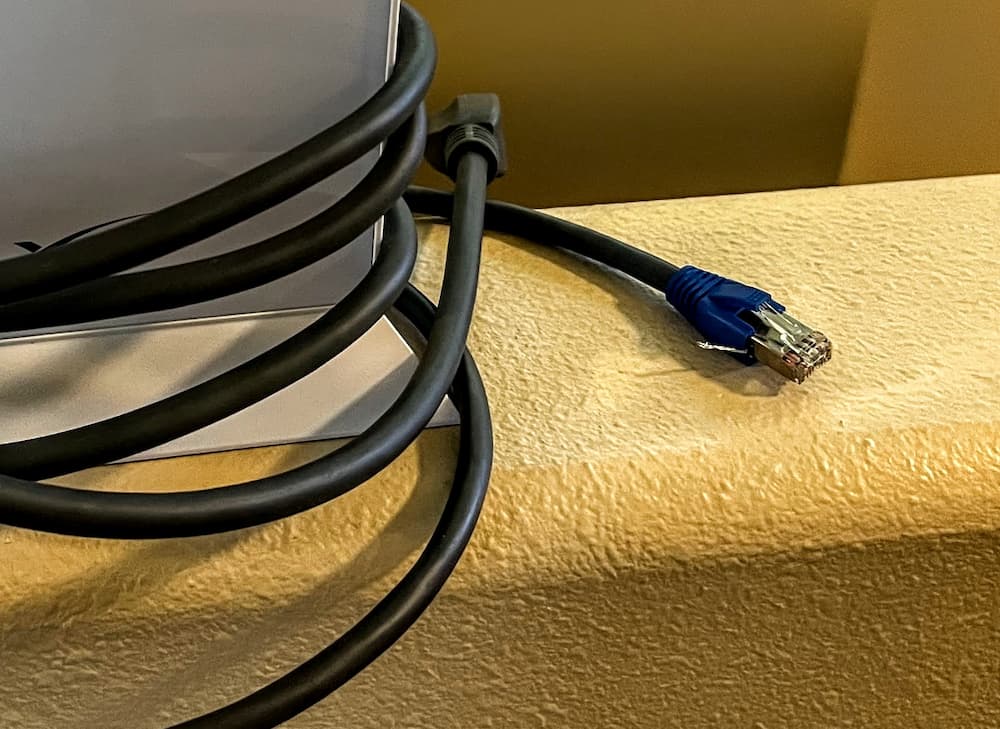
The final step is to add a Neutrik NE8MX-B which is a waterproof shielded housing that can be used outside – to the dish side:
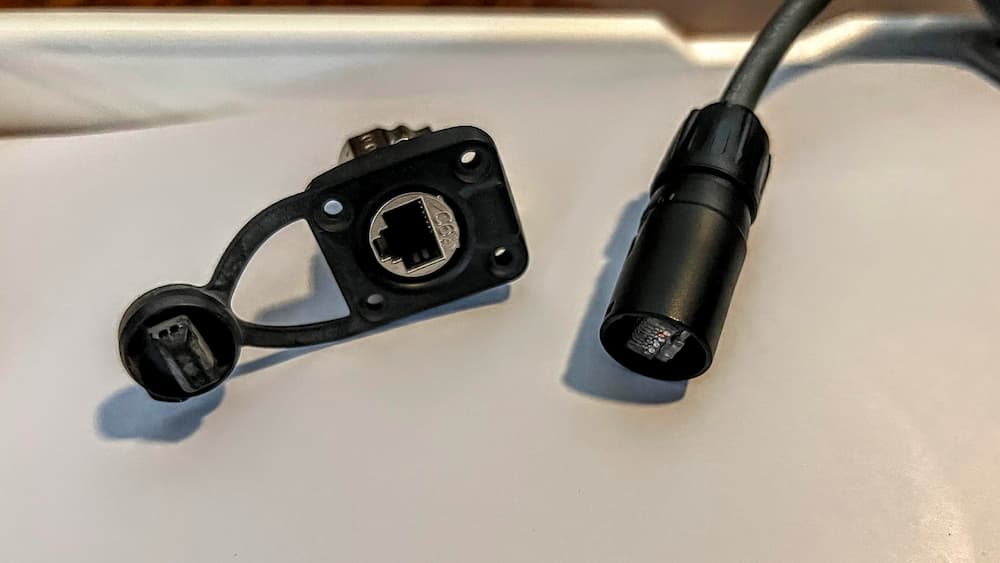
In the picture above the right side shows the Neutrik heavy duty waterproof housing installed over the cable end I just crimped. The left side shows the waterproof bulkhead connector that can be mounted in wet areas (NE8FDX-P6-W). The IP-65 rating means it will survive any rain or even a hose pointed at it. As a bonus Neutrik secures my amateurish crimp connection inside a monster plug! (Many have reported the cheap so called waterproof connectors on Amazon are actually not.)
Its very simple to install but rather then trying to figure out the bag of parts I just watched a video:
Here is the other stuff I used and that worked well for me. The “propane dust caps” below work great to cover the Starlink proprietary connectors (or even RJ45 plugs) while traveling.
The cable tester will be used when I permanently wire the RV for Starlink – more on that in the future.
(Links are Paid)


Great tutorial, this is exactly what I was looking for.
Why did you use the platinum connectors with the drain wire adapter (https://www.amazon.com/dp/B079CV7LQR/ref=as_sl_pc_as_ss_li_til?tag=avoidpitfalls-20&linkCode=w00&linkId=62f0ee8301aa393c96454b695bde3df3&creativeASIN=B079CV7LQR) for the unshielded SL cable? I have shielded RJ45’s but not ones with the drain wire adapter, do I need them for this installation?
Hi Tod
The Sl cable is shielded and has a drain wire. I just picked these RJ45 connectors kind of at random. You are right the drain wire adapter is not really needed in this application.
Steve,
Nice writeup, as usual.
I’m curious, did you do anything to waterproof the interior connection to the Neutrik NE8FDX-P6-B D panel connector?
Thanks
Larry,
Thanks!
On the inside of my RV mine are mounted in an entertainment compartment – see the later posts on the subject – so no waterproofing at all on either side of the panel mount.
On the outside, I mounted the waterproof connecter and then used the waterproof bullet connectors on both sides.
This later post has some photos: https://avoidpitfalls.com/taming-the-wild-starlink/
Thanks Steve for your quick response.
For the outside mount (the NE8FDX-P6-W) I haven’t found a waterproof connector to connect to backside of this mount. The Neutrik NE8MX-B works nicely for a very secure connection to the front of the mount, but I don’t see how it could attach to the backside. Am I missing something or is there a different connector of the backside? Sorry to be a pain about this!
Larry if memory serves me right I thought I did use the waterproof barrel connector on outside mount interior connection.
But its been a while and I have forgotten. Now that I think of it I vaguely recall using a rubber boot so perhaps not. In my case based on where I mounted it there wouldn’t be a lot of splashing. I’ll be at the RV later this afternoon (working on another project) and I’ll take a look and let you know.
Nope you were right. I covered the cat 6 cable with a wire loom and then I put a big rubber boot over the wire loom and pushed that over the jack on the back. So its pretty waterproof and looks like its held up fine.
Steve, thanks for the follow up. Much appreciated.
Do you have a direct link to the Neutrik NE8FDX-P6-B D-Shape Cat 6a Shielded Feedthrough Panel Connector? The only one I can find looks like it is not the shielded variant.
I bought the same Neutrik feed through panel connector and need to split my cable. For
the cable, did you wire both connectors as T568b or do you have to wire one of the connectors in reverse?
I used a meter on the coupler and confirmed you don’t wire any connections in reverse. The coupler handles matching the ends (pin1 to pin1) so you just create each connector as T-568b.
Hi: Excellent article – thanks. This is precisely what I was looking to do on my 5th wheel RV.
The RJ45 connector you recommended is currently unavailable on Amazon, is there an alternative you would recommend? There are so many different versions, but many don’t seem to be listed for 23awg cables. Thanks for any help.
Hello. Oops, I see that now. In theory any cat 6a passthru connector should work.
A lot of the ones sold are junk though. If you make a cable or two for practice and it passes with the tester I linked above you can be pretty confident they are good.
Try this one – its has thousands of reviews – and specifically mentions 23 or 24 awg – let us know if it works OK? https://amzn.to/3s71Ndl