Nov 2024 Update – The Starlink Gen 2 was great but I since purchased and installed a Starlink Mini on my roof.
I’ll admit I was initially a Starlink skeptic for RV usage. Its heavy, big, uses a lot of current, and until recently can’t be used in motion. (While you might be able to use in motion now, you would have to heavily modify the dish to lay it flat).
That said, we realized that every year we cut our RV trips short because of lack of Internet. My job requires me to be in touch for emergencies, and so most of the time we have been leaving wilderness areas after short visits because I can’t take the risk of staying out of contact.
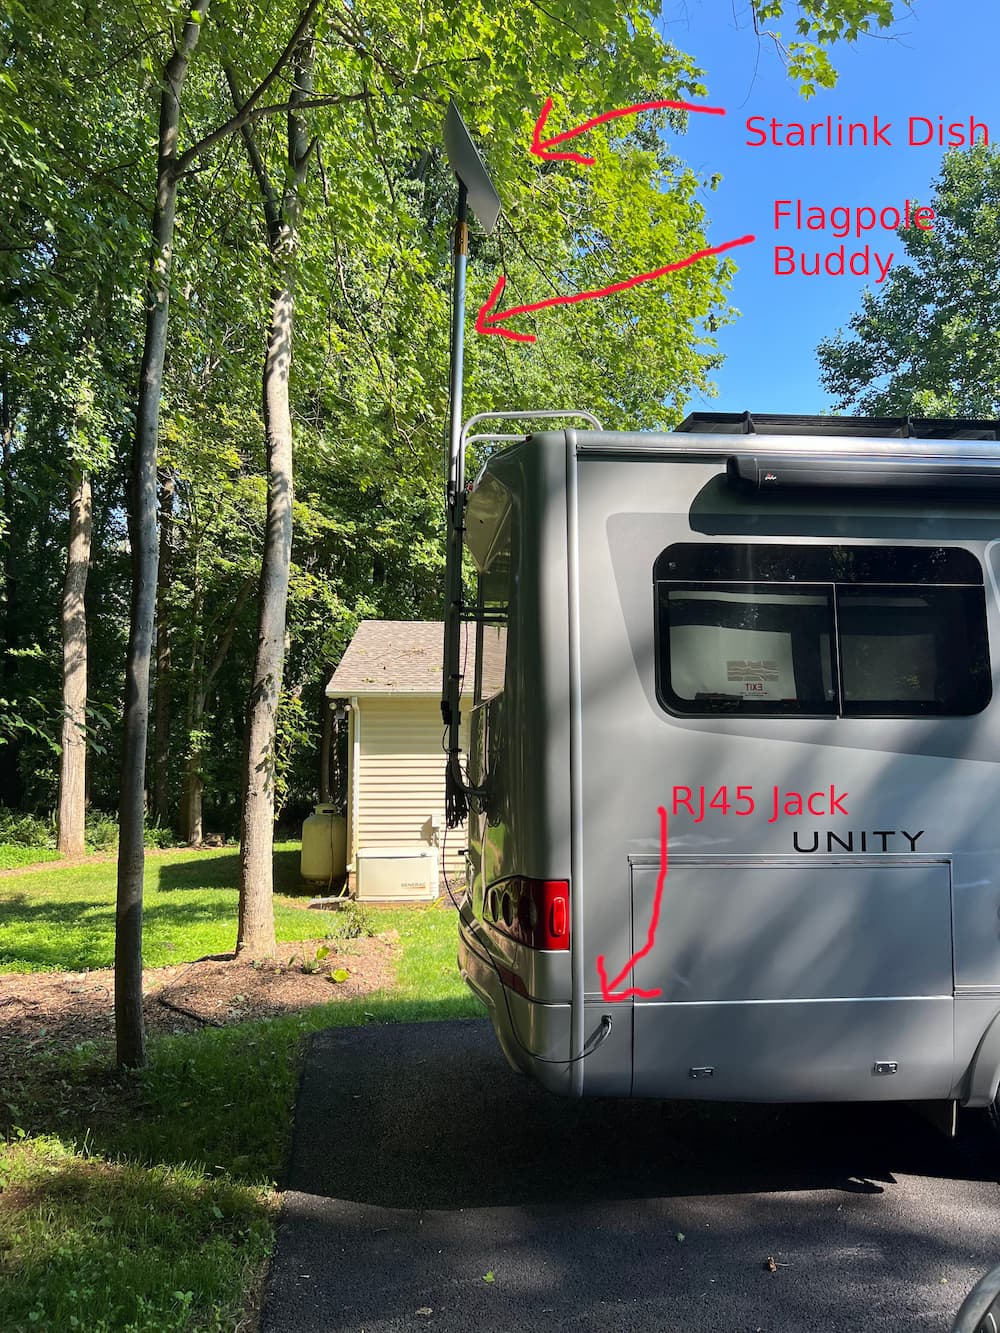
So this will be a life changer for me. It means we can camp anywhere in the US and have some Internet. (Even with a lot of tree cover, I usually get something, and the 75 foot cable means you can station the dish pretty far in a pinch.)
For us it was worth spending any amount of money and time to make this thing work, as it means the difference between traveling or not. We prefer camping in remote and wilderness areas, and more times then not there is not usable cell Internet service.
For starters I already have excellent Verizon and AT&T Internet in the RV. Much of the time, while driving or in civilization, that will still be the Internet carrier. Starlink takes some work and up to 30 minutes to deploy, so it isn’t going to be the first choice for Internet when other methods are available.
So I started with an excellent Pepwave cell Internet router. With its dual carriers a lot of the time I’ll have premium Internet while traveling.
Next, I did a “dry run” of Starlink. This entailed just using it out of the box, as is. Setup was 15 minutes and done. I mounted the dish on the ladder where its high and safe (but can still be ground mounted to avoid trees as needed).
The Starlink router I just dropped in an outside storage compartment. There is enough play in the rubber seals to run the power and dish cables in and still be able to close the door, and the outside outlet is powered by the inverter or shore power. I detailed that simple 15 minute Starlink setup.
However there were a couple of improvements I wanted to make!
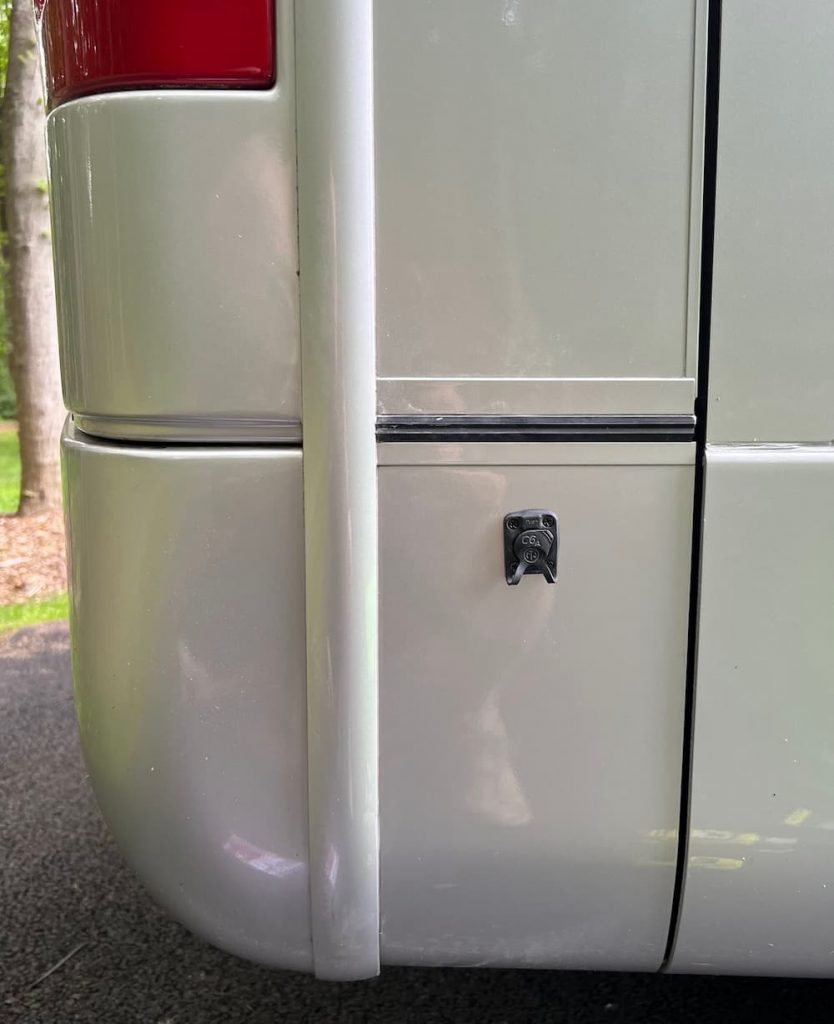
The next step was to cut the Starlink dish cable and install RJ45 jacks and plugs. It turns out its fairly easy and fun. I wrote up those details at Cutting Starlink cable and installing RJ45 Plugs.
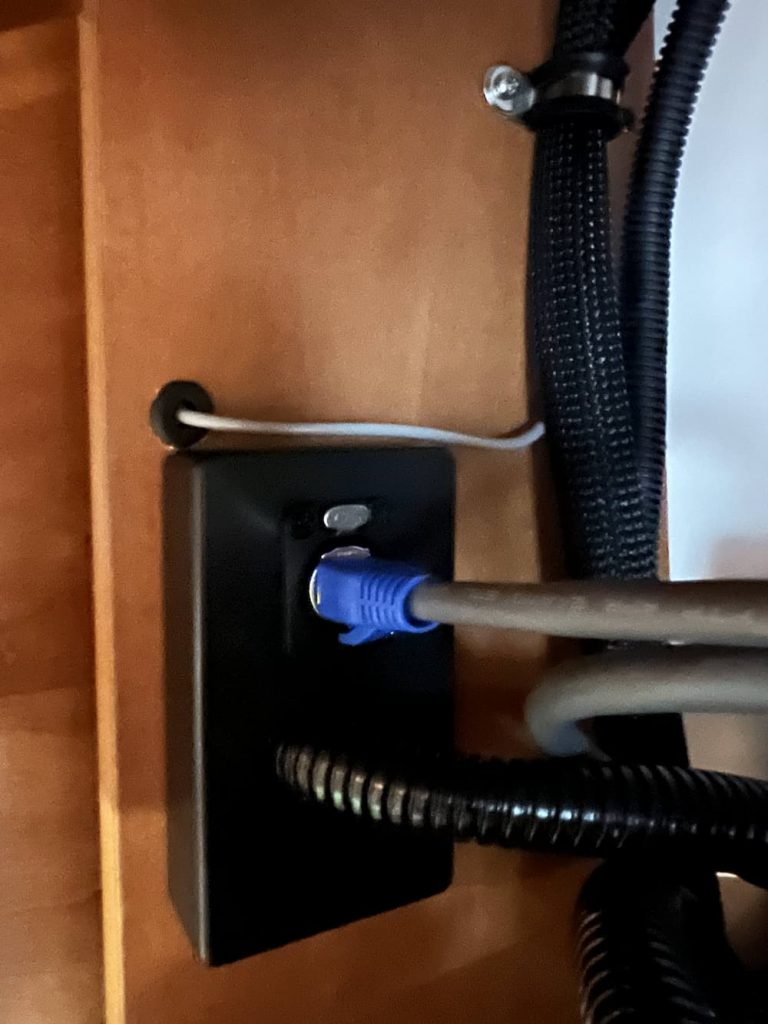
By itself that didn’t yield anything, but it enabled the next step: installing an outside Starlink jack:
Looking closer:
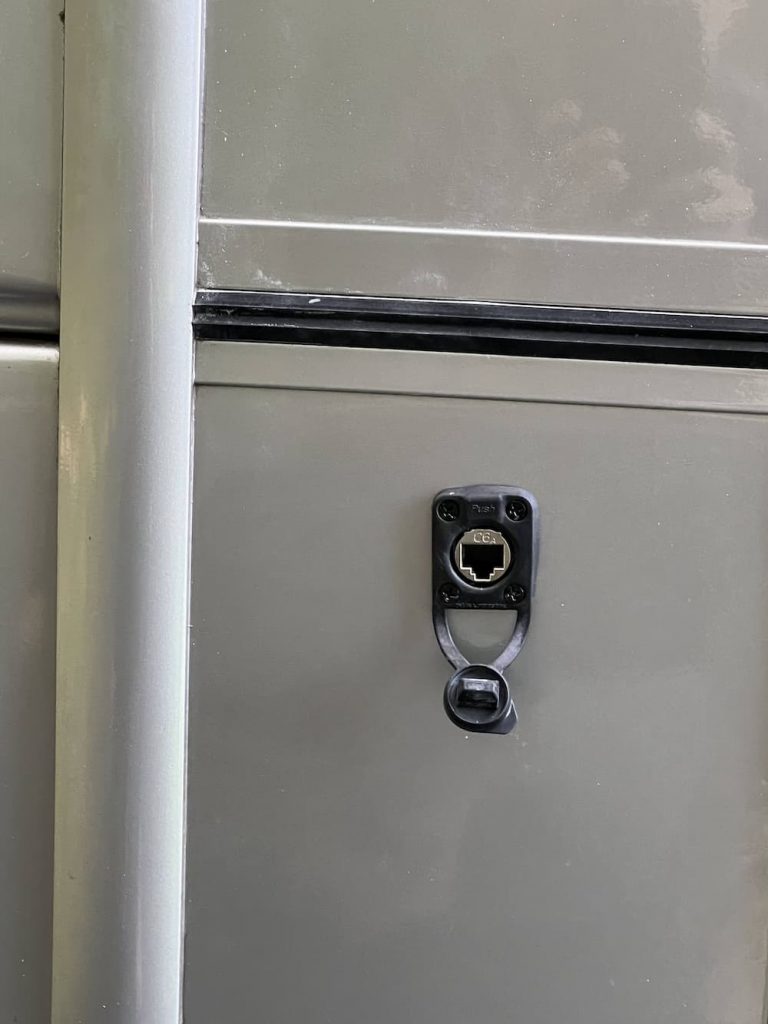
As an aside I really should remember to clean stuff off before I take pictures, instead of shooting them while the dust is still settling! In this case drilling a good sized hole through the RV panel sent dust everywhere.
The dirtiest part of the job was next. I bought a spool of Cat 6a cable off Amazon (links below) and ran a network cable under the RV, terminating the other end above the TV. To accomplish this I located the cover plate Triple E installed (Thanks Sprinter Forum!).
Its found just forward of the door on my RV, and inconveniently, on top of the Equalizer Systems pump. It was just barely reachable with some grunting and swearing. And it took some good prying and yelling for it to come loose:
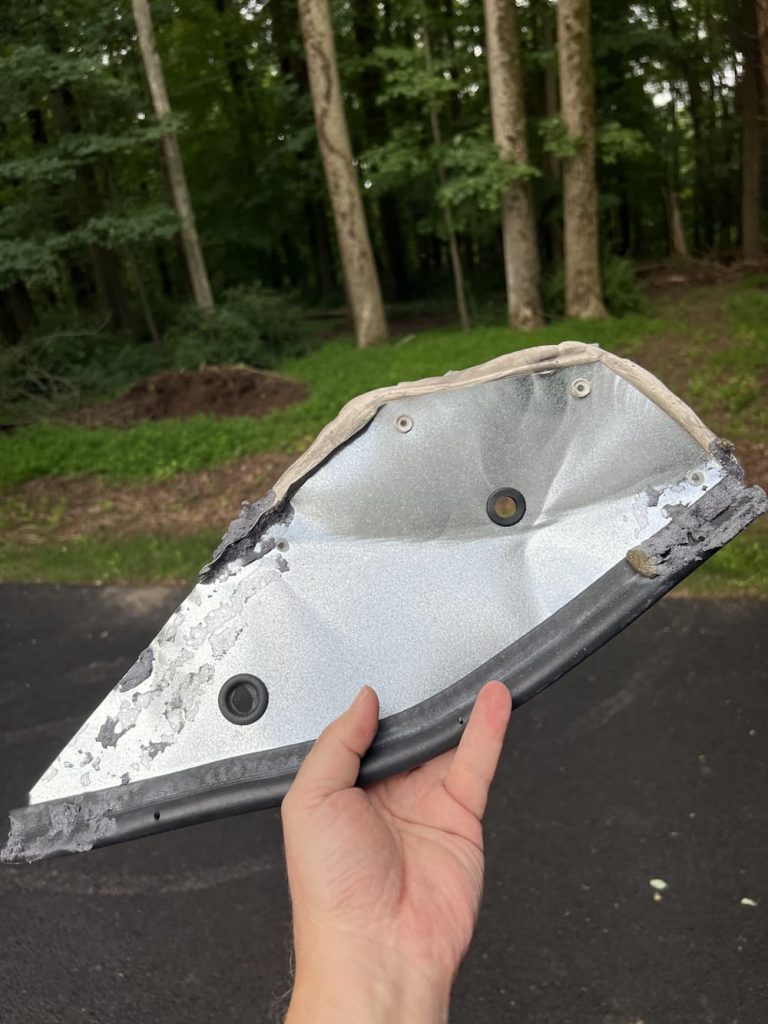
This photo is after I drilled a couple holes in it for power and network wires. (In all honesty, the hole on the right turned out to be badly placed and I had to plug and move the hole south, but thats another story)
The reason for 2 holes is that I also ran 3 #10 wires up; more on that later.
So the network cable goes under the RV all the way to just forward of the door, then up through the wire valley thoughtfully provided by Triple E, then behind the right shelf off the passenger seat (just unscrew the side panel to pull it), and then finally above the TV in the entertainment cabinet:
I’ll admit a few times during this job as it stretched into a couple days I questioned if it makes sense or was even going to work, but I really want to see more of the US and Starlink is my ticket!
The REALLY nice thing about running RJ45 jack to RJ45 jack this way is you can use a $10 network cable tester off Amazon to make sure you wired it correctly, link below.
At this point, I put the router in the entertainment compartment, plugged it into the jack above, and, mission accomplished! I now can easily keep my router inside, and simply deploy the dish outside when needed with the jack I installed.
Most people will want to stop here, or perhaps get a small inverter – more on this below – to power the router so you don’t have to power up your big inverter.
But I wanted to convert my dish to purely 12 volts, so:
The very last phase of the project was to install whats known as “The Starlink Router Delete” invented by the folks on Reddit. This means to install a 12 volt power supply for the dish so I won’t have to run the inverter anymore. A circuit creates the necessary POE (power over Ethernet) supply for the dish instead of the router (which goes in the trashcan) the dish connects to my existing Peplink router so I only have a single house Wifi.
In turns out that besides Reddit there is a whole Facebook forum devoted to this – ‘Starlink Hacks” and they have their mission statement in a drawing:
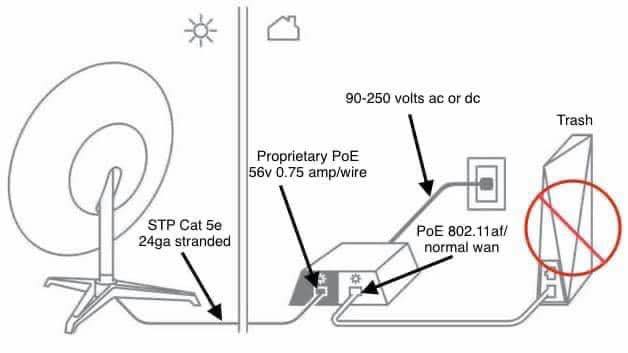
This is for the old dish, but basically the idea is to make your own power supply and throw away the Starlink router.
Its not that hard to do if you have followed this far, but it turns out a guy on Etsy started selling the thing already built for you at Etsy Router Delete Kit. (Yes it shows as sold out – you may have to beg or threaten him to make more).
So I bought an aluminum box off Amazon and and made this Frankenstein device:
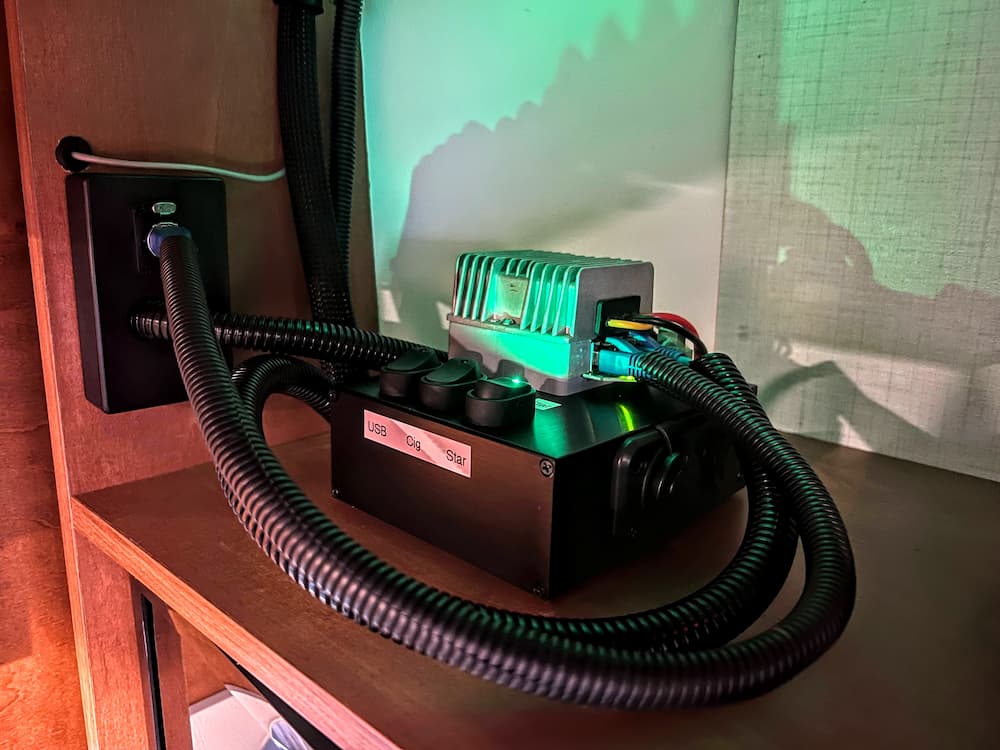
In the base of the box I ran the 10 gauge cables I alluded to and 3 switches to power the POE thingy and 20 amp cigarette lighter and USB outlets.
The cigarette lighter socket is plan “B”. I bought a 300 watt pure sine wave inverter. I can always just bring the Starlink router back (I dont actually plan to throw it away) and use that smaller inverter instead of my onboard 3000 watt inverter to save energy – if the Etsy hack self destructs.
In the picture above the front cable coming out of that big heat shield goes to the jack and then out to the dish. The cable behind it goes down the cabinet, behind the TV, and down to where I have my Peplink router mounted.
And… the thing seems to work perfectly! I’ve configured my router so that Starlink and Verizon are the priority providers followed by AT&T:
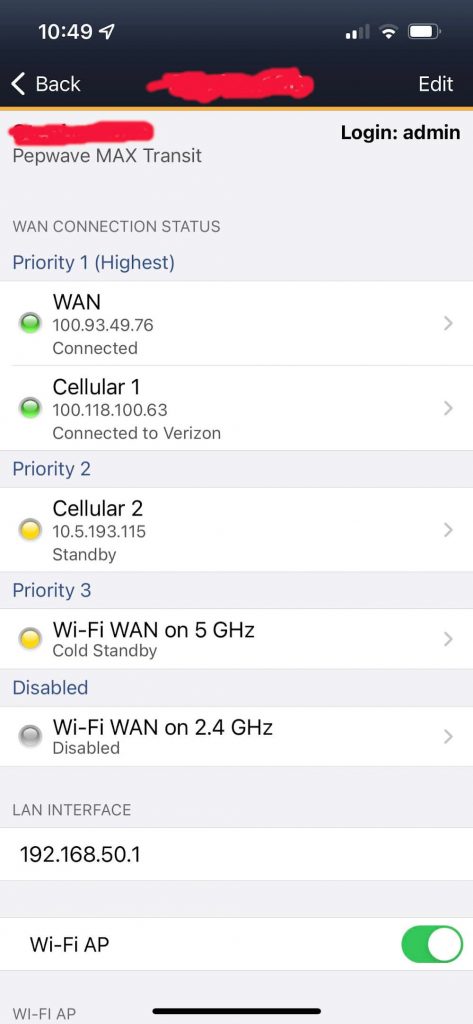
This screenshot shows how the versatile Peplink router is configured. Priority 1 is Starlink or Verizon; I don’t care which as the Verizon is unlimited. Priority 2 is the AT&T sim (which is sorta bootleg as its supposed to be used in a tablet so I only use it when nothing else is available).
Starlink works exactly as before, including its native app. (Peplink thoughtfully provided a Starlink hack to their routers to accomplish this easily)
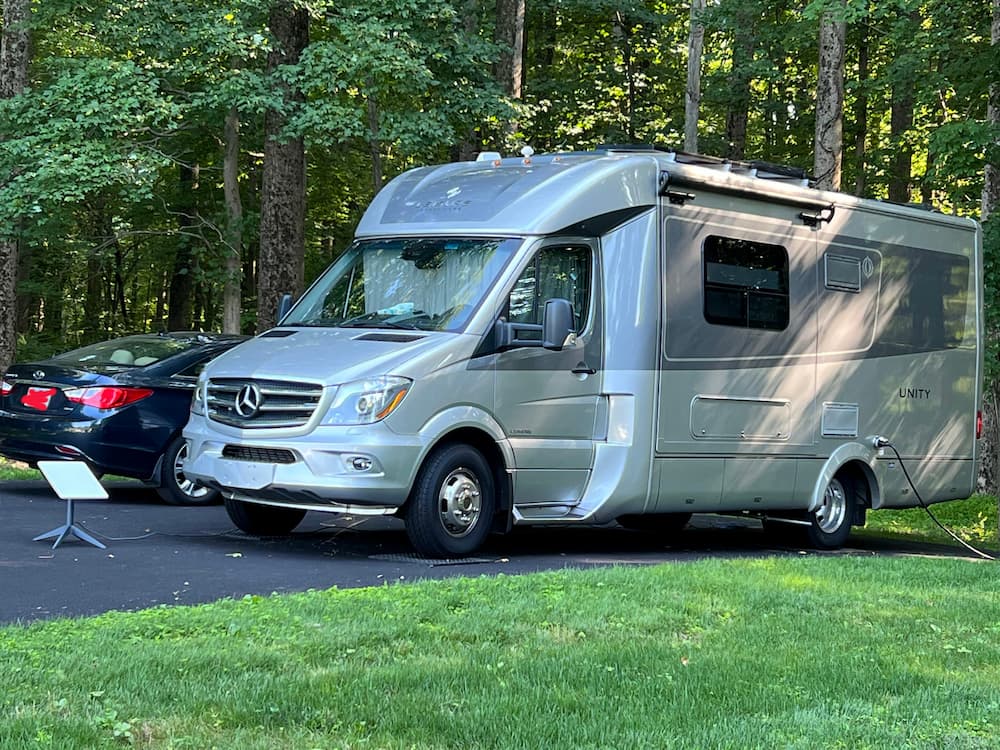
I can deploy the dish on “Flagpole buddy” from the ground (as in the pictiure at the top of the page) or, when there is tree cover, or I’m just too lazy, on the Starlink stand:
Wilderness, here I come – heading out in a couple weeks, and this time I’ll be in no hurry.
Here are some of the parts I used. See my other links above for other descriptions and purchases.
(Links are Paid)


Leave a Reply