I previously had replaced my junk Sprinter radio with a Pioneer Avic-W8400NEX. This worked out pretty well. It had wireless Apple Carplay and was pretty advanced at the time. That thing was damn expensive!
After 4 years of use, I was *mostly* satisfied. But, since riding in Teslas I have grown fond of the oversized exploding video screen in the dash. I used to think it looked junky and toyish, but heh, its 2022 now.
So I searched for the biggest badass radio I could find, and it looks like this is it! This monster has an 11″ screen and should help freshen the appearance of the Sprinter cab which always had a plumbing truck feel for me.
The Alpine does not have an offline navigation app, but I found that I rarely used mine anyway. Most of the time I can download Google Map routes in advance when I have cell signal, and Google Maps is WAY improved now at navigating rural areas. In rare cases I can use the offline GPS app (Sygic Truck) on my phone as last resort.
I bought from Crutchfield. Besides their good reputation they also have a wire harness service, where, for a few bucks, they crimp all the connections for you on a custom harness with a steering wheel controller making the whole thing (almost) plug and play.
I did go ahead and purchase a parking brake cheat relay, so I don’t need to engage the parking brake to use settings or pair a phone. Naturally I recommend you never do these things while in motion, but I often don’t bother with the parking brake on flat parking spots so it would have been a nuisance for me, even while stopped.
And some of the reviews indicate its truly awful. You have to engage the parking brake, sometimes twice, to do anything in settings or HDMI, and if you know Sprinters you know the parking brake is a bit finicky and a handful. When its very flat I sometimes leave it off.
So on to the install!
Here is the main wiring harness with my small addition of the parking brake cheat:
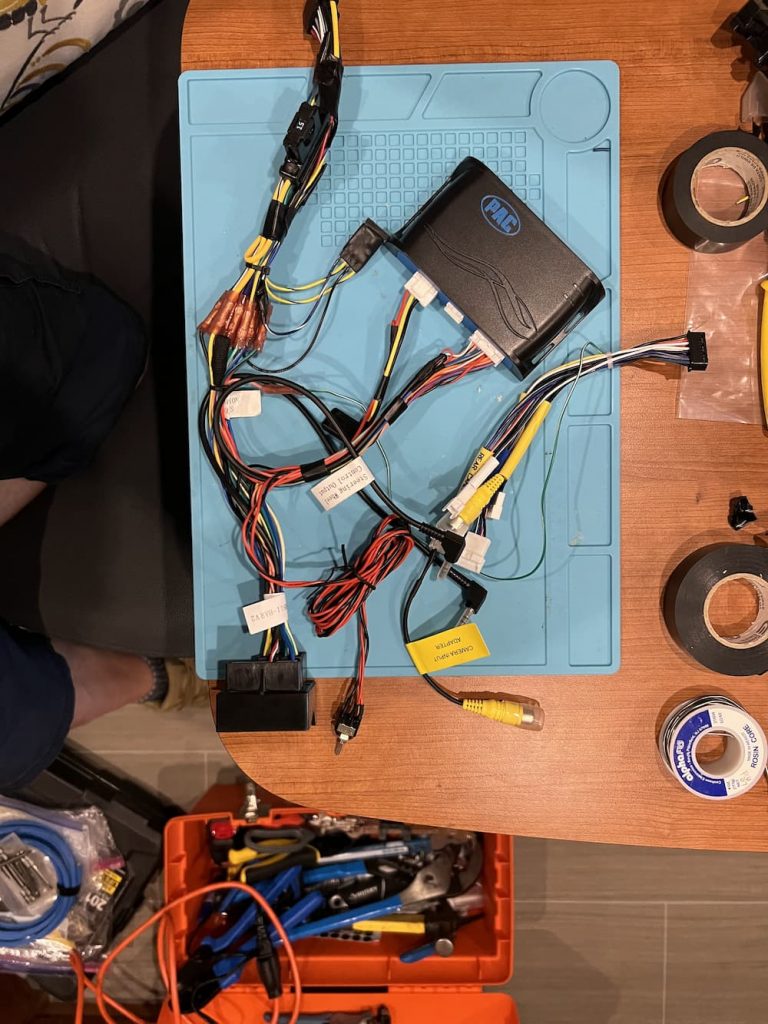
Just to the right of all those nice crimps Crutchfield did – you can see the relay I patched in.
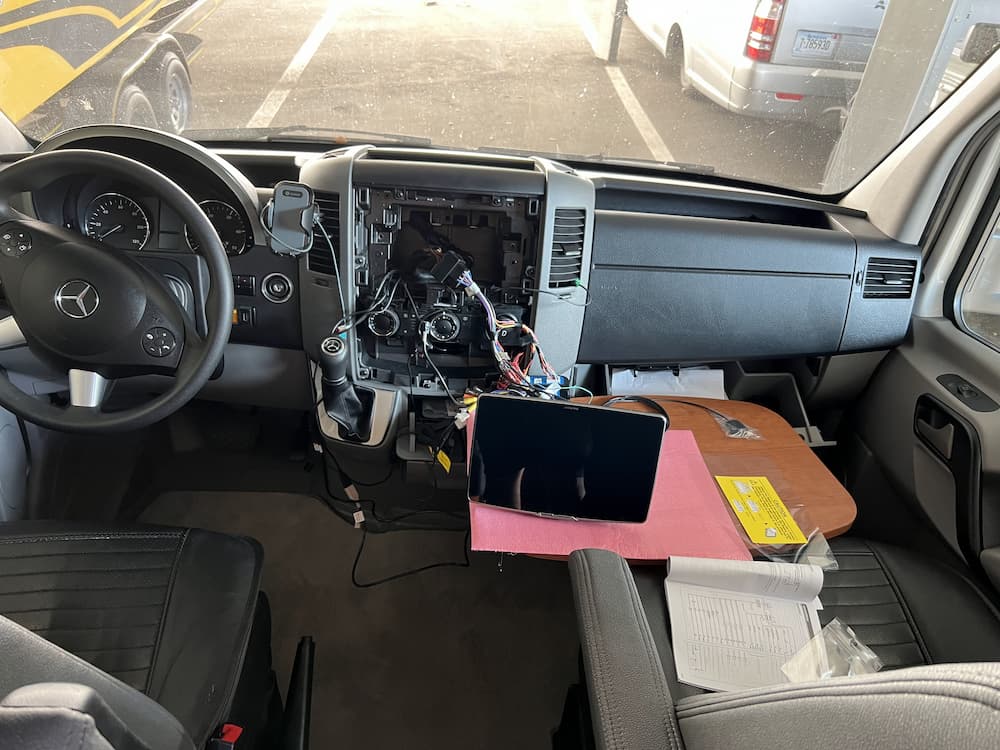
The next step is to “dry run” the installation. So using the conveniently (never used) “Captain’s Table” that came with my RV) I jury rigged everything:
I reconnected the Mercedes ground bolt and – drum roll – it booted!
However, after a few seconds it turned off. Several more attempts also failed, and I called Crutchfield, who didn’t have any idea either what could be wrong.
He did make the sensible proposal that I should start cutting apart that nice custom harness I paid for, and try hot-wiring the red and yellow to 12 volts along with the ground, to see if that got a clean startup without connecting the harness to Mercedes – as a first troubleshooting step.
Instead I decided to first try removing the parking brake cheater relay by cutting it off. That failed to solve anything.
Sometime during this frustration I discovered the answer – which I already knew but had forgotten. In tiny print in the manual is the statement that you must connect the “power plate” a small piece of plastic – or the display won’t turn on.
Since this was just a preliminary test I had forgotten that step, and in any case, the manual implies that the display won’t power on – NOT that the Alpine will enter a one time Boot Loop.
(Later I found numerous Youtube videos of other installers suffering the same woe)
So after connecting the power plate and reinstalling the parking brake cheat it worked perfectly at last.
At this point the unit seemed (mostly) functional. I also plugged in the Sirius module and confirmed that worked.
Note that Mercedes has a few “FAKRA” connectors that Crutchfield included in the package that I purchased – however I already had these from my previous Pioneer installation.
They are:
- Green FAKRA to yellow camera input
- Black FAKRA to radio antenna
- Violet fakra to Apple CarPlay/Android Auto USB
Before I get too excited, the next step is to locate the GPS and Microphone.
You might ask yourself – since this unit has no mapping software, why does it need a GPS? Well it turns out with wireless CarPlay/Auto its required. Reason is, the phone may be buried in your purse or glove box with poor GPS reception.
And even with wired Carplay, your phone may be kicking around somewhere and not give the best location – so don’t skip this step.
You don’t need to locate the GPS on top of the dash, but it should be close. So I put mine above the radio in the tray:
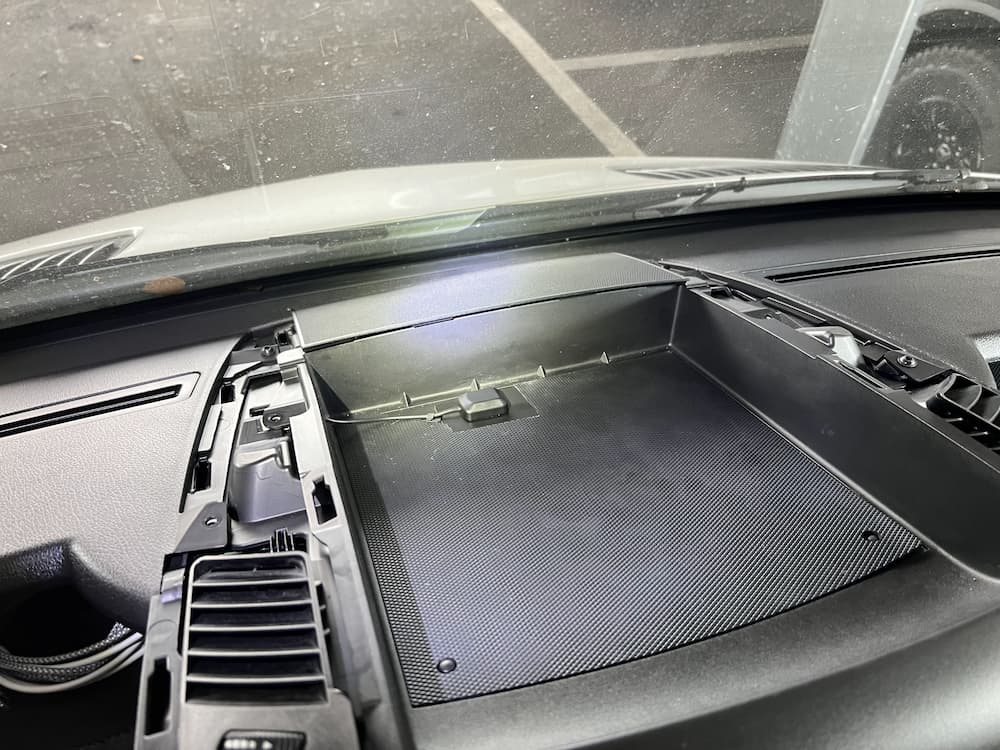
This is covered later with the plastic top so the GPS is not visible, but only a thin skin away from the stars.
The microphone I located overhead:
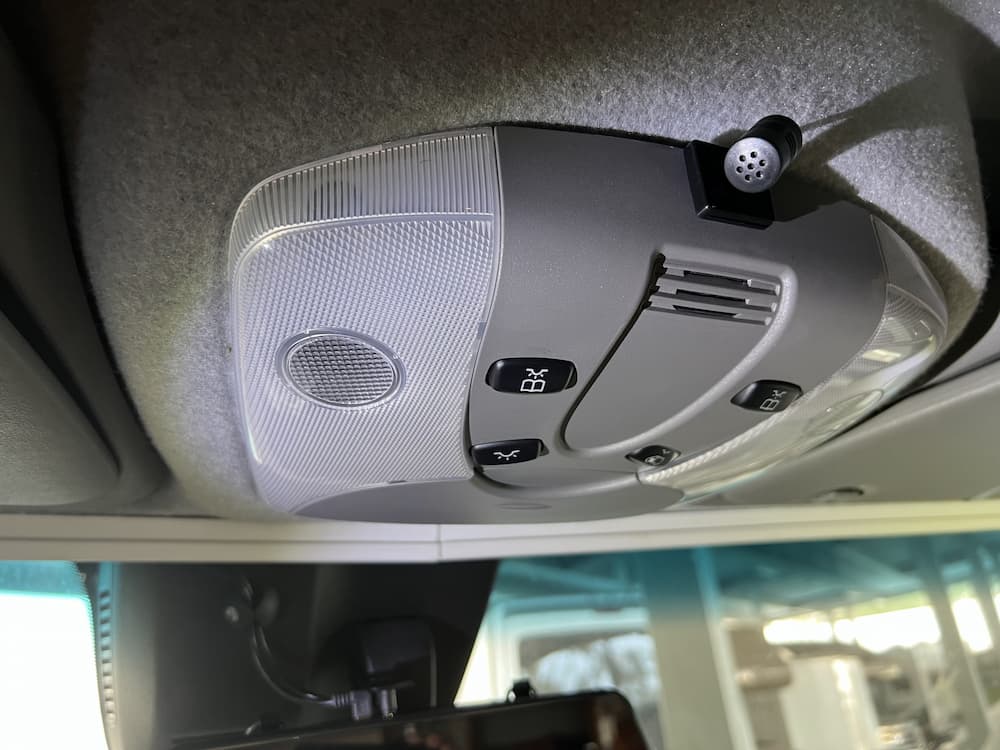
This looks like a chore, but is quite easy. The “A” pillar that runs from the dash to ceiling on each side pops off easily and you just fish the wire to the overhead console which likewise drops with a squeeze.
Lastly I also connected a Roku stick to the HDMI port. While it sounds like suicide to watch a movie while driving, and I’m not sure I’ll ever use it, I couldn’t help myself.
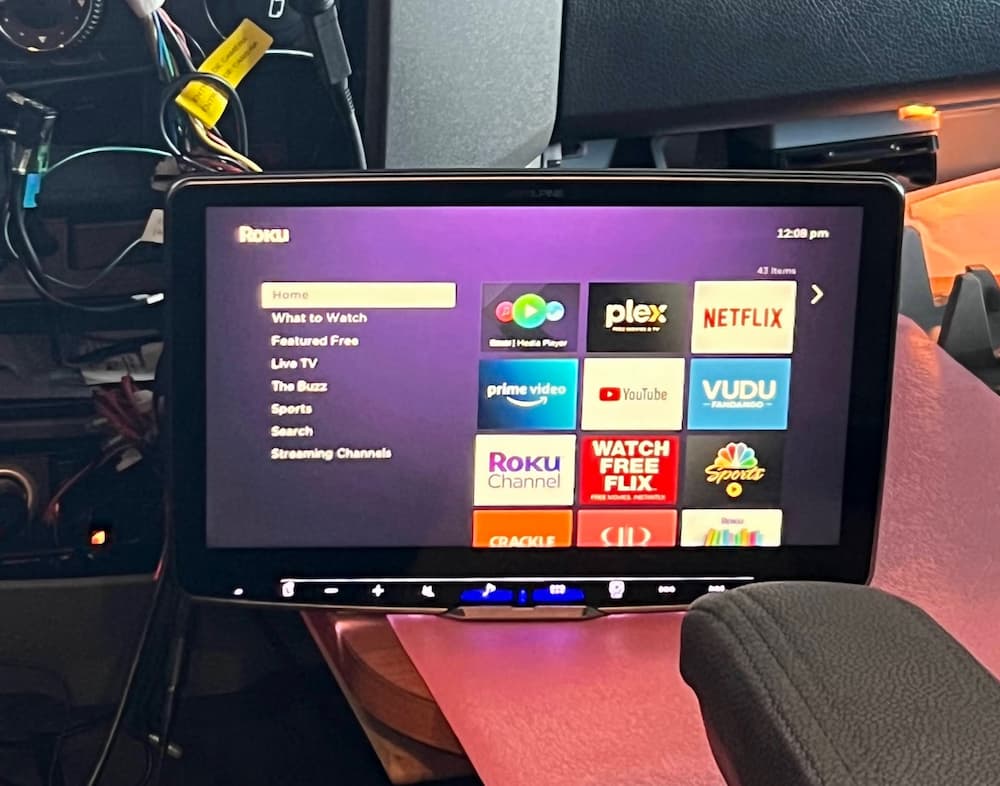
OK, so it would be seriously insane and possibly get you nominated for a posthumous Darwin Award to watch TV while driving, but I can see this being occasionally useful, say, while at a rest stop or dumping.
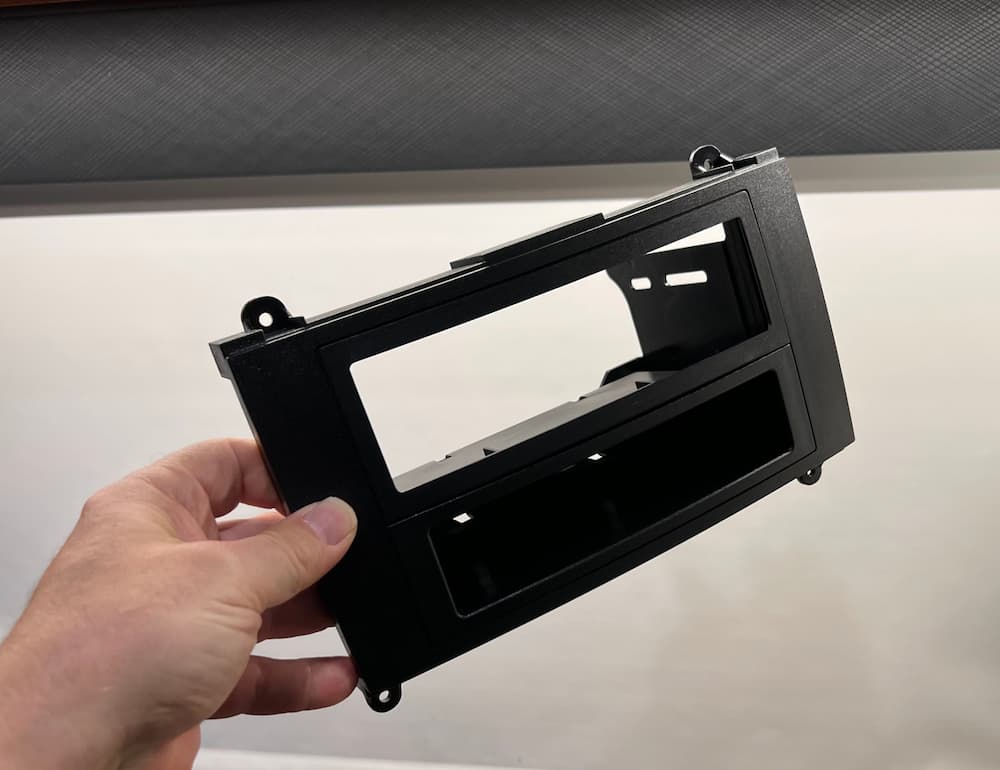
The next step was to see about actually mounting the beast. The single DIN Mercedes adapter seemed really flimsy but after it was screwed together seems adequate:
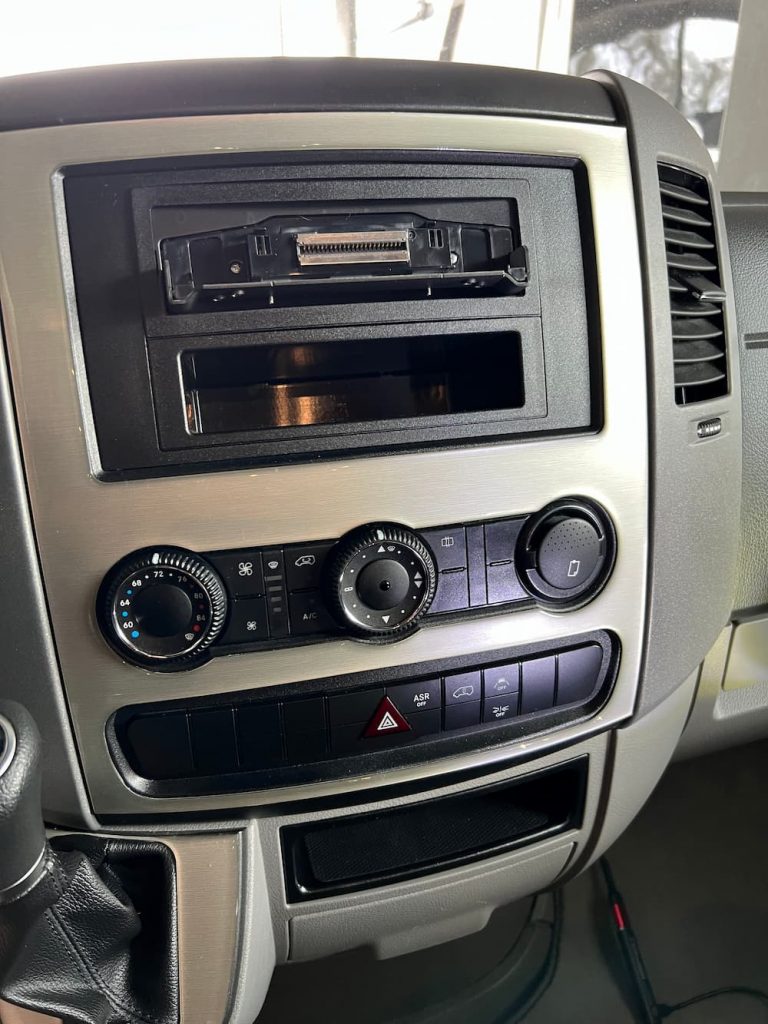
A little dark to see in the picture but the bottom is a nice pocket. Since I plan to slide the screen down it will probably be unusable though.
Here is a pic of the single din Alpine mounted. Very easy since I left the display off for now.
Finally I added the display. The display angle is adjustable only when mounted, so be sure to do a “dry run” mount first before its in the dash. Then straighten out the display to nearly vertical.
Later, when you finally mount it, you can angle it away slightly if necessary to mount the rear cover plate.
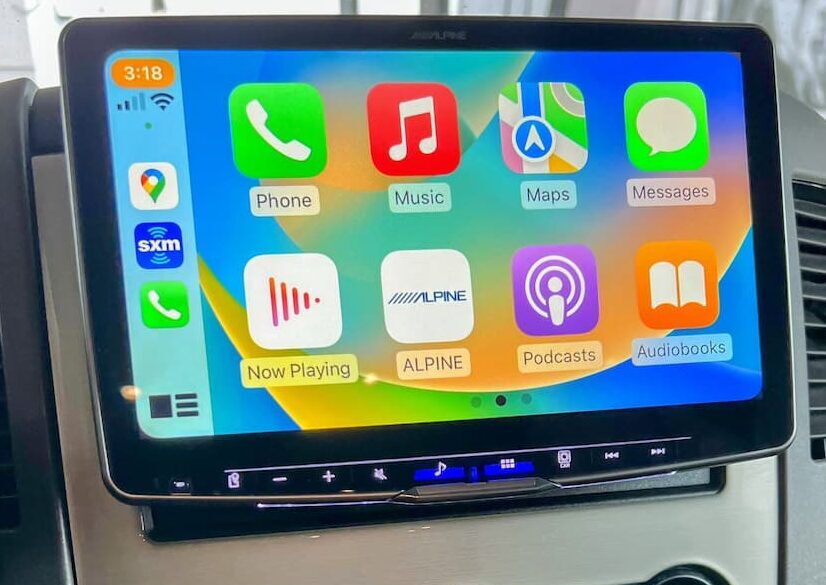
Once that was all done, it looks gorgeous:
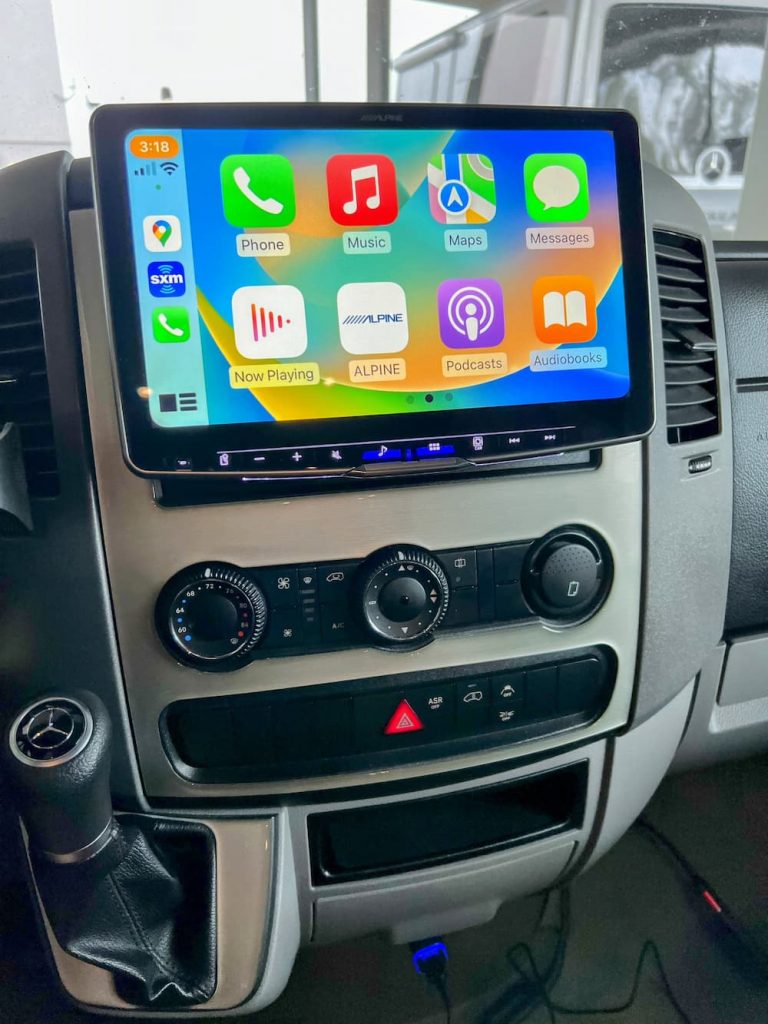
Note that I mounted the display as low as possible, for a more stealthy look and also to avoid baking the display in the sun. As a result of this the pocket under the radio is almost totally covered. You could adjust the display to be higher if you want to use the pocket.
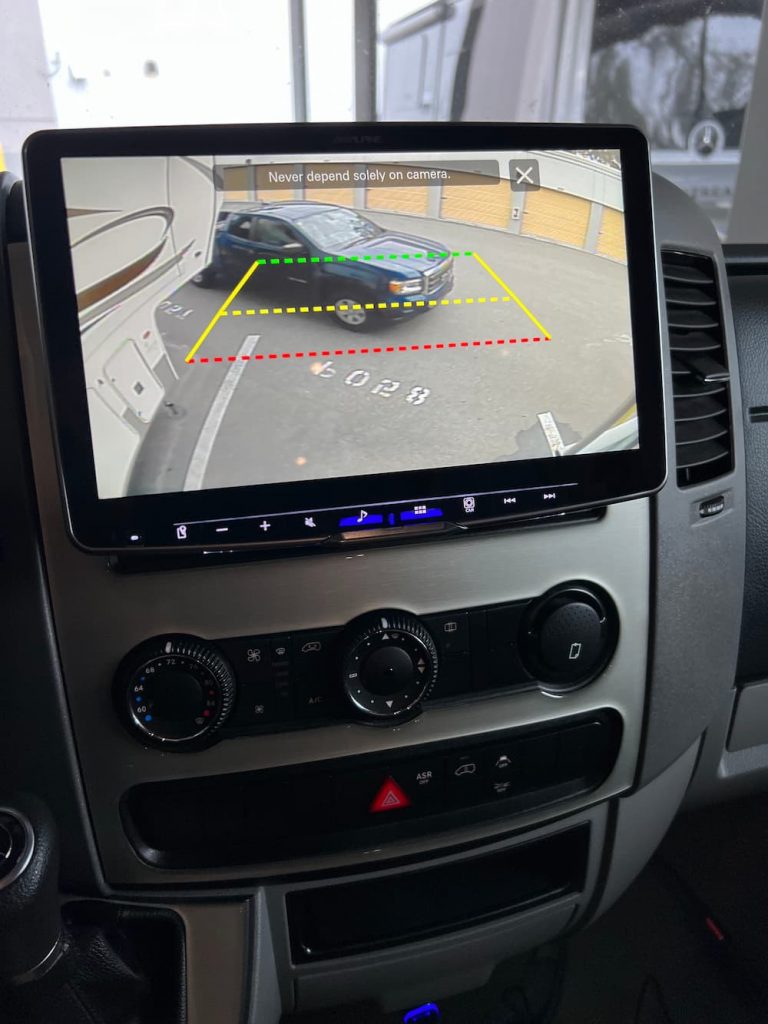
Everything works perfectly – steering wheel controls, my aftermarket Sirius XM, Roku, and the factory backup camera. There are alignment guides I can adjust later:
This was actually a pretty easy install, thanks to Crutchfield, who not only made the wire harness but also provided great technical support on the first ring when I had a couple questions.
On a scale of 1-10 I would rate this a 6 in difficulty. Not hard it all if you are patient and read the manual. And thanks to Crutchfield, it was plug and play except for the parking brake cheat.
Some stuff I found helpful for the install:
Links are paid


Leave a Reply