OK sometimes, third time really is a charm. Or maybe I am just a slow learner?
It started when my NovaKool RFU6406D didn’t work as expected. Besides the cheap manual thermostats, they are tuned for maximum energy savings. So the temperature sensors are at or near the chill plates, which causes it to turn off prematurely. That is great for saving energy but poor at what I want it to do – which is to be as close as possible to a residential fridge in performance. I don’t want to be worrying constantly that its not holding safe temperatures – in the name of less amp hours.
My first attempt was rushed and inexperienced – I was new to the world of embedded systems programming and design, and I had a trip planned shortly. The result was I tried to use an Arduino Nano 33 IOT chip. (I ended up needing two). The device was crude and ugly, but it worked perfectly, proving I was on the right course. My fridge because more like my home refrigerator.
Still, I later wanted something much better. Try #2 used a Beaglebone Green Wireless. This achieved several objectives: It got it down to a single chipset board. It eliminated a complex dependency on Arduino’s cloud IOT stuff. And most importantly, it eliminated mechanical relays in favor of opto-isolators. As an extra, I wrote it in Python, which is simpler and less likely to have memory corruption than C++.
I used it on a couple trips, and it worked great. But, I realized I still had a ways to go. The biggest problem was that it proved really difficult to work with. Its built by Seeed Studio, a great Chinese company, but the implementation of the Beaglebone architecture made it maddeningly a pain to setup. Pins conflicted with other pins and every step seemed to be torture.
It was also completely overkill. Beaglebone is a full blown mini Debian Linux system, so its way more architecture than I need to turn fridge compressors on and off.
At some point I finally got more familiar with the embedded systems world (and frankly, saw some other good secop hobbyist projects online for inspiration!) and I decided to go for gold. I’ve been playing with this stuff for a couple years now and I gained enough experience to finally get it right, hopefully.
So I started with the chipset. I chose the Seeed Studio ESP32C3. This tiny thumbnail sized chipset totally blew me away. It has built in Wifi and Bluetooth and is vastly faster and more capable than the Arduino I used in try #1.
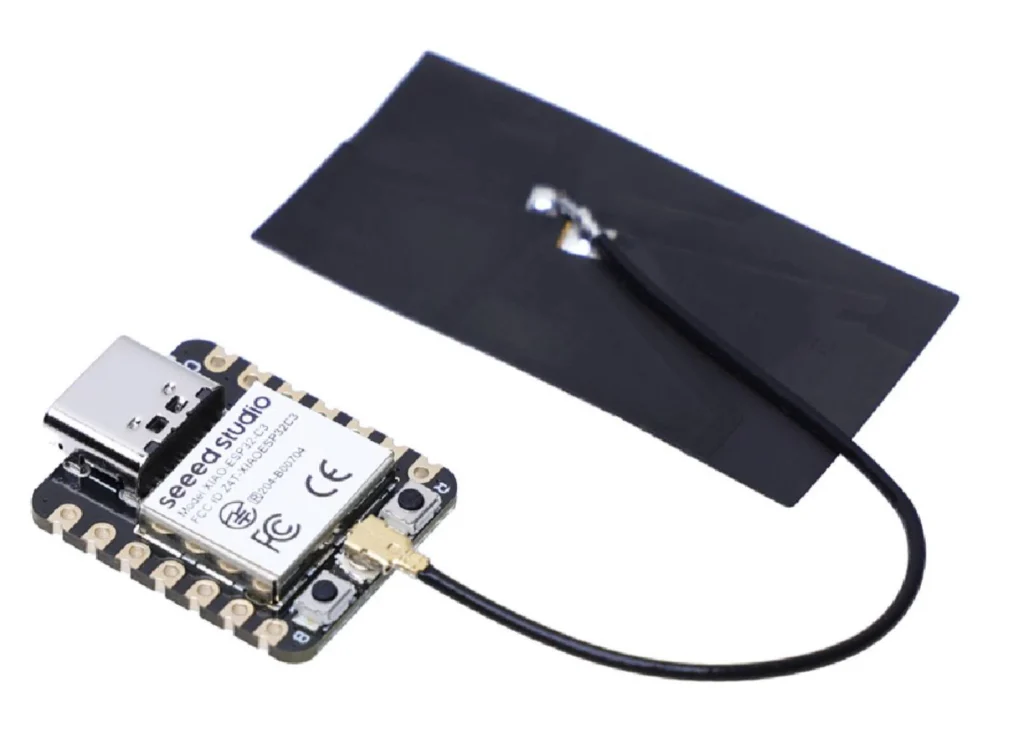
This thing is literally only slightly bigger than its USB-C port. Its dwarfed by the plug-in antenna. I was in no hurry this time, so I decided to go all out.
The most important thing I wanted was variable speed. Sadly, just about none of the available marine or RV refrigerators use these compressors as designed. Instead, they stick a resistor on the thermostat to hardwire a speed between 2000 and 3500 RPM.
This works, but you have to chose between the refrigerator being maddeningly slow to cool (and endure unsafe food temperatures) or get better performance at the expense of wasted power consumption. The reason is, lower RPMs are much more energy efficient. So if a controller can choose a lower rpm and only use a higher rpm as needed, in theory you could get the best of both worlds.
This time, I wanted to throw in a “kitchen sink” of features:
- Small self contained board with onboard 12 volt power supply
- Dual Compressor
- Variable Speed
- Web page interface with status and many settings
- Telnet access for debug logging
- Online firmware downloads
- Support for both Bluetooth and DS18B20 sensors
So while I had always intended to add variable speed someday, this time I started off with it. And because the ESP32C3 is so simple to power, I decided to build a small single board PCB that included a 12 volt to 5 volt DC step down power supply and a resettable fuse – so it was literally plug and play – no extra components.
Lastly, up until now I have been relying on Bluetooth SensorPush sensors for precise temperature readings. This works great, but I have always had a nagging fear that the SensorPush battery might fail or even go dead at the worst possible time. So this final design still works with them, so I can use it immediately, but it also supports DS18B20 sensors. These hardwired sensors would be a little more work to implement, but I think I can wire them in using the original thermostat wiring. So I added this capability so I can later replace the Bluetooth sensors with DS18B20 hardwired ones.
The result of my ambition was this:
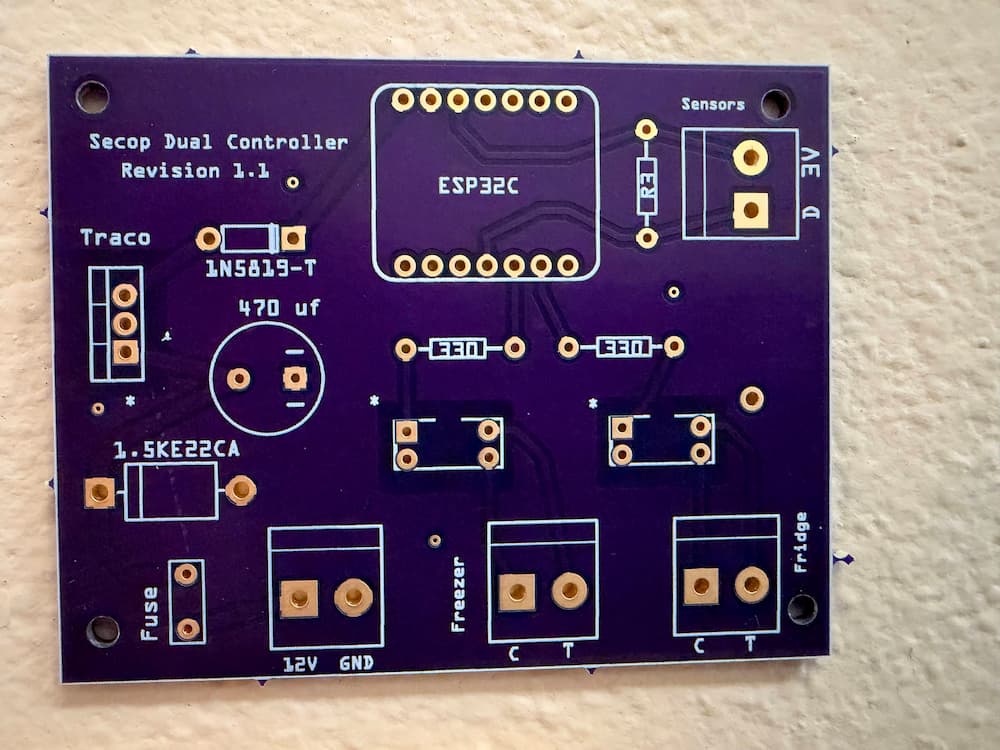
This first picture is of the PCB board I designed and had fabricated. This tiny PCB shows just how trivial this circuit is. There is a 12 volt power supply (Traco), a capacitor and a couple of diodes, the ESP32C3 itself, a resettable fuse, and a pair of optocouplers with resistors. Finally a pull up resistor for the future DS18B20s. Thats it!
The optocouplers don’t just turn on and off – they use PWM (Pulse Width Modulation) to signal the compressors what speed is wanted. In the course of my research I realized you don’t have to change the settings on the Secop controllers – just remove the speed resistor and attach a 5 kHz PWM signal.
This is documented by Secop – barely – and I had missed this point before. Nothing special required – this will work with any Secop compressor refrigerator. (Although I have only tested on the smaller BDF35F, I assume it would work on its larger brother)
All of the components are the highest quality, sourced from Mouser – not Amazon clone junk. And I used sockets for the ESP32C3 and optocouplers so they can be repaired easily if ever required. Populated, it looks like this:
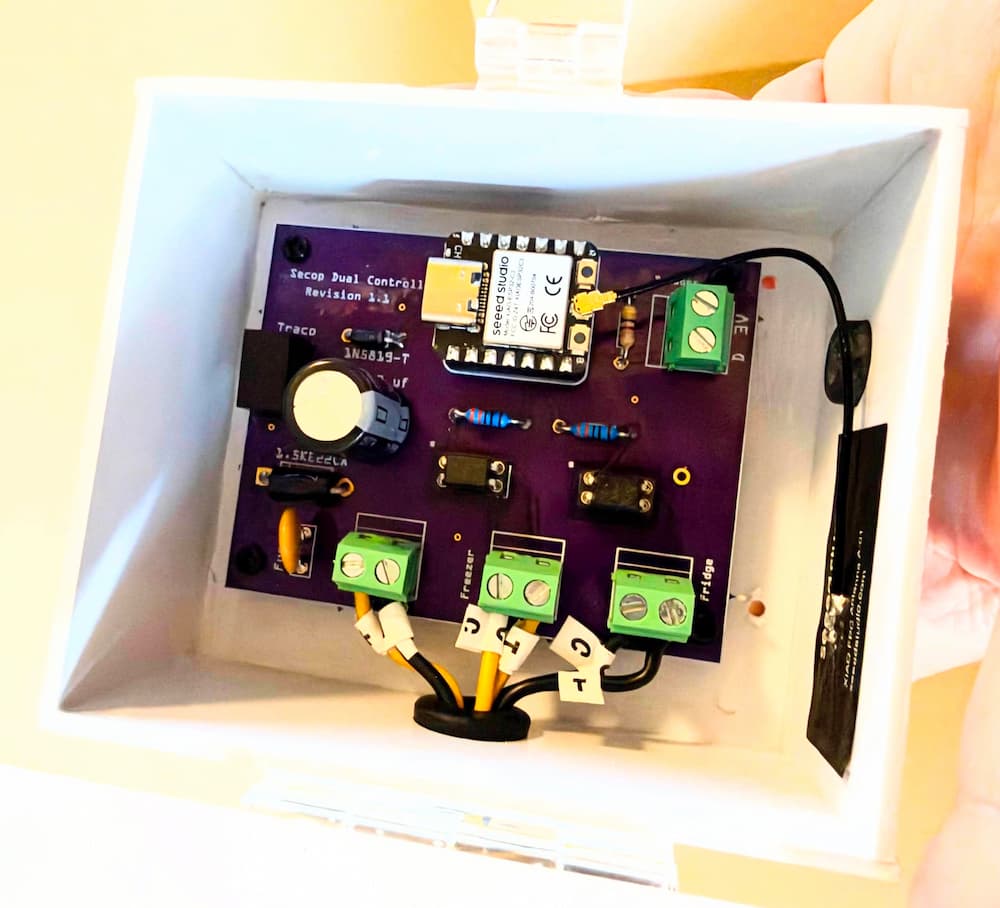
This pictures shows it installed in the (hideously ugly) homemade PCB box I glued together. The screw terminals are all used except for the future DS18B20 sensors which will be added another day.
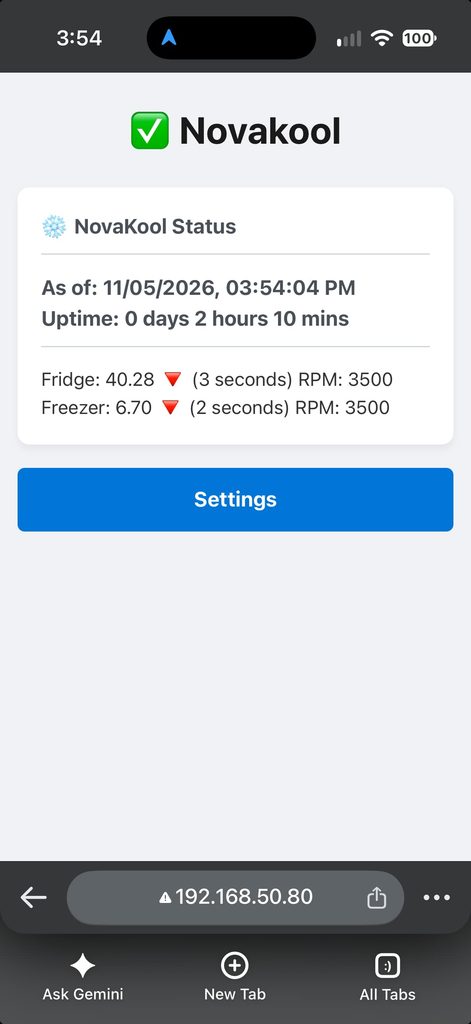
After starting, the controller offers a basic webpage to monitor the current status:
And a robust page for settings, firmware updates, etc.

About the only feature I couldn’t fit in was being able to remotely control/access it away from the RV. Something like Tailscale is too complex to easily run on this tiny processor. But I have a couple of choices. First, for my testing I left an old laptop running a Tailscale exit node in the RV.
So I can access it remotely, upload firmware, whatever.
For more typical use, I created a free Blynk.cloud account and added a simple status panel. Its updated every 5 minutes to stay within the free plan limits – good enough for remote monitoring. I threw in some remote alerts. I could add more, but for now I am happy with this:
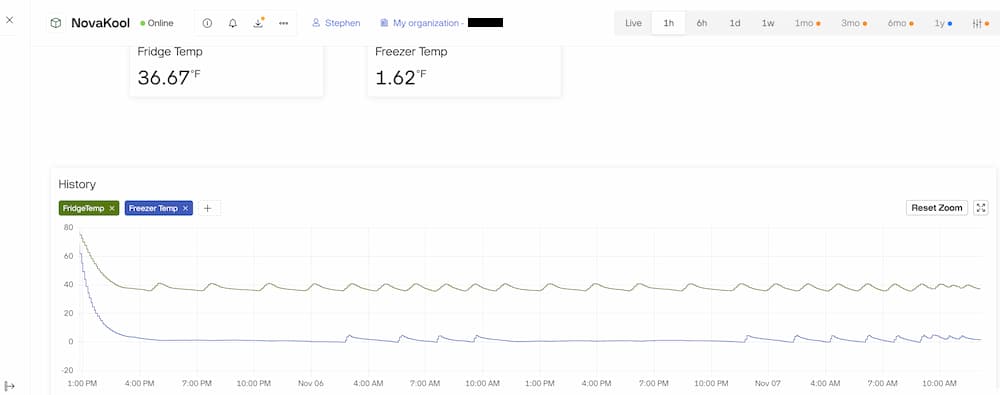
So with Blynk I have full remote monitoring and alerts and I can see up to a 30 day graph of temperature ranges for both compressors.
I will post more, including a parts list and a link to the PCB Fabricator to purchase the PCB directly from them. I’ll also post a github link to the source code. (Its C++ built with free Visual Studio Code)
And I’ll also update this post after my first trip using it. For now I have been testing in my empty RV in storage but of course it will behave slightly differently when loaded with food.
Leave a Reply