I previously installed an Isotherm Cruise 219 refrigerator. This gigantic refrigerator was a huge pain to install because it required extensive cabinet modifications.
And after a couple glitches I have been reasonably happy with it. I probably would have continued using it for years, until this NovaKool RFU6406 D fell from the sky into my hands. Literally.
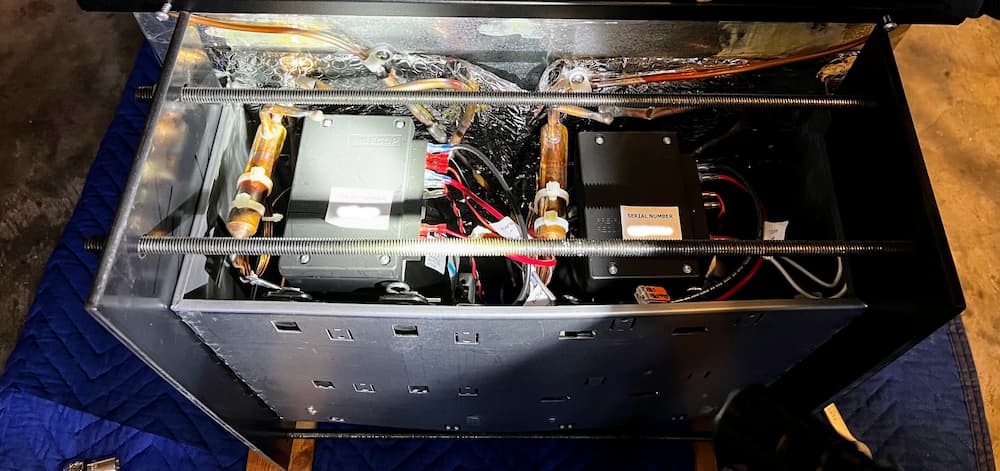
This is the base of the refrigerator. It looks like Fedex dropped it. There were other superficial signs of crushing, so its also possible they stacked them or something. There was no damage to the parts of the refrigerator that you can see when installed, except for the front metal bottom grill which is replaceable.
Anyway, it was delivered to a customer who naturally demanded a replacement. After a claim was filed and approved, the customer received a new one. When he asked NovaKool what to do with the damaged one they replied that he could discard it.
And he did. Right into my greedy hands lol! I was thinking it might be possible to repair it.
At first glance you might wonder why I would even want this refrigerator. Its specs look far less impressive than my Isotherm. Its much smaller for example, more like the Dometic fridge that came with my RV.
But it has one killer feature – dual compressors.
Home refrigerators typically have a temperature setting for both the freezer and the refrigerator so each can be maintained at a safe comfortable zone. They may achieve this with separate compressors or a single compressor with zone valves but the effect is the same.
In contrast almost all RVs have a single temperature control. To achieve this the fridge diverts a set amount of cooling to the freezer and hopes for the best.
Most of the time this is fine at 75 degrees.
In extreme temperatures however the refrigerator and freezer diverge from the average conditions they were designed for. So I found that in extremely hot weather the refrigerator struggled to keep up, while the freezer wastefully got far colder than needed – sometimes as low as 10 or 15 below zero.
Conversely, in extremely cold weather the refrigerator stayed off for a long time and the freezer drifted much to warm, rising to as high as 20 degrees.
So I found my self often fiddling with the thermostat and trying to find a compromise. It was not a huge deal and I could have lived with it, but the idea of having a more powerful refrigerator and 2 independent zones was very appealing.
The NovaKool is really a completely separate fridge stacked on top of a freezer. In fact if the fridge failed you could set the freezer warmer and at least use that on the way home. Each compressor is about 75 or 80% as powerful as my single compressor Isotherm, so the fridge and freezer should have far more cooling capacity.
So I didn’t need a new fridge but this was too good an offer to turn down!
The first step was seeing if it was even salvageable. I can replace anything electrical but finding a Secop refrigeration engineer is almost impossible, and if I could find one, they charge more than brain surgeons.
So I ordered these 2 heavy steel plates cut to size, and 4 super long threaded rods. I then drilled 4 holes through the edges, and slowly tightened the homemade jig.
It made a lot of strange noises and popping sounds but it worked!
For good measure, I installed a “foot” on the worst crushed part to retain the new shape.
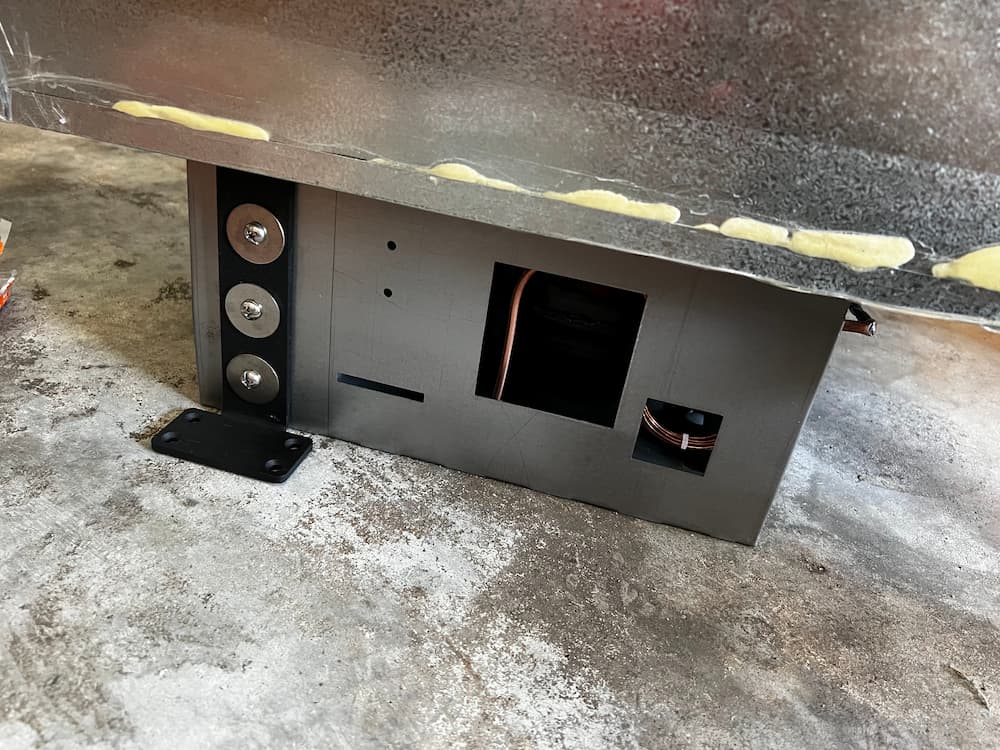
All this seemed to work, and while its not exactly perfectly straight, it moved the copper lines and compressors, etc. closer back to where they are supposed to be.
Next, I had to hook up 12 volts for testing as this fridge lacks any AC input.
And… it worked! Sort of.
Nothing exploded or leaked, and everything got cold. But the fridge cooled disappointingly slow compared to my Isotherm. Something didn’t seem right. I looked at the wiring and it turns out NovaKool installs “speed resistors” on these to derate the refrigerator and freezer to lower speeds.
Why? Why? Why? You might ask. Well, the answer is in numerous documents they publish on the subject. They slow down the compressors because they are most efficient when running almost continuously. You save a little energy and the fridge runs quieter.
Except, and its a big one – not only will the fridge take much longer to cool down, every time you open it you will experience the same slow cooling. The NovaKool solution works best if you never open the fridge and don’t care that the initial cool down takes 24 hours.
Which is all nonsense, as anybody who owns an RV knows. I have 400 amp hours of lithium so I’d much rather waste a few of those amps and have cold food.
So the first thing to do is speed up the compressors. You can easily do this by changing the speed resistors readily available from NovaKool. But fortunately, I have already hacked the Secop compressors and was able to remove the speed resistors and reprogram both compressors to run all out.
Which I did, and restarted the fridge. This time fridge and freezer cooled much faster, but there was one more problem – both were randomly turning off at times which made the cooling slower.
At first I thought there were damaged components overheating, but there were no compressor fault codes on my equipment. So I tried an experiment of “hot-wiring” freezer and compressor to run continuously for now.
And… man did that sucker fly! In 2 hours both compartments were fully cooled down – fridge under 39 and freezer near zero.
So its a bit of a mystery to me why the factory thermostats seem not to work well. There doesn’t appear to be any damage. Coincidentally, I had already built an electronic thermostat for the Secop compressor in my Isotherm, and it was pretty easy to modify it for dual compressors. My electronic control features an Internet monitoring and settings app, so why not use that instead of troubleshooting the crude mechanical thermostats.
In fact the electronic thermostat worked so well that I designed a custom PCB board for the dual processors to make it a little tidier.
I ran the salvaged fridge for a week in my garage and couldn’t find anything wrong with it, so its finally time for the installation!
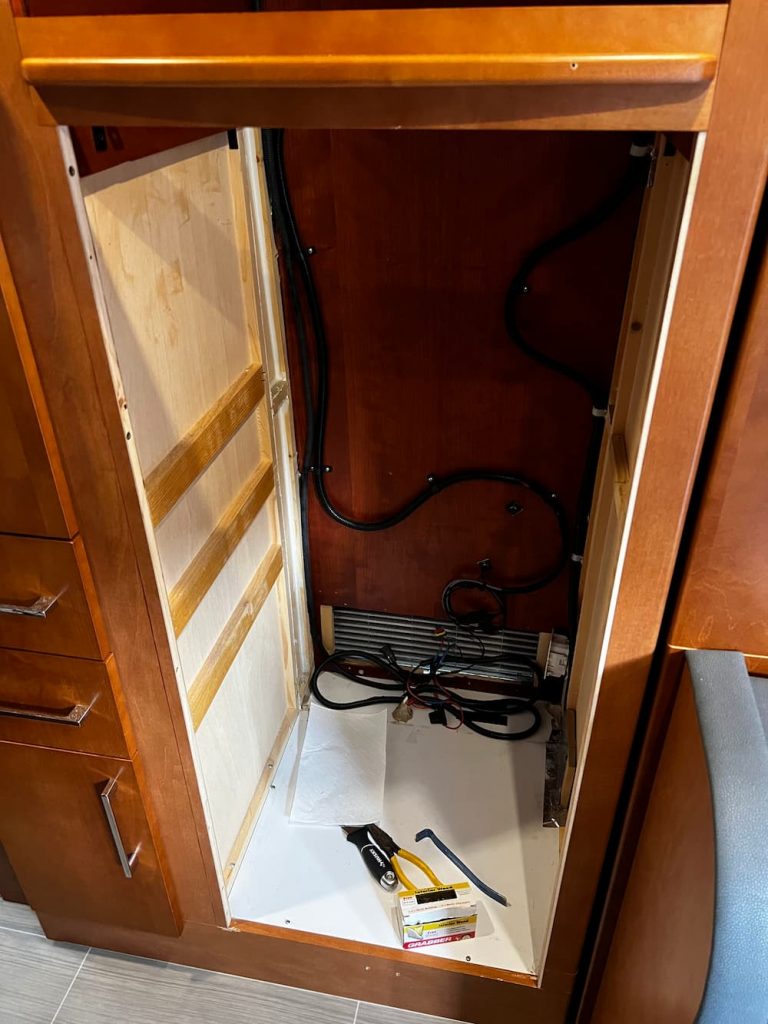
The actual install was just a lot of cabinet work for me making mine smaller. There is no propane, no AC, and not even a water drain, making this just about one of the easiest fridges to install, once I got past the extensive woodwork.
I installed a 3/8″ filler strip on the left side of the cabinet. I also had to move the shelf and the vertical filler to accommodate the NovaKool. This is what the cabinet looked like now right before I slid the NovaKool in: (Actually it did not fit and I removed the 1/4″ filler strip on the right and it then fit perfectly)
I plan on someday installing a standard kitchen toaster oven / air fryer above the refrigerator, so I put cherry 1/4″ stained cherry plywood on the sides above and a 3/4″ cherry plywood shelf down. I never liked the idea of the enclosed microwave oven – seems like an overheating hazard to me. This way I can put whatever I like on top – a combo toaster oven / air fryer is appealing.
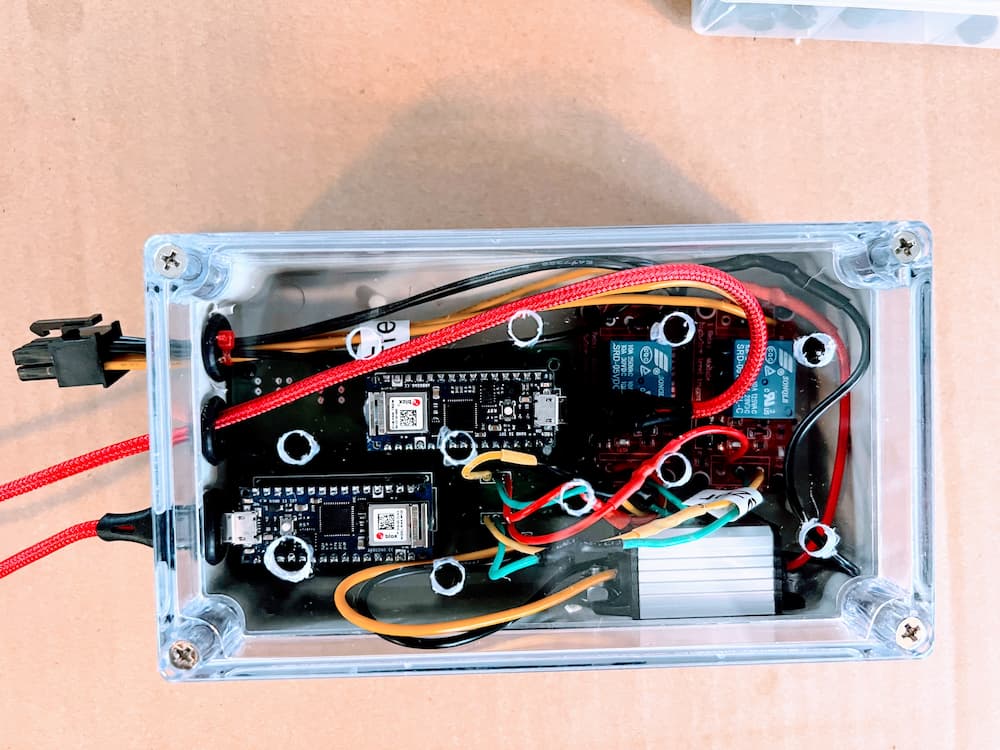
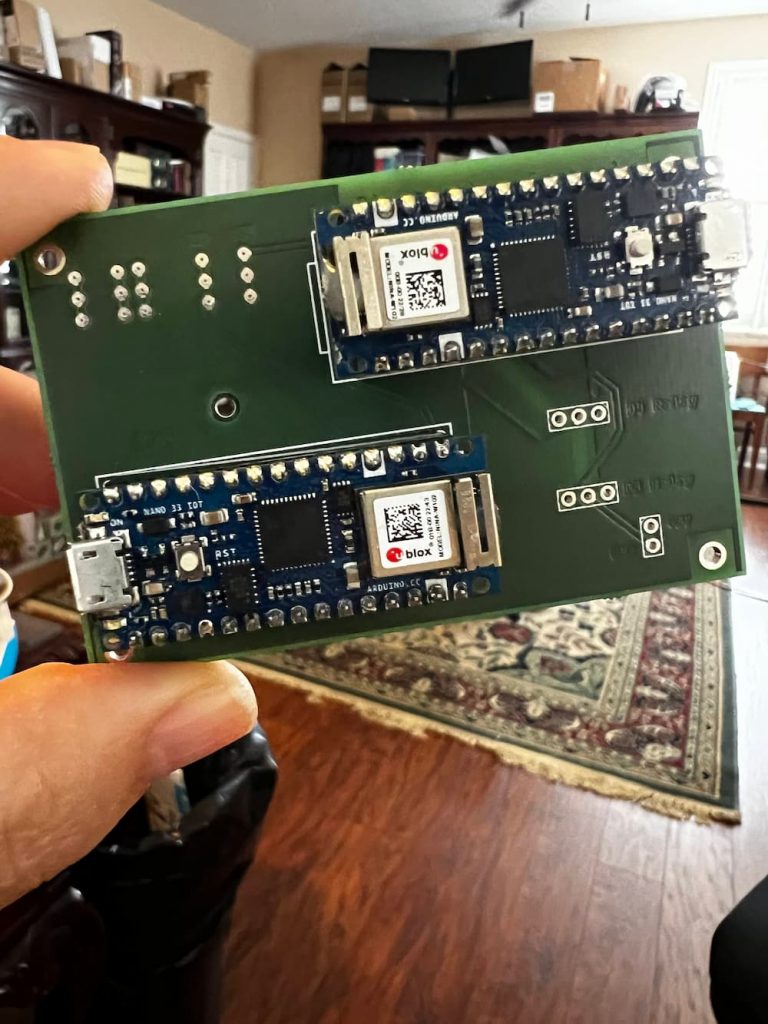
This is the thermostat I eventually built. It has 2 Arduino Nano 33 IOT microprocessors. One of them polls the SensorPush Bluetooth Sensors and turns the refrigerator on and off as needed using 5 volt relays. The other microprocessor board acts as the IOT relay and manages a control panel accessible on the Internet.
As a bonus, the temperature and setting are available on an app and work over the Internet!
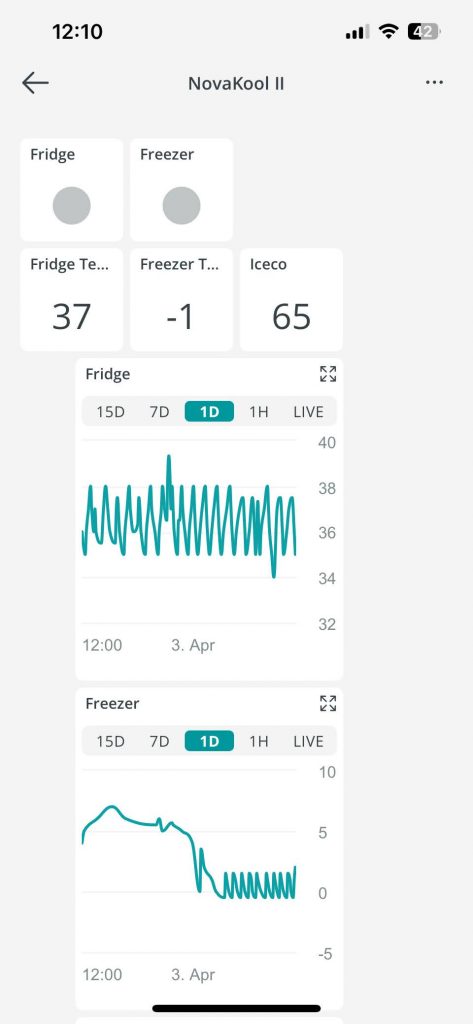
The advantage of an electronic thermostat is precise temperature adjustments, Internet monitoring and a settable “Hysteresis”. Hysteresis lets you decide what range the temperature will be, for instance I typically set the refrigerator to turn on at 39 degrees and turn off 35 degrees. The 4 degrees of hysteresis helps with humidity and frost control – also you don’t want the compressor turning on and off more than necessary.
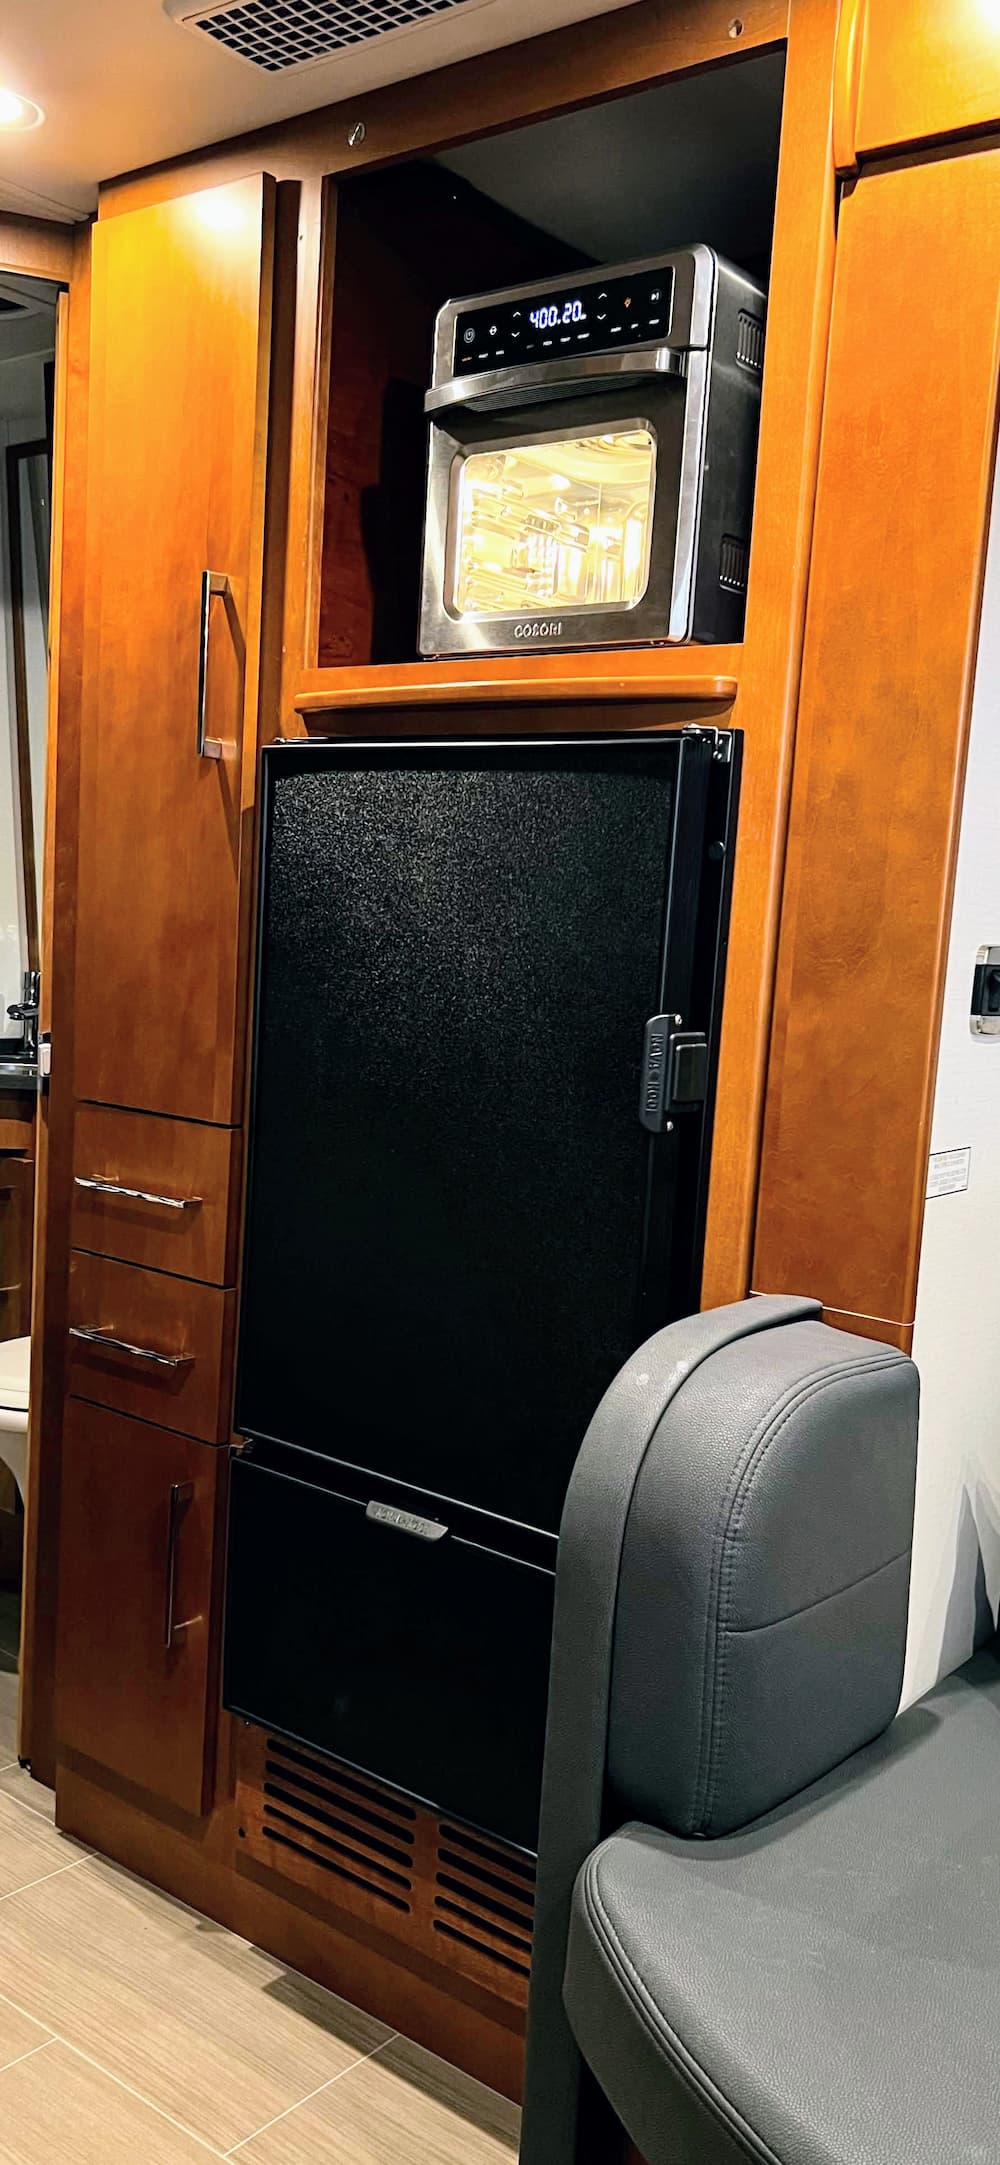
Finally, I slid in the refrigerator and it looks very nice:

The real nice cherry vent below the fridge is something I found on Amazon. The NovaKool came with a metal version, which would have been acceptable, but it was a bit mangled.
Also I realized that you’d have to slide the fridge part of the way out to remove it and perform maintenance, so I slapped a coat of cherry stain on the Amazon vent and 4 coats of polyurethane and it came out beautiful.
Postscript: September 2024
After using the fridge for a while, a couple observations.
The top fridge compartment is working as well as I hoped. It will maintain a safe (34-40 degrees) temperature in every case so far, even at 95 degrees. Its very powerful and recovers from being opened and loaded quite quickly.
The freezer compartment is good, but not quite perfect. I would like to maintain it at zero degrees, just like a home freezer, and in warmer weather, that’s generally not possible. I can get it down to 5 degrees when the ambient temperature is 80, but have also seen it rise to 20 degrees when its extremely hot, parked with the AC off, and the sun is beating on that side.
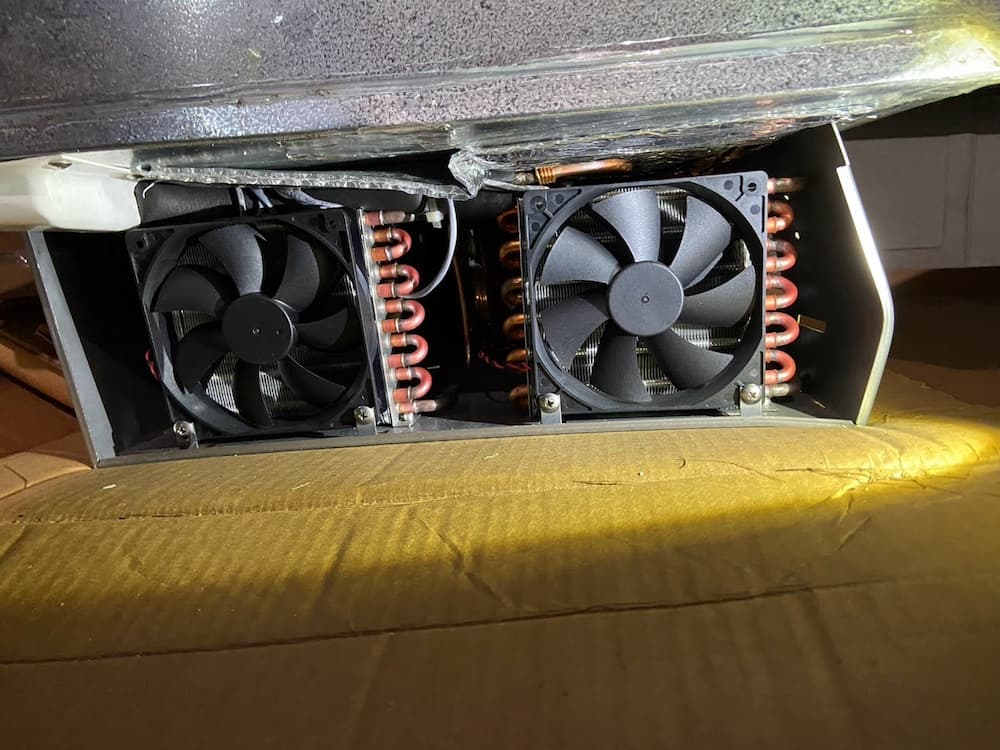
This is due to the fact that my Unity Corner Bed has quite a small area behind the fridge, and in the worst conditions, it heats up pretty hot. I feel certain that over time I can improve this considerably, and I am experimenting with different fan combinations behind the refrigerator – either exhausting straight up to the open shelf above or forward into the passenger compartment. So thats still a little bit of a work in progress but overall I am still rating the fridge excellent and my best so far.
Also, I was originally concerned that this lacked any kind of defrost line like my previous models. But during a 2 month trip – the frost, while it did frost some it never got bad enough to inhibit performance, so I am really pleased on that matter as I hate to defrost on the road.
Leave a Reply