June 24 2022 Update: Now that the RV plan came out I switched to RV so I could pause at times. So If you plan to use at home the convoluted instructions below are still correct, but for RV there is no service address and its a simpler signup. That said you may now have to activate residential at your service address, so be sure to pick an area that you can at least drive to if ordering residential with portability. Also, This guide is for a quick 15 minute tryout of Starlink, but I wanted a more useful setup with an outside jack, so I later upgraded my RV Starlink installation.
I already have some great coach internet.
But of course at times, particularly out west, Internet is still non-existent. Contrary to what the “booster” companies claim you can’t manufacturer a signal where none is present. So even with my high end router setup lots of the USA is an Internet dead zone.
Hello Starlink! With new portability features and availability now, its a no-brainer, well, as long as you are willing to buy an expensive dish and shell out $135 a month…
Its important to understand Starlink doesn’t replace cell technology. It can’t be used in motion without hacking the motors and breaking the TOS, possibly getting yourself kicked off for good. It doesn’t work under trees, tech support is abysmal, and unless you have an absolutely perfect view of the sky your calls and Zoom meetings may be lacking.
But in the middle of nowhere, where the alternative is smoke signals, its truly great!
So here is how I did it in 15 minutes. And by the way, thanks for visiting! Please check out all my RV upgrades.
Step 1 – Order Starlink
No waiting list for RVs! Go to starlink.com. Order a dish. Its very likely your home adress is wait-listed, so expect to wait a year or more for residential use. However, for RVers, you can just pick any open address since you will be using it on the go.
To find an open address you start by going to Starlink Availability Map. Zoom in with the “+” key. Those light blue areas are available now. You can either zoom in on a town and then Google some business in the area, or you can use a Google Plus Code. In the later case the Google Plus Code can be a cornfield or a rock on a highway; Starlink doesn’t care that the “service address” is not a postal address.
Later on in the order process you will provide a shipping address and a billing address, and most people have the dish in about a week.
Very important! After your order is accepted you will receive a welcome email and an invitation to create an account. As soon as you do login and activate “portability” for $25 a month.
Otherwise, its only authorized to activate at that cornfield in Iowa you registered it as…
Step 2 – Order “Flagpole Buddy”
This is an optional step but Starlink comes with a small tripod stand meant for temporary usage. Here is my dish in my backyard being tested:

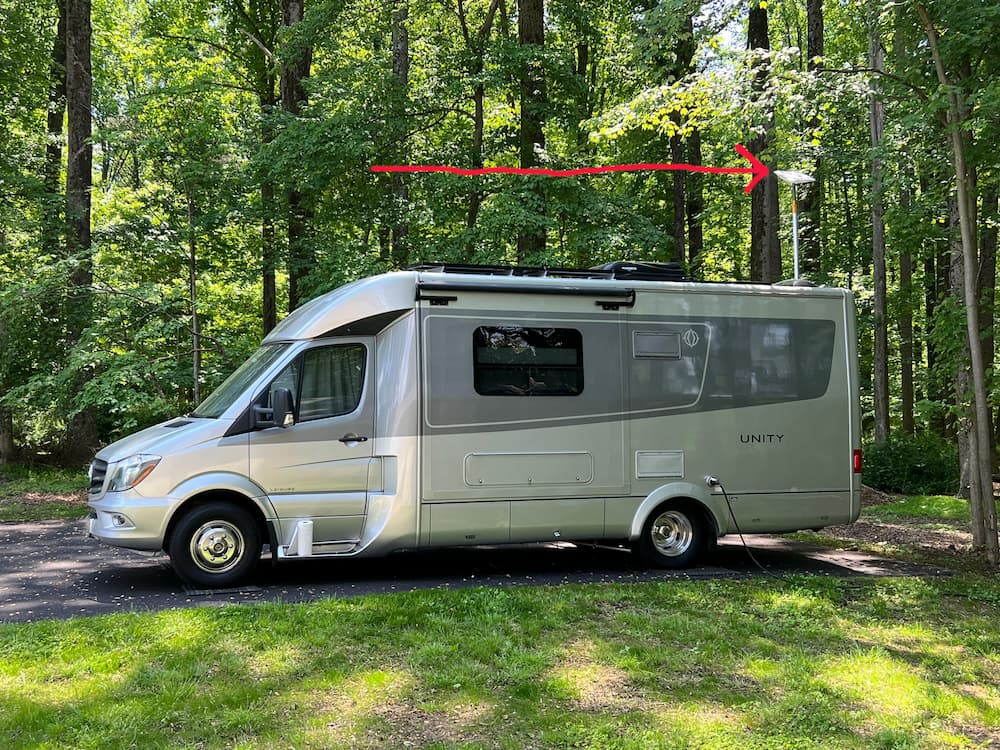
This is great for a quick setup, and I will use this a lot when under trees or have obstructions, but I’d also like to have a quick ladder mounting ability. This will extend it over the roof and out of harms way (and dogs who will love to relive themselves on it).
The beauty of the otherwise wildly overpriced “Flagpole buddy for Starlink” is that you deploy it from the ground. No climbing required. For reference, here is mine installed:
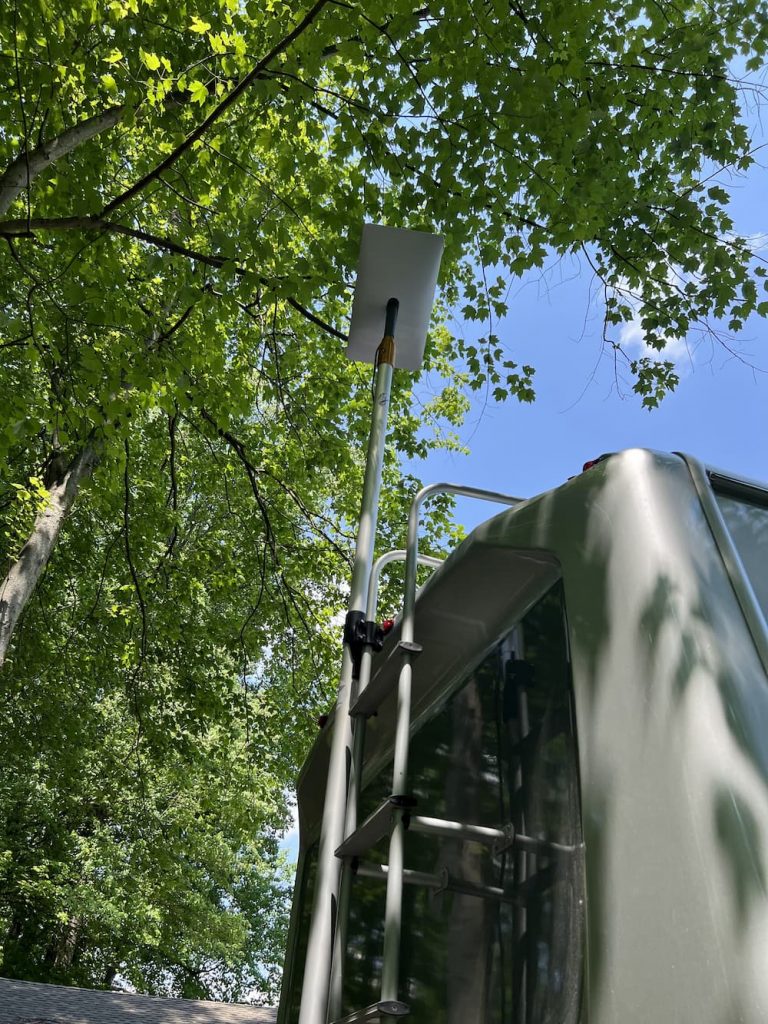
There are two screw on brackets that attach to your ladder. Once you arrive at a destination the 2 piece pole and dish snap into the brackets without going up the ladder (which would be kind of tough carrying an 8 foot pole with a dish on top).
Step 3 – Get Starlink!
Mine took about a week.
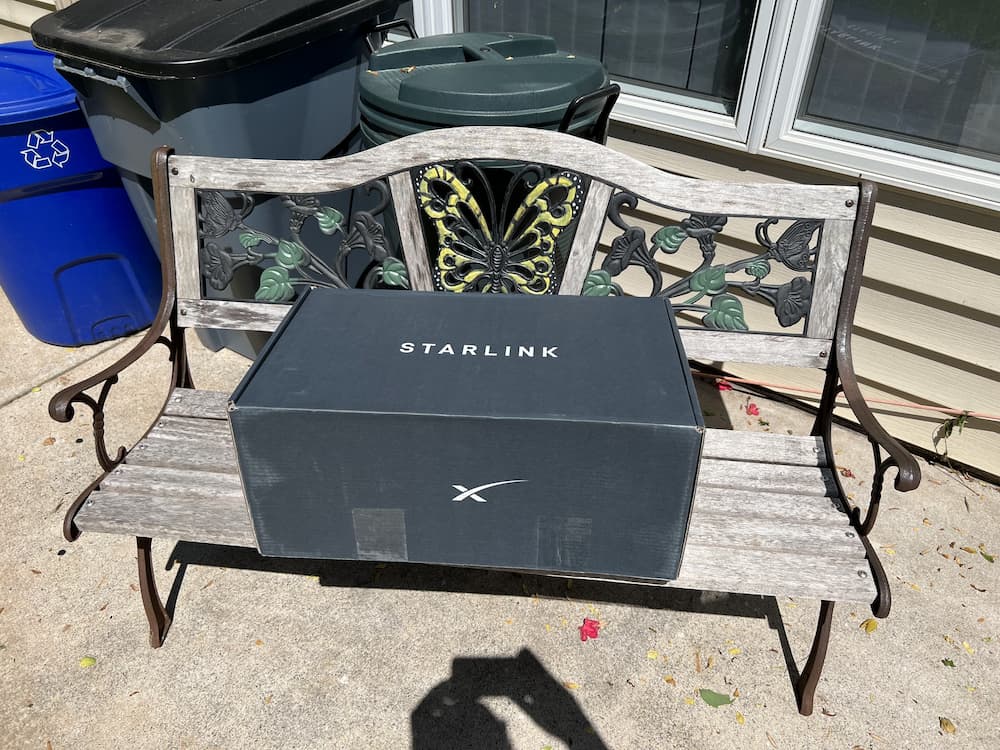
This is how fedex left mine. Sweet!
Step 4 – Connect and go!
I have lots of plans for the best way to use this while traveling. There will be some bulkhead drilling, a power supply replacement so it runs on 12 volts, some quick disconnect weatherproof connectors, etc. But I need the whole thing done in 15 minutes so I can use it now!
So here is what I did next.
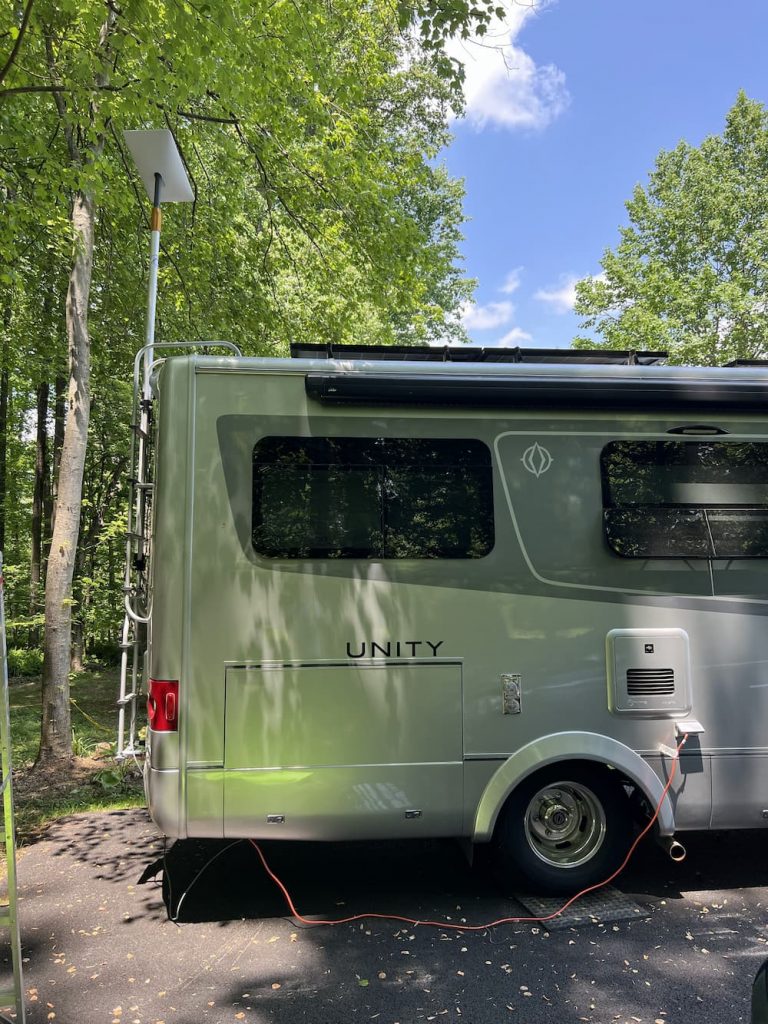
I simply mounted Flagpole buddy and the dish, placed the Starlink router in an exterior compartment, and plugged in. On the left side of my compartment there was plenty of gap for the 2 wires between the rubber seals.
Starlink has an app you download, and it guides you through activation. At one point it complained I was at the wrong service address. Others have said just wait overnight, but I was impatient so I did a reset (pull the plug out 4 times) and the second try worked perfectly.
Once it activates you are rewarded with this wonderful page:
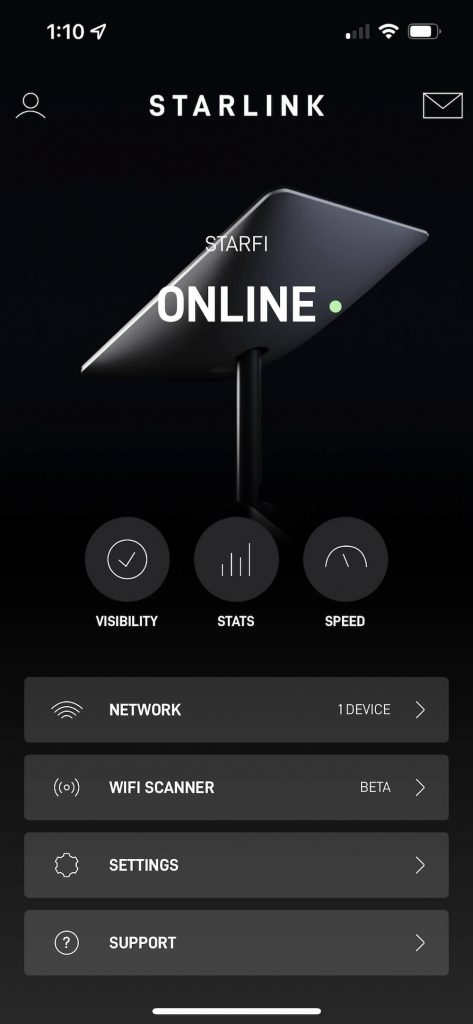
Done!
Now I want to clean this up as soon as possible, and that involves some drilling and planning, but that is another post. In the meantime I can venture into the wilderness and quickly be up and running.
As an aside, I mounted the dish under these trees and was completely shocked that it works with practically no view of the sky. Obviously the internet would not be super great here.
A few other considerations. If you are already on a waiting list, many have reported you can simply change your service address to an open area and within an hour you will get an email offering you immediate shipment. A few have said that didn’t seem to work so they simply cancelled their order and started over with a different email address.
Also, almost every day I attempt to change my service address to be my home address. Someday that will succeed. In the meantime that just means that I should not use my Starlink at any location (including my home) for more than 2 months.
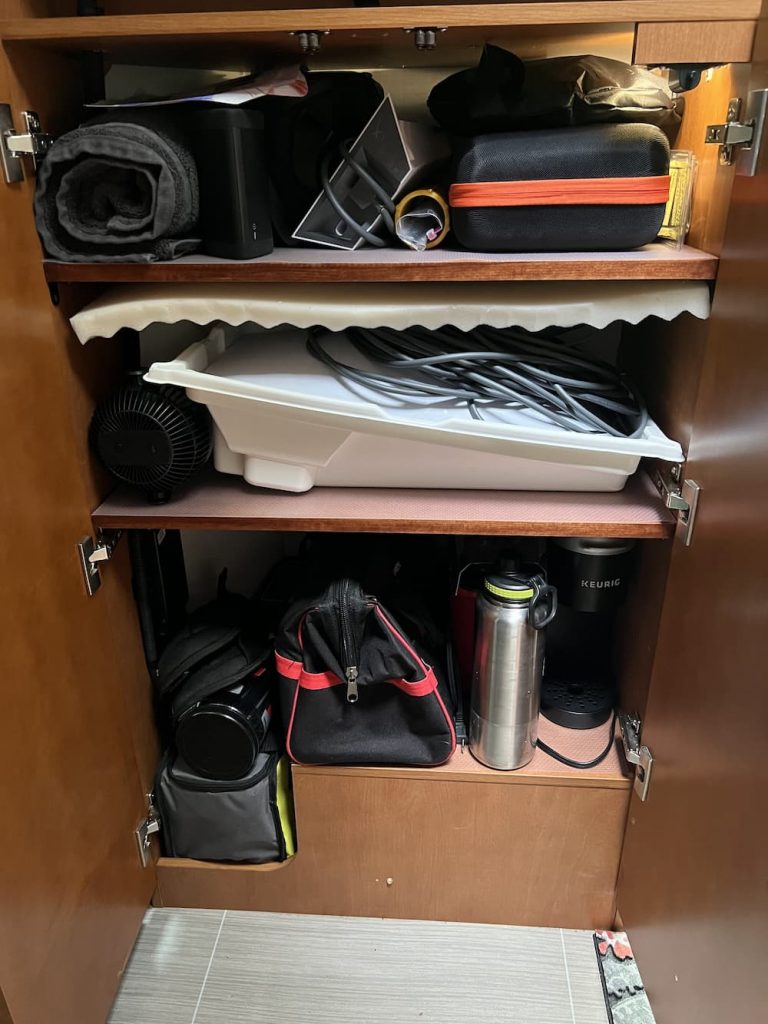
Finally, where to store the dish when underway? Lots of online posts show giant Pelican cases and such, but I travel in an RV not much longer than a big pickup truck. But as it happens, the bottom piece of plastic that holds the dish in the shipping box fit right on a living room shelf I built, so all I did was place a piece of loose foam on top and declare victory:
So thats about it. It may have been a bit more than 15 minutes, but all my preliminary testing has been very, very good!
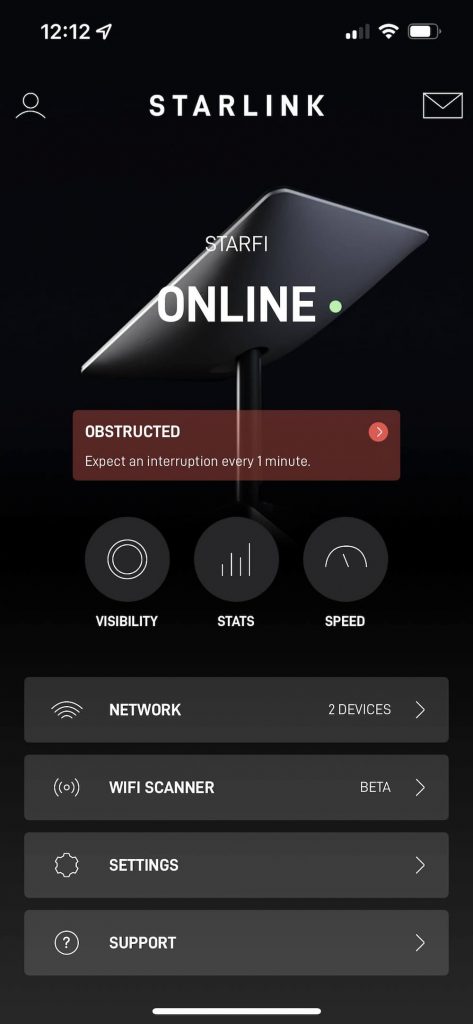
Update: One day later
It updated firmware 2 versions overnight. As expected the stats now show lots of obstructions. Good for testing and not much else:
June 24 2022 Update
Getting around to a more permanent install and eliminating the Starlink router so I can run off 12 volts. The first step is to make RJ45 hjacks and plugs from the existing cable. Its a long post so I documented it here: Starlink Custom Cables.
I was surprised it was under the trees, I thought it needed a clear view. Does it have to be to the south or all around?
How much was the speed affected?
Hey Harry
I am getting frequent interruptions so the signal is pretty bad. This is at my house where I installed it so I don’t care. I was just showing that even with heavy tree cover I am getting some internet. It seeks to the north. I was getting 50 Mbps but frequently totally out for a minute or so.
have an LTV as well and just setting up. we have the 400watt solar panel system and some AGM batteries. more often than not, off the grid and don’t really use much besides some lighting at night. Any idea on the power consumption of the router?
Its going to be in the neighborhood of under 50 watts for the dish and router, and then, add in the loss from the inverter. I haven’t measured it yet. I also purchased a 300 watt pure sine wave inverter to experiment with that vs my big inverter. So in other words, for an RV this is a lot! Power management definitely a challenge and we expect to keep it off at night when there is no sun after maybe streaming a movie.