
Note: This is an older post. I’ve upgraded everything since then. Nowadays you also have the choice of a smart shunt from Victron with no display. While that might be tempting because the Bluetooth app is way more convenient, reports are that a very short range Bluetooth is used on the smart shunt, so I’m glad I got the display. The new mounting location is shown in my Xantrex / Renogy post.
This weekend, we finally will be taking a short trip where we will be “off the grid” for a few days. This is partly by design – in Florida you cannot really sleep in an RV in the summer without AC!
So it occurred to me, that we will have literally no clue how the coach battery is holding up. Sure, there is a rudimentary voltage reading onboard, but that is not really useful for knowing the batteries state of charge.
Among other things, if we have some sun on the roof and the solar charging, the voltage reading may look just fine until the sun goes down and reveals a dead battery.
So, off to install the Victron BMV-712. This works by installing a shunt on the native battery terminal, enabling it to read the amps coming and going, and by knowing the size of your batteries in amp-hours, the state of charge,
More importantly than the voltage, which I already know, the Victron will also show you a whole bunch of other info, either on the gauge above, or conveniently via bluetooth on your phone:

So, since I am anxious to take off, and running a remote cable from the battery box to the meter will take some serious thought, I did what most people do and just stuffed the meter in the battery box. I’ll mount it someday, but for now it means I can finish the whole job in a couple hours and use the app via bluetooth.
For starters the LTV has 2 6 volt “flooded” batteries (yuck) wired in series. So you think of the pair as one functional 12 volt battery. The shunt included with the BMV-712 has to be wired to the negative of the battery.
The first thing I discovered after sliding the batteries out of the box and removing the cables – there is practically no room to mount the shunt anywhere! Initially I thought I would mount on the side of the box – but since I want to upgrade to Lithium someday, and they are a little wider than the standard batteries, I decided to mount it on the rear with some sheet metal screws:
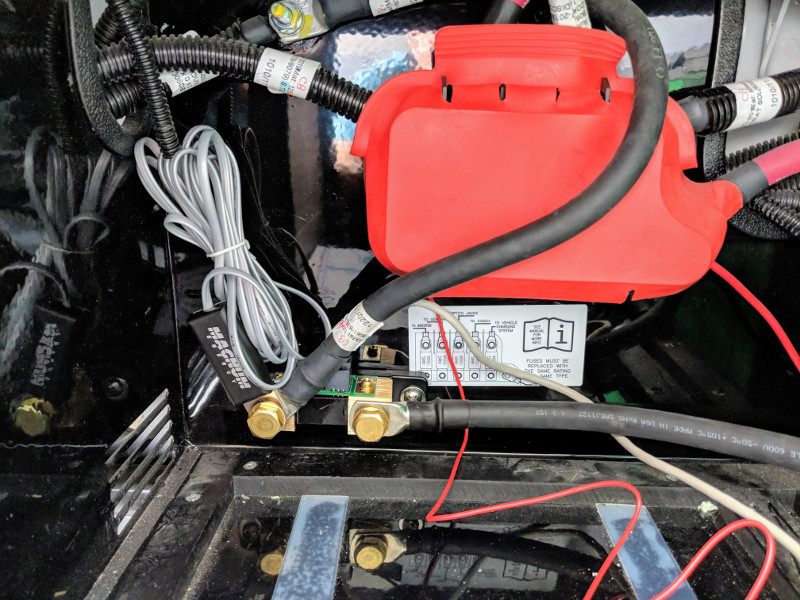
You can see the shunt in the bottom left. The left side gets what used to be connected the battery negative (Ground + the Magnum cable) and the right side gets a brand new cable which goes to the battery.
Edit: (Sept 7 2019) I later learned the “Magnum Cable” is actually the Battery Temperature Sensor for the Magnum Inverter/Charger. It probably really should stay on the battery terminal, as its senses a rise in temperature! Moot point now, as I removed it to install the Battleborn Lithium batteries which don’t use it since they have a built in bms (battery management system).
Thats it, only there was a bit of a curveball. Those original connections had too small of a ring to fit on the Victon shunt (which is 3/8″), so I had to widen them slightly with a rat tail file and a drill.
The stock batteries are 5/16″ posts, so I ordered a cable off Amazon that is 5/16″ on one side and 3/8″ on the other. That will fit exactly with no alterations. I ordered 2 feet which was overkill. The 2/0 Welding cable I bought is quite flexible, and the extra length makes it super easy to slide the batteries out for watering.
When slid back in, it looks like this. I just dumped the meter in between for now until I can mount it someday.
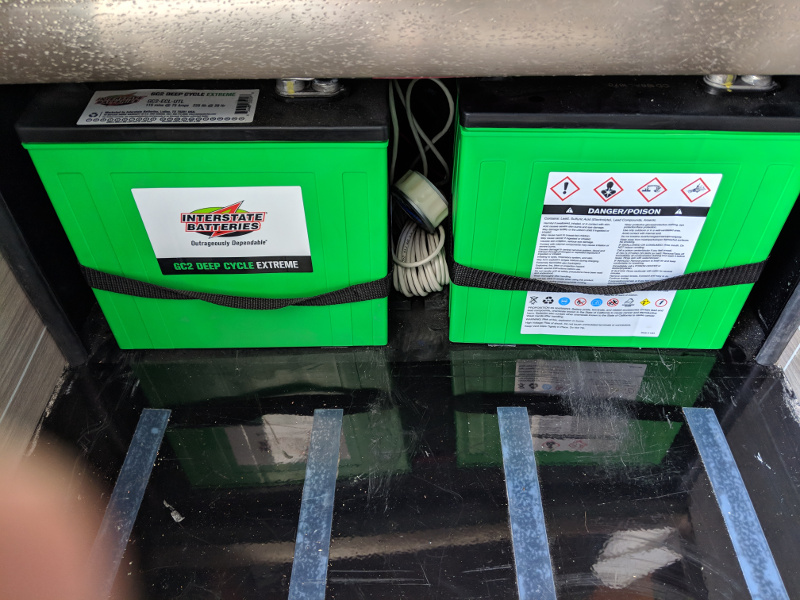
When I slid the batteries back, they barely fit. I think the rear of the battery is pressing against the cables attached to the shunt behind it. Its not too bad, and the Lithium batteries I plan to install lalter are a bit thinner in depth anyway.
The Victon app was nice and simple. It updated the firmware in the meter, and pretty much configured itself. I went into the settings and most of them were right on. I think I put in my battery amp-hours capacity (225) and not much else.
Here is the parts list. Note on Amazon I had to buy 2 cables (they are sold as a pair) but I think the extra may come in handy when I finally get around to installing the Lithium batteries.
(Paid Links)

Leave a Reply